
Special Offers


The future is here, and it’s digital. It’s in the electronics that make devices work: the sensors, the motors, and the logic that controls them. It’s in the 3D printed plastic parts, and the CNC-machined wood and aluminium. If you want to build something in the modern age, you need to be thinking digitally.
We’ve rounded up a few of our favourite makes previously published in HackSpace magazine (which is now part of Raspberry Pi Official Magazine), which should keep you entertained for an afternoon, a weekend, or longer.
- Discover your new favourite hobby
- Learn the digital skills that make the world go round
- Try your hand at 3D printing, electronics, programming, and more
- Discover projects that you can do in an hour, afternoon, or weekend
Technology isn’t just something you buy — you can build it yourself! With a bit of know-how you can 3D print jigs for more accurate woodworking, build your own custom games controller, add artificial intelligence to an old phone, or anything else you put your mind to. Whether you’re new to programming with electronics or you’re just getting started, there’s a project in here for you. Fire up your 3D printer, soldering iron, or Raspberry Pi, and start making!
What's in the box?
1 x Book of Making
Unleash the full potential of your laptop or desktop with the DATO DP700 PRO 256GB NVMe M.2 2280 SSD. Engineered for blazing-fast performance and unwavering reliability, this solid-state drive drastically reduces boot times, accelerates application loading, and ensures lightning-fast file transfers, transforming your computing experience. It's the ideal upgrade for users seeking a responsive, efficient, and reliable storage solution.
- Blazing-Fast Speeds: Experience sequential read speeds of up to 3300MB/s and sequential write speeds of up to 1200MB/s, significantly outperforming traditional SATA SSDs and HDDs.
- Optimized Performance: Built with advanced 3D NAND technology for superior durability, power efficiency, and storage density.
- NVMe PCIe Gen3x4 Interface: Utilizes the high-speed PCIe Gen3x4 interface, connecting directly to your motherboard for maximum bandwidth and minimal latency.
- Compact M.2 2280 Form Factor: Designed to fit perfectly into modern laptops and desktops that support the M.2 2280 slot.
- Enhanced Reliability: Supports TRIM command for consistent performance over time and S.M.A.R.T. (Self-Monitoring, Analysis, and Reporting Technology) for proactive drive health monitoring.
- Effortless Upgrade: An easy and effective way to boost system responsiveness, perfect for revitalizing older systems or building new, high-performance machines.
Specifications
- Capacity: 256GB
- Form Factor: M.2 2280
- Interface: PCIe Gen3x4 NVMe
- NAND Flash: 3D NAND
- Sequential Read Speed: Up to 3300 MB/s
- Sequential Write Speed: Up to 1200 MB/s
- Dimensions: 80mm x 22mm x 2.25mm
- Features: TRIM Support, S.M.A.R.T. Support
- Ideal for: Laptops, Desktops, Workstations
- Operating Temperature:0c to 70c
- Storage Temperature:-40c to 85c
What's in the box?
1 x DATO DP700 PRO 256GB NVMe M.2 2280 SSD

Upgrade your workspace with a sharp 23.8-inch LED-backlit display designed for productivity, study, and light gaming. The Full HD (1920 × 1080) panel delivers clear, detailed text and visuals, while an anti-glare surface and wide 178°/178° viewing angles ensure the picture remains consistent from almost any position.
Enjoy smoother scrolling and casual gameplay with up to 100Hz refresh over HDMI, and a fast 5ms response time keeps motion clean when the action speeds up. With HDMI 1.4 and legacy VGA connectivity, this monitor easily pairs with modern laptops as well as older desktops and media players—perfect for home, office, or school environments.
Flexible ergonomics and security features include tilt adjustment (-5° to 20°), VESA 100×100 mounting for wall or arm setups, and a Kensington lock slot. Energy-conscious operation (≤24W typical, ≤0.5W standby) helps keep running costs low, while multiple picture presets (Standard, Movie, FPS, RTS, EyeSaver) let you tailor the display to your task.
Key Features:
- Full HD 1920 × 1080 Resolution – Sharp visuals for work, study, and casual gaming
- Smooth Motion up to 100Hz – Fluid scrolling and gameplay over HDMI
- Wide Viewing Angles & Anti-Glare Panel – Consistent colors and reduced reflections
- Balanced Picture Quality – 1000:1 contrast, 250 cd/m² brightness, 16.7M colors
- Versatile Connectivity – HDMI 1.4 and VGA for modern and older devices
- Easy Picture Control – Presets: Standard, Movie, FPS, RTS, EyeSaver
- Ergonomic & Secure – Tilt -5° to 20°, VESA mountable, Kensington lock ready
- Energy Efficient – ≤24W typical, ≤0.5W standby/off
What's in the box?
1 x Volkano 27-inch Full HD IPS Monitor with HDMI/VGA, 100 Hz
Break free from the tangle and lose yourself in the music. The Pro Bass Nova Series True Wireless Earphones combine high-performance audio with a sleek, minimalist design, making them the ultimate companion for your daily grind, your workout, or your downtime.
Features
- True Wireless Freedom: Say goodbye to cables. Advanced Bluetooth technology ensures a rock-solid, seamless connection for uninterrupted playback.
- Total Control at Your Fingertips: Navigate your playlist, adjust volume, or summon Google Assistant and Siri with intuitive touch controls—all without reaching for your phone.
- Crystal Clear Hands-Free Calling: Stay productive on the move with an integrated microphone designed for effortless call management.
- All-Day Power: With up to 21 hours of total playtime on a single charge, these earphones are built to outlast your longest commute or toughest training session.
Specifications
- Bluetooth Version: V5.3
- Profiles: AVRCR, A2D, HFP
- Chipset: AB5656C
- Range: Up to 10m
- Charging Case Battery: 180 mAh
- USB Charge Input: DC 5 V, 1 A
- Charging Input: Type-C
- Earphones Battery: 25 mAh per Earphone
- Charging Time: 1.5 - 2 Hours
- Playing Time: 4 - 6 Hours
- Driver Size: 8 mm
- Impedance: 32
- Sensitivity: 102 3 dB
- Frequency Response: 20 Hz - 20 kHz
What's in the box?
1 x Pro Bass Nova Series TWS Earphones
1 x Charging Cable
1 x Instruction Manual
1 x Extra Ear Tips

PLEASE NOTE: Misusing or mishandling a lithium-ion battery may cause a FIRE or EXPLOSION which can result in INJURY or DEATH.
PD 20W LCD fast universal battery charger with professional discharge capacity testing function, capable of displaying capacity. The 18650 battery charger is suitable for 3.7V lithium batteries and 1.2V Ni MH Ni CD AA AAA batteries
You will need a suitable USB-C Power supply for this charger. We suggest our 27W power supply.
What's in the box?
1 x Liitokala Lii-402 Micro USB 4Slots Battery Charger
1 x USB-C male to USB A male Cable
You will also need a power supply for this charger or plug it into another device like your laptop or PC

The Creality SparkX i7 3D Printer with CFS Lite 4 Filament Dispenser is built for makers and professionals who need dependable, high-quality multi-material printing. Combining a rigid frame with a precise motion system, the SparkX i7 delivers excellent dimensional accuracy, smooth surface finishes, and reliable performance across both rapid prototyping and production runs.
Paired with the CFS Lite 4 Filament Dispenser, the system supports automatic filament switching, making multi-colour and multi-material prints effortless. Intelligent filament management helps minimise interruptions and keeps your prints running smoothly, while the streamlined workflow keeps setup and operation simple.
Whether you're an engineer, designer, or dedicated maker, the SparkX i7 offers the flexibility, speed, and repeatable results expected from a modern desktop 3D printing platform.
Specifications
- Printing Technology: Fused Filament Fabrication
- Model Name: SPARKX i7
- Build Volume: 260 × 260 × 255 mm
- Input Power: 100-240V~ AC 50/60 Hz
- Printer Dimensions: 470 × 423 × 456 mm
- Display Screen: 2.85-inch color touchscreen
- Net Weight: 9.12 kg
- Rated Power: 700W@220V / 400W@110V
- Printing Speed: ≤ 500 mm/s
- Filament Compatibility: PLA/PETG/PLA-CF/TPU (shore 64D or harder)
- Acceleration: ≤ 10000 mm/s²
- Quick-Swap Hotend: Yes, no tool required.
- Printing Accuracy: 100±0.1 mm
- Print Status Light: Full-color RGB
- Layer Height: 0.05-0.3 mm
- AI Camera: 720p with lighting
- Extruder: Direct drive extrusion
- Spaghetti Detection: Yes, via AI camera
- Filament Diameter: 1.75 mm
- Pressure Advance:Yes
- Nozzle Diameter: 0.4 mm, compatible with 0.2/0.6/0.8 mm nozzle
- Build Plate Detection: Yes
- Nozzle Temperature: ≤ 300 ℃
- Air Printing Detection: Yes
- Heatbed Temperature: ≤ 100 ℃
- Leveling Mode: Full-auto leveling
- Build Plate: Dual-sided golden textured PEI
- Input Shaping: Yes
- Connection Port: RS 485 (6-pin)
- Power Loss Recovery: Yes
- Printable File Format: G-code/3MF
- Filament Run-Out Resume: Yes
- Slicing Software: Creality Print 6.3 or newer versions
- Filament Tangle Detection: Yes
- CFS Lite: Supported
- Filament Run-out Detection: Yes
- CFS Mini: Supported
- Cutter Wear Monitoring: Yes
- File Transfer: USB Drive/Wi-Fi
- Belt Tensioning: Manual
- File Storage: 8G EMMC
- Firmware: Creality OS
- Wi-Fi: 2.4 GHz
- UI Languages: English/German/Spanish/French/Italian/Portuguese/Russian/Turkish/Japanese/Korean/Arabic/Chinese
What's in the box?
1 x Creality SparkX i7 3D Printer with CFS Lite 4 Filament Dispenser
Resources
These clips are great for protecting your fingers whilst assembling sewing projects. Why limit yourself to fabric though, we could also see them coming in useful for papercraft projects, taming uncooperative cables or combining with some string to make a snazzy photo display.
They come in a handy storage tub with 100 clips in a mix of 8 colours (pink, red, orange, yellow, green, blue, purple and clear). The flat side of the clips has guide markings 5, 7 and 10mm in from the edge, which helps keep your seams precisely lined up.
Specifications
- Width: 10mm
- Length: 27mm
- Clip thickness (fully open): approx. 90mm
What's in the box?
1 x tub of 100 clips
Features
- Argon ONE V3 Case is now made compatible for Raspberry Pi 5 with upgraded features and all new black finish.
- Better Active Cooling with the blower type PWM programmable 30mm fan. Repositioned within the case to be more quiet.
- Improved Passive Cooling with the addition of heatsink on the power management chip of the Raspberry Pi 5 aside from its CPU, which both get hot during heavy use.
- Better communication and power management with the Raspberry Pi 5 thru Raspberry Pi's RP2040 chip, which controls the features and functions of the Argon ONE V3, like fan speed, power management state (e.g. boot manually or automatically after a power outage by simply setting the jumper pins inside the case) allowing you to use the Argon ONE however you see fit.
- Power button located at the back can perform the following with the installation of a open sourced script allows for safe shutdown, reboot and forced shutdown
- Cable management remains exquisite with two full-sized HDMI ports neatly placed at the back allows the Raspberry Pi 5 to use two monitors simultaneously
- Sleek magnetic cover to the access port of the custom color coded GPIO Pins.
- Built-in IR receiver allows the Argon ONE V3 to be easily usable with the Argon IR remote meaning the case now makes for an even better media player!
What's in the box?
1 x Argon ONE V3 Case for Raspberry Pi 5
Specifications
| Transmission standard | HDMI1.4B |
|---|---|
| Video input | 1080p/1080i/720p/576p/576i/480p/480i |
| Signal transmission | Supports using CAT-5E/6 network cable (CAT-6 recommended) instead of HDMI cable, the distance between transmitter and receiver up to 50m |
| Power input | Type-C port (DC 5V 1A) |
| Applicable scenarios | Security monitoring, Video conference, Multimedia teaching, Home theater, etc. |
Connection Example
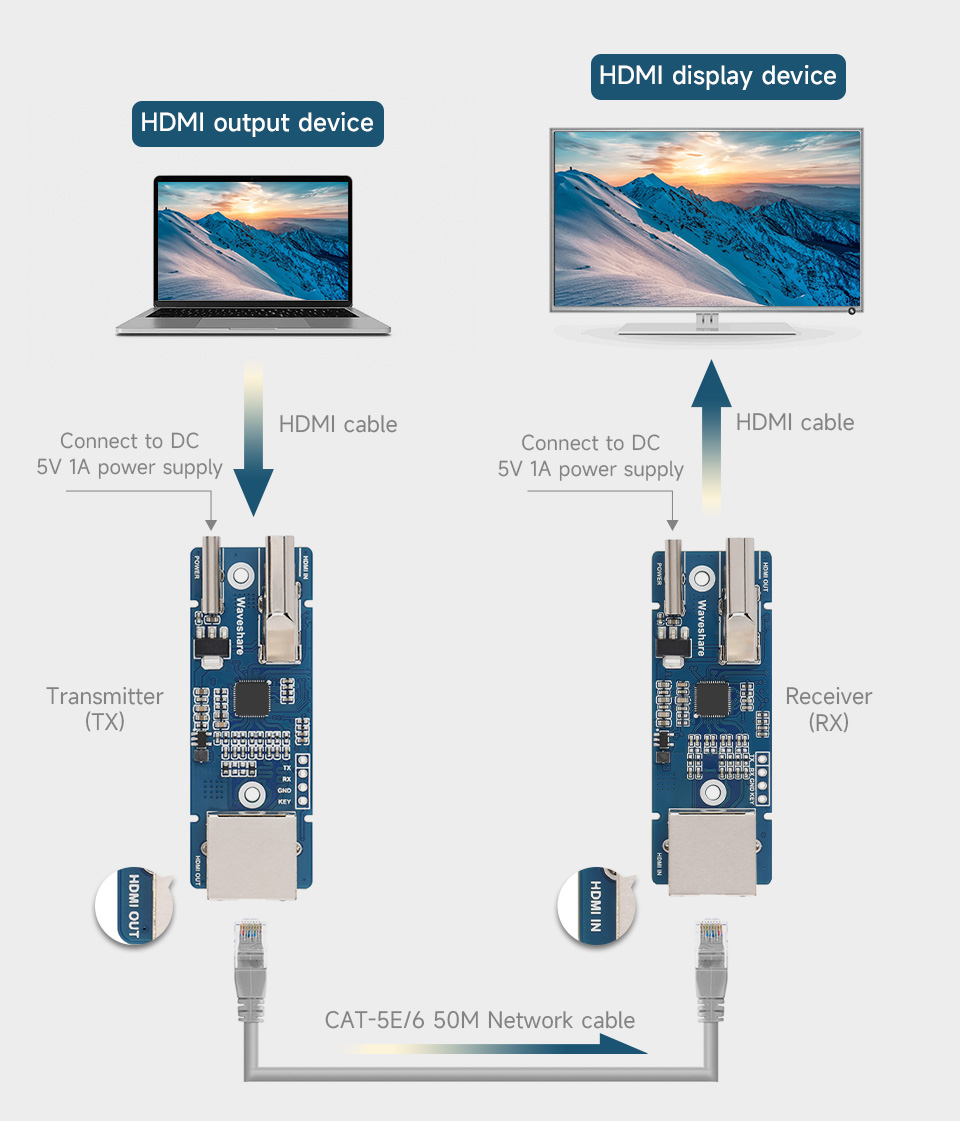
Note: The quality of the network cable will affect the signal transmission quality, it is recommended to use CAT-6 network cable for better transmission.
Onboard Interface
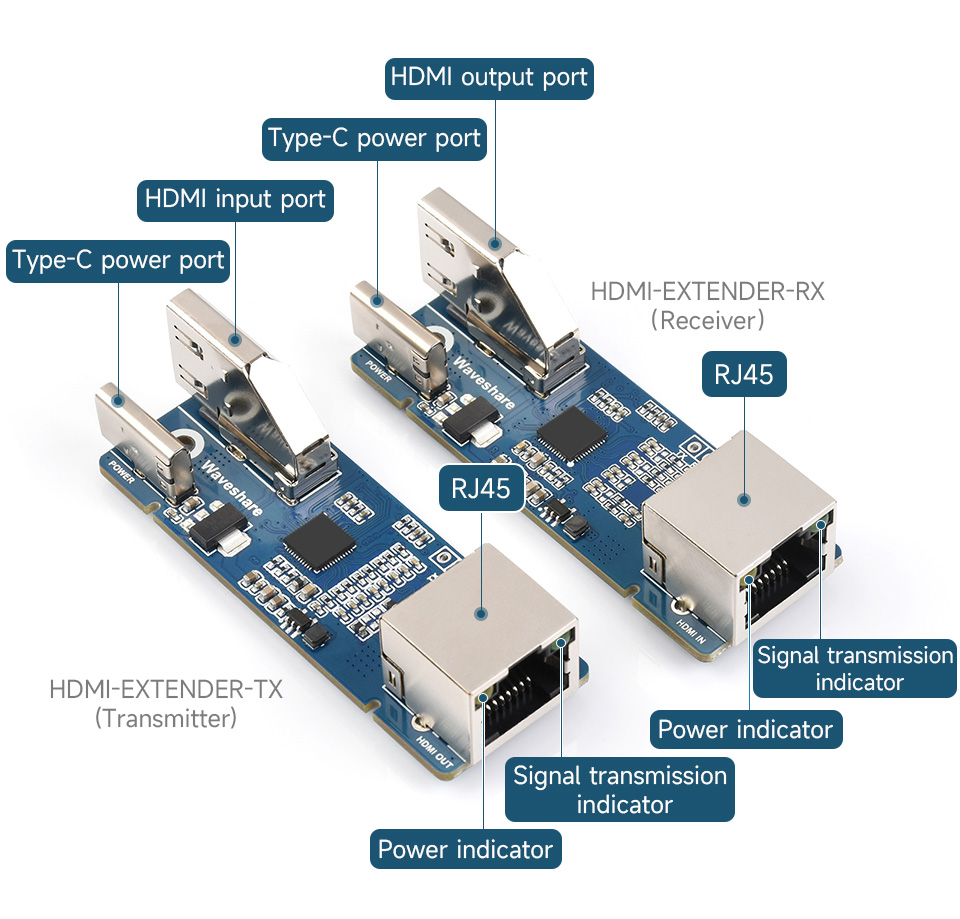
Outline dimensions
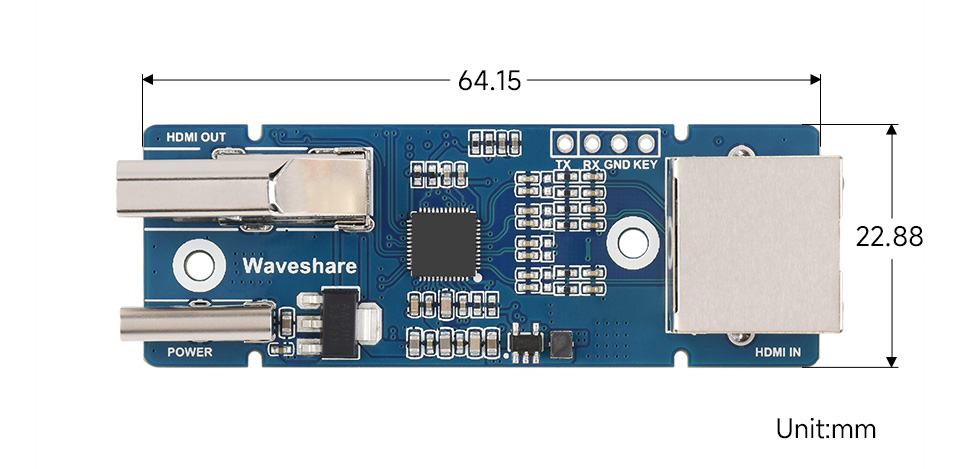
What's in the box?
1 x HDMI-EXTENDER Sender
1 x HDMI-EXTENDER Receiver
You will also need 2 x USB_C power supplies and Cat5e/6 cable
Resources
Carbon dioxide is a critical indicator of indoor air quality that can affect human cognitive
abilities and well-being. The SCD40/SCD41 are Sensirion's next-generation miniaturized CO2 sensors, offering high precision and cost-effectiveness. These modules feature a 2.54mm pitch pin header interface for power supply and communication connections. On-chip temperature and humidity compensation is achieved through built-in sensors for humidity and temperature measurement. The SCD40/SCD41 can intelligently regulate indoor ventilation systems based on C02 concentration levels, thereby maintaining a healthy and efficient environment with low C02 levels over time. This makes the SCD40/SCD41 ideal for applications focused on improving indoor air quality.
Features
- 2.4-5.5V
- Detects CO2 Carbon Dioxide 400-5000ppm
- Detects Temperature
- Detects Humidity
- I2C Communication
Specifications
- Reference Accuracy and Range: SCD40: 400-5000 ppm
- Supply Voltage Range: 2.4-5.5 V
- High Accuracy: ±(40 ppm + 5%)
- Digital Interface: 12C
- Integrated Temperature and Humidity Sensor
- Low Power Consumption
- Typical Accuracy 50ppm +-5% reading
- Pin Definitions
GND: Ground input terminal
VDD: Positive power supply input terminal
SCL: 12C clock terminal
SDA: 12C data terminal
What's in the box?
1 x SCD41 sensor
Resources
The SCD40 and SCD41 are high-performance "True" CO2 sensors. Unlike cheaper VOC sensors that estimate CO2 levels, these use photoacoustic technology to measure the actual concentration of CO2 in the air.
The setup for the Raspberry Pi 5 (and older models) involves the I2C interface.
1. Hardware Connections (I2C)
The module communicates via I2C, which only requires four wires. Note that while these sensors can handle 5V power, the Raspberry Pi's logic pins are 3.3V. Ensure your module's I2C lines are compatible (most breakout boards from Adafruit/PiShop have 3.3V regulators/shifters built-in).
| Sensor Pin | Raspberry Pi Pin | Physical Pin # |
| VIN / VCC | 3.3V (or 5V if supported) | Pin 1 (3.3V) or Pin 2 (5V) |
| GND | Ground | Pin 6 |
| SCL | I2C Clock (GPIO 3) | Pin 5 |
| SDA | I2C Data (GPIO 2) | Pin 3 |
2. Enable I2C on the Raspberry Pi
Before you can read the data, you must enable the I2C port:
Run
sudo raspi-configin the terminal.Navigate to Interface Options > I2C.
Select Yes to enable it.
Reboot your Pi.
(Optional) Check if the sensor is detected by running
i2cdetect -y 1. The SCD4x should appear at address 0x62.
3. Install the Python Library
The easiest way to interact with the SCD4x in 2026 is via the Adafruit CircuitPython library, which is fully compatible with standard Raspberry Pi OS.
# It is recommended to use a virtual environment on the Pi 5mkdir co2_project && cd co2_projectpython3 -m venv .venvsource .venv/bin/activate# Install the librarypip3 install adafruit-circuitpython-scd4x

4. Python Example Code
This script initializes the sensor and prints the CO2, Temperature, and Humidity readings every two seconds.
import timeimport boardimport adafruit_scd4x# Initialize I2C bus and sensori2c = board.I2C()scd4x = adafruit_scd4x.SCD4X(i2c)print("Serial number:", [hex(i) for i in scd4x.serial_number])# Start the sensor's internal measurement cyclescd4x.start_periodic_measurement()print("Waiting for first measurement (takes ~5 seconds)...")try:    while True:        if scd4x.data_ready:            print(f"CO2: {scd4x.CO2} ppm")            print(f"Temperature: {scd4x.temperature:.1f} °C")            print(f"Humidity: {scd4x.relative_humidity:.1f} %")            print("-" * 20)        time.sleep(2)except KeyboardInterrupt:    # Important: Stop measurements to save power/sensor life    scd4x.stop_periodic_measurement()    print("Measurements stopped.")

Key Differences for SCD41 Users
If you specifically have the SCD41, you have a few extra features:
- Single Shot Mode: The SCD41 can take a single measurement and go back to sleep, which is better for battery-powered projects. The SCD40 must remain in "periodic" mode.
- Extended Range: The SCD41 reads up to 5,000 ppm (and even up to 40,000 ppm in "extended" mode), whereas the SCD40 is optimized for indoor air quality up to 2,000 ppm.
Pro Tips
If you are using this sensor for a commercial project in South Africa (like a school ventilation monitor), look into Automatic Self-Calibration (ASC). By default, these sensors calibrate themselves based on the lowest CO2 reading they see every week. If your room is never fully ventilated (never hits 400ppm), the sensor's readings will "drift." You can disable ASC in the code if you prefer to do a manual calibration outdoors.
Features
- Powerful UPS Backup for Raspberry Pi 5 & More. Designed for Raspberry Pi 5/4/3B+/Zero 2 W, PiPower 5 delivers stable 5V/5A output with intelligent power-path management. Automatically switches to battery during outages, keeping your NAS, server, AI, and IoT systems running without interruption
- Reliable Battery Backup with Smart Charging Protection. Built-in rechargeable battery pack ensures continuous power when needed. Supports USB-C PD input (5–15V, up to 45W) with balanced charging and advanced protection against over-charge, over-discharge, and overheating for long-term reliability
- Smart Monitoring with Web Dashboard & I2C Control. Powered by a 32-bit ARM Cortex-M23 MCU, PiPower 5 provides real-time monitoring of voltage, current, battery level, and charging status. Access all data via I2C or an intuitive web dashboard for full visibility and control
- Multi-Channel Alerts & Smart Power Notifications. Stay informed with multiple alert methods including buzzer alerts, real-time dashboard updates, and optional email notifications. Get instant notifications for key events such as power loss, low battery, and power restoration—perfect for unattended systems and remote monitoring
- Safe Shutdown & Auto Restart for Data Protection. Automatically performs safe shutdown when battery is low and supports auto restart when power returns. Protects your SD card, SSD, and system data—perfect for 24/7 NAS, servers, and remote projects
What's in the box?
1 x PiPower 5 UPS HAT
1 x Battery pack
Resources
We use this joystick in our new Picade and it's solid, responsive, and reliable. Pair it with a Raspberry Pi, Picade X HAT, and some arcade buttons and you've got all the controls you need to build your own arcade machine!
We'd recommend also picking up one of our 5-pin ribbon cables and the Zero Delay Arcade USB Encoder & Wire Set.
Features
- 35mm black ball top
- Black dust cover
- 8-way square restrictor gate
- 9mm diameter, 36mm tall shaft
- 5-pin connector (compatible with JST-XH cable)
Resources
Notes
- Pinout: up, down, right, left, ground (from pin closest to centre)
- Overall dimensions (including ball-top): 106x70x95mm
- Mounting plate dimensions: 60x95mm
- Corner hole centres (5mm holes): 44x82mm
- Centre hole centres (6mm holes): 85mm

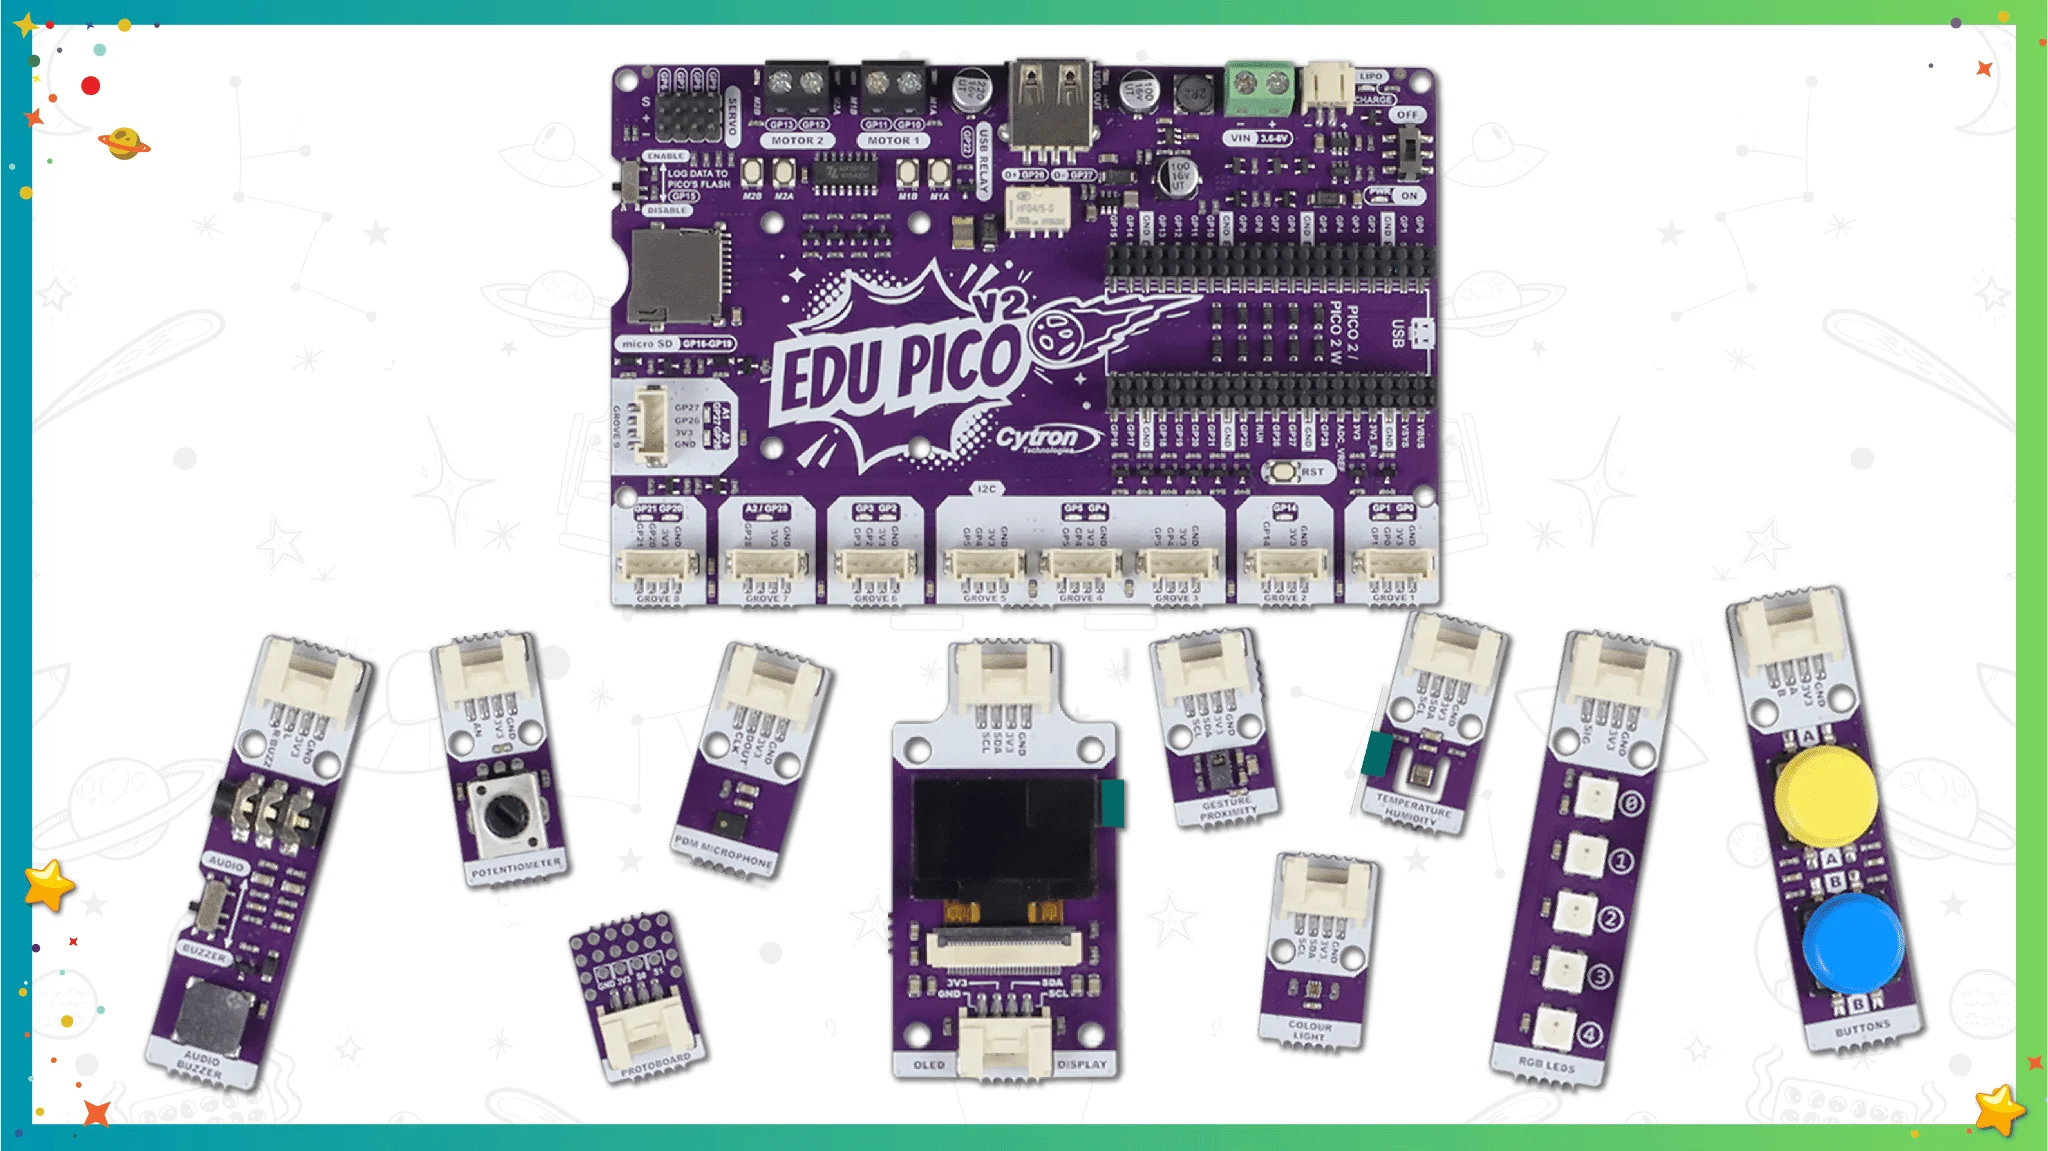
Unlock the next generation of Raspberry Pi Pico 2 W with our EDU PICO V2 Project and Innovation Kit—an all-in-one evolution designed to supercharge creativity, foster advanced learning, and fuel high-performance innovation. Whether you're a student, educator, or maker, this kit is your high-speed gateway to the cutting edge of embedded systems and programming using CircuitPython.
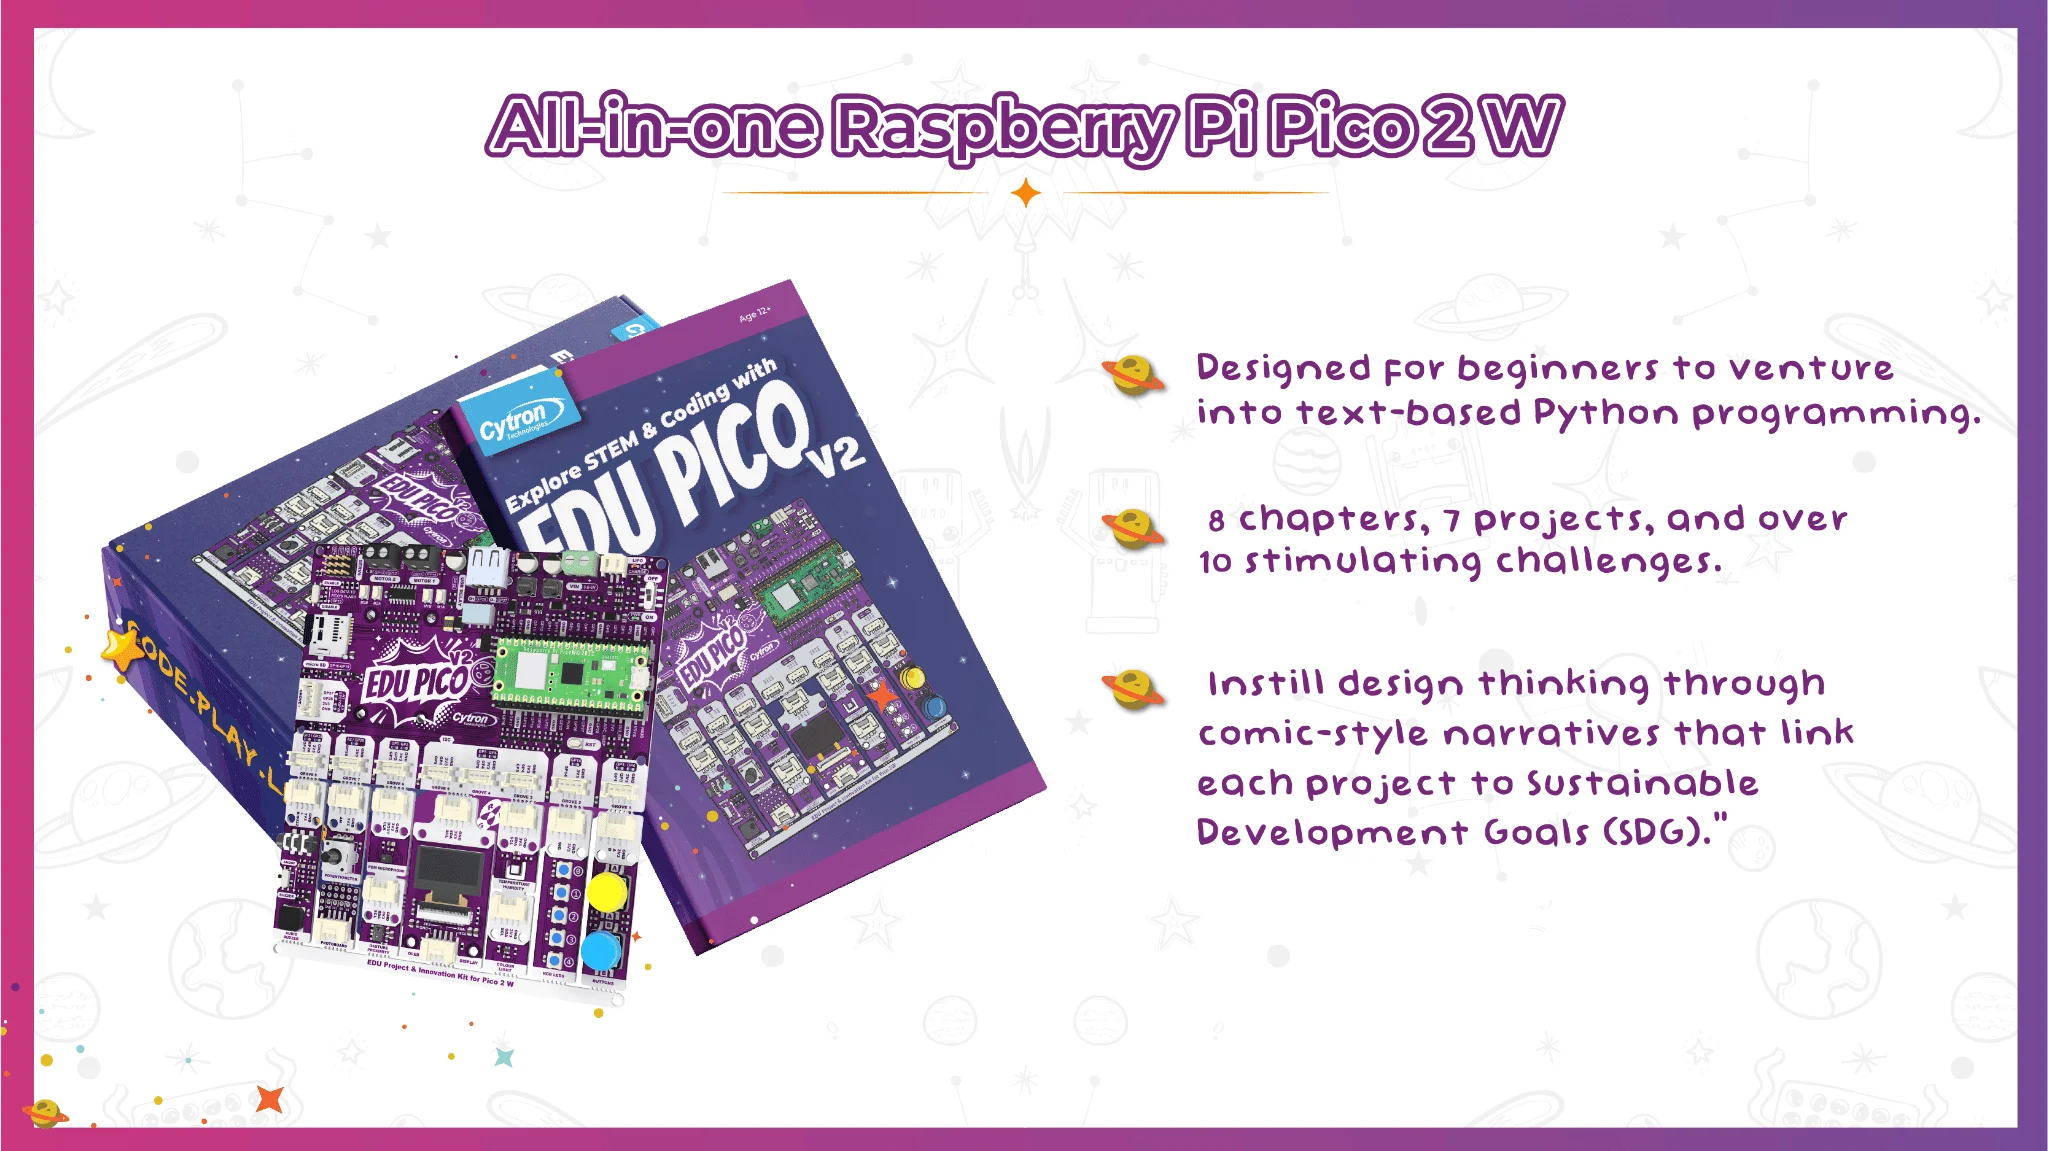
Tired of getting bogged down by slow processing or complicated setups? We get it. Our kit is designed for innovators who want to focus on the fun, not the fuss. Now powered by the Pico 2 W, featuring the faster and more capable RP2350 chip, you get more processing muscle in the same easy-to-use package. Plug, play, and let the high-speed magic happen.
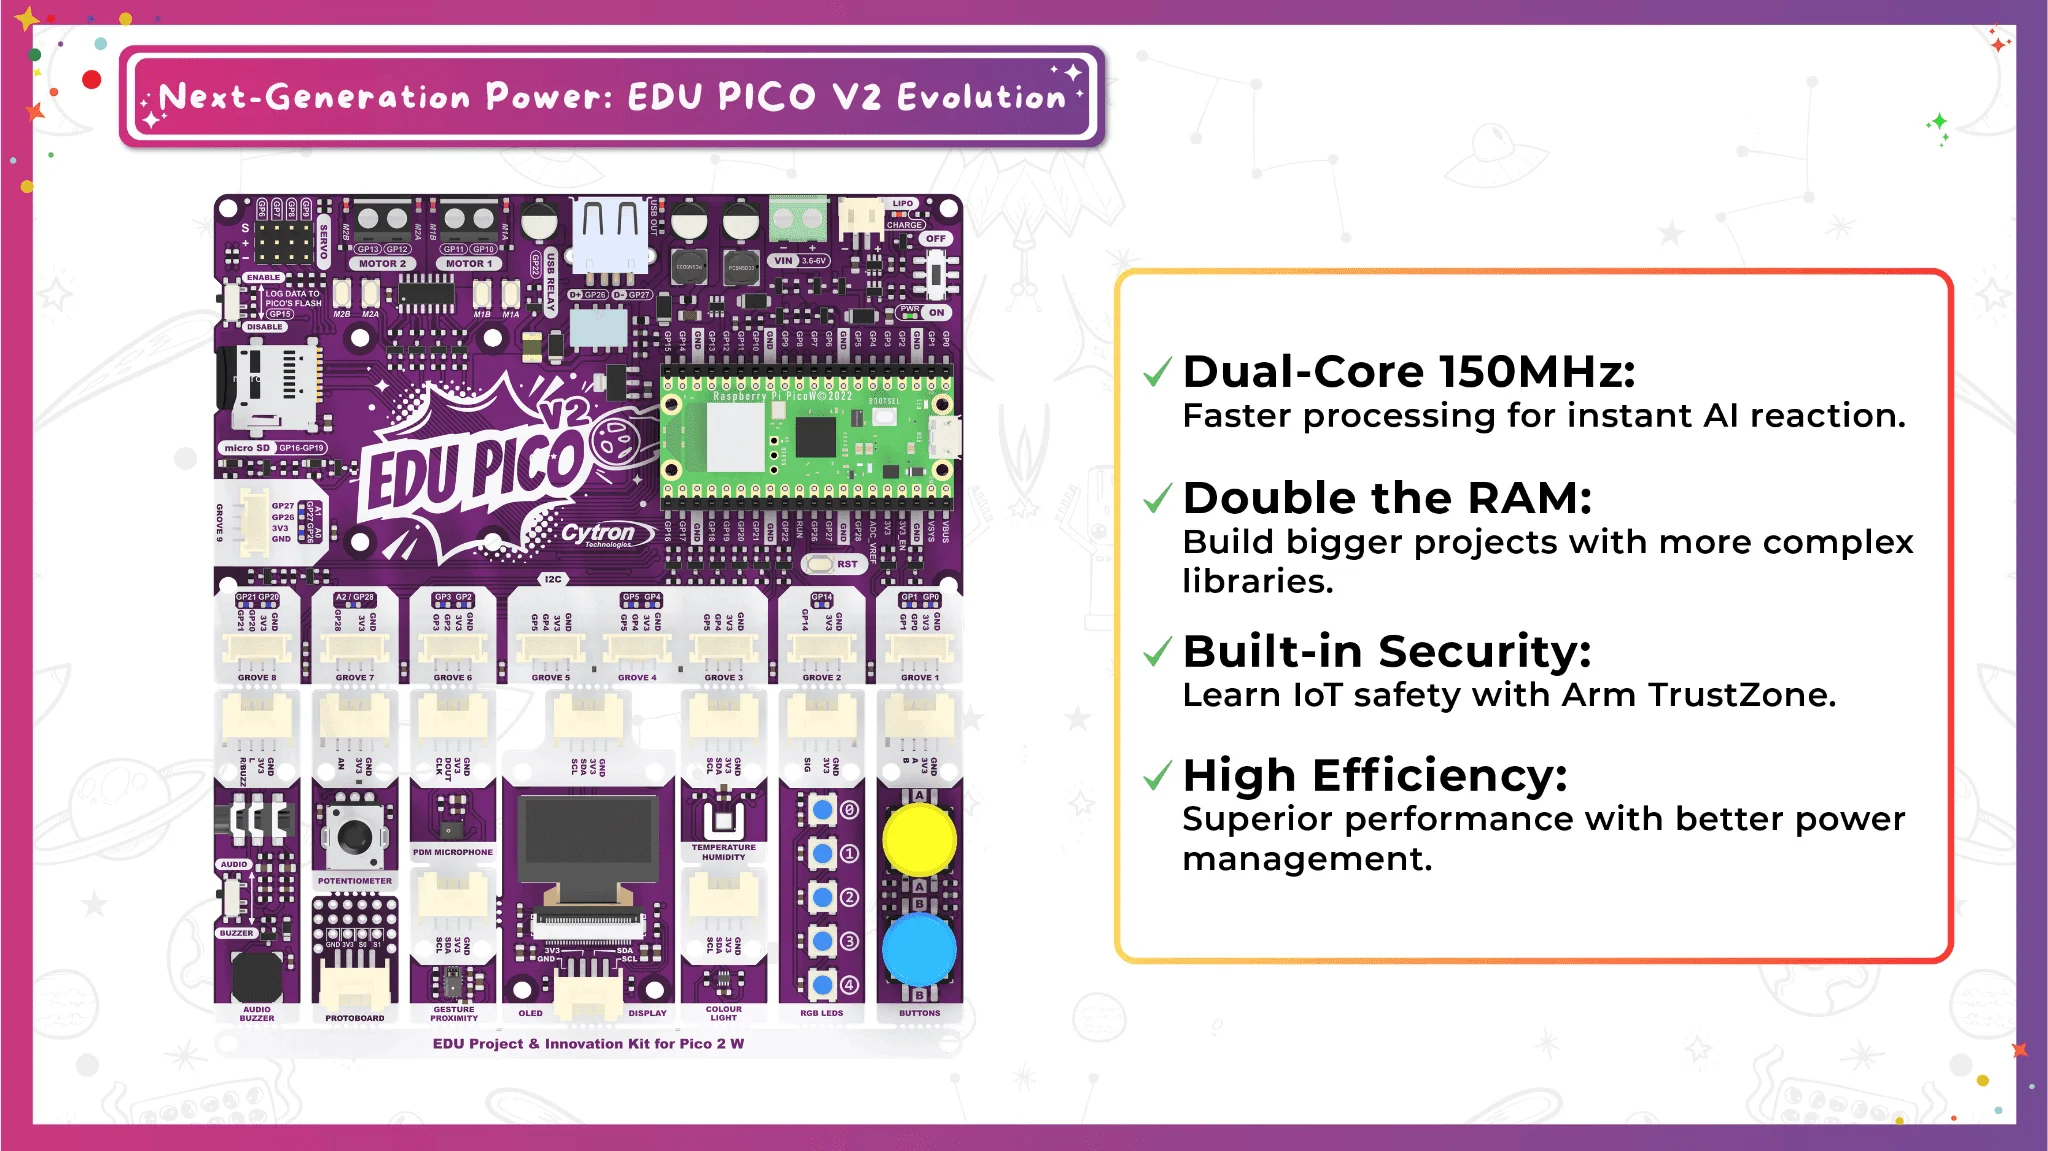
Unleash Your Creativity: Modular Freedom for Real Projects
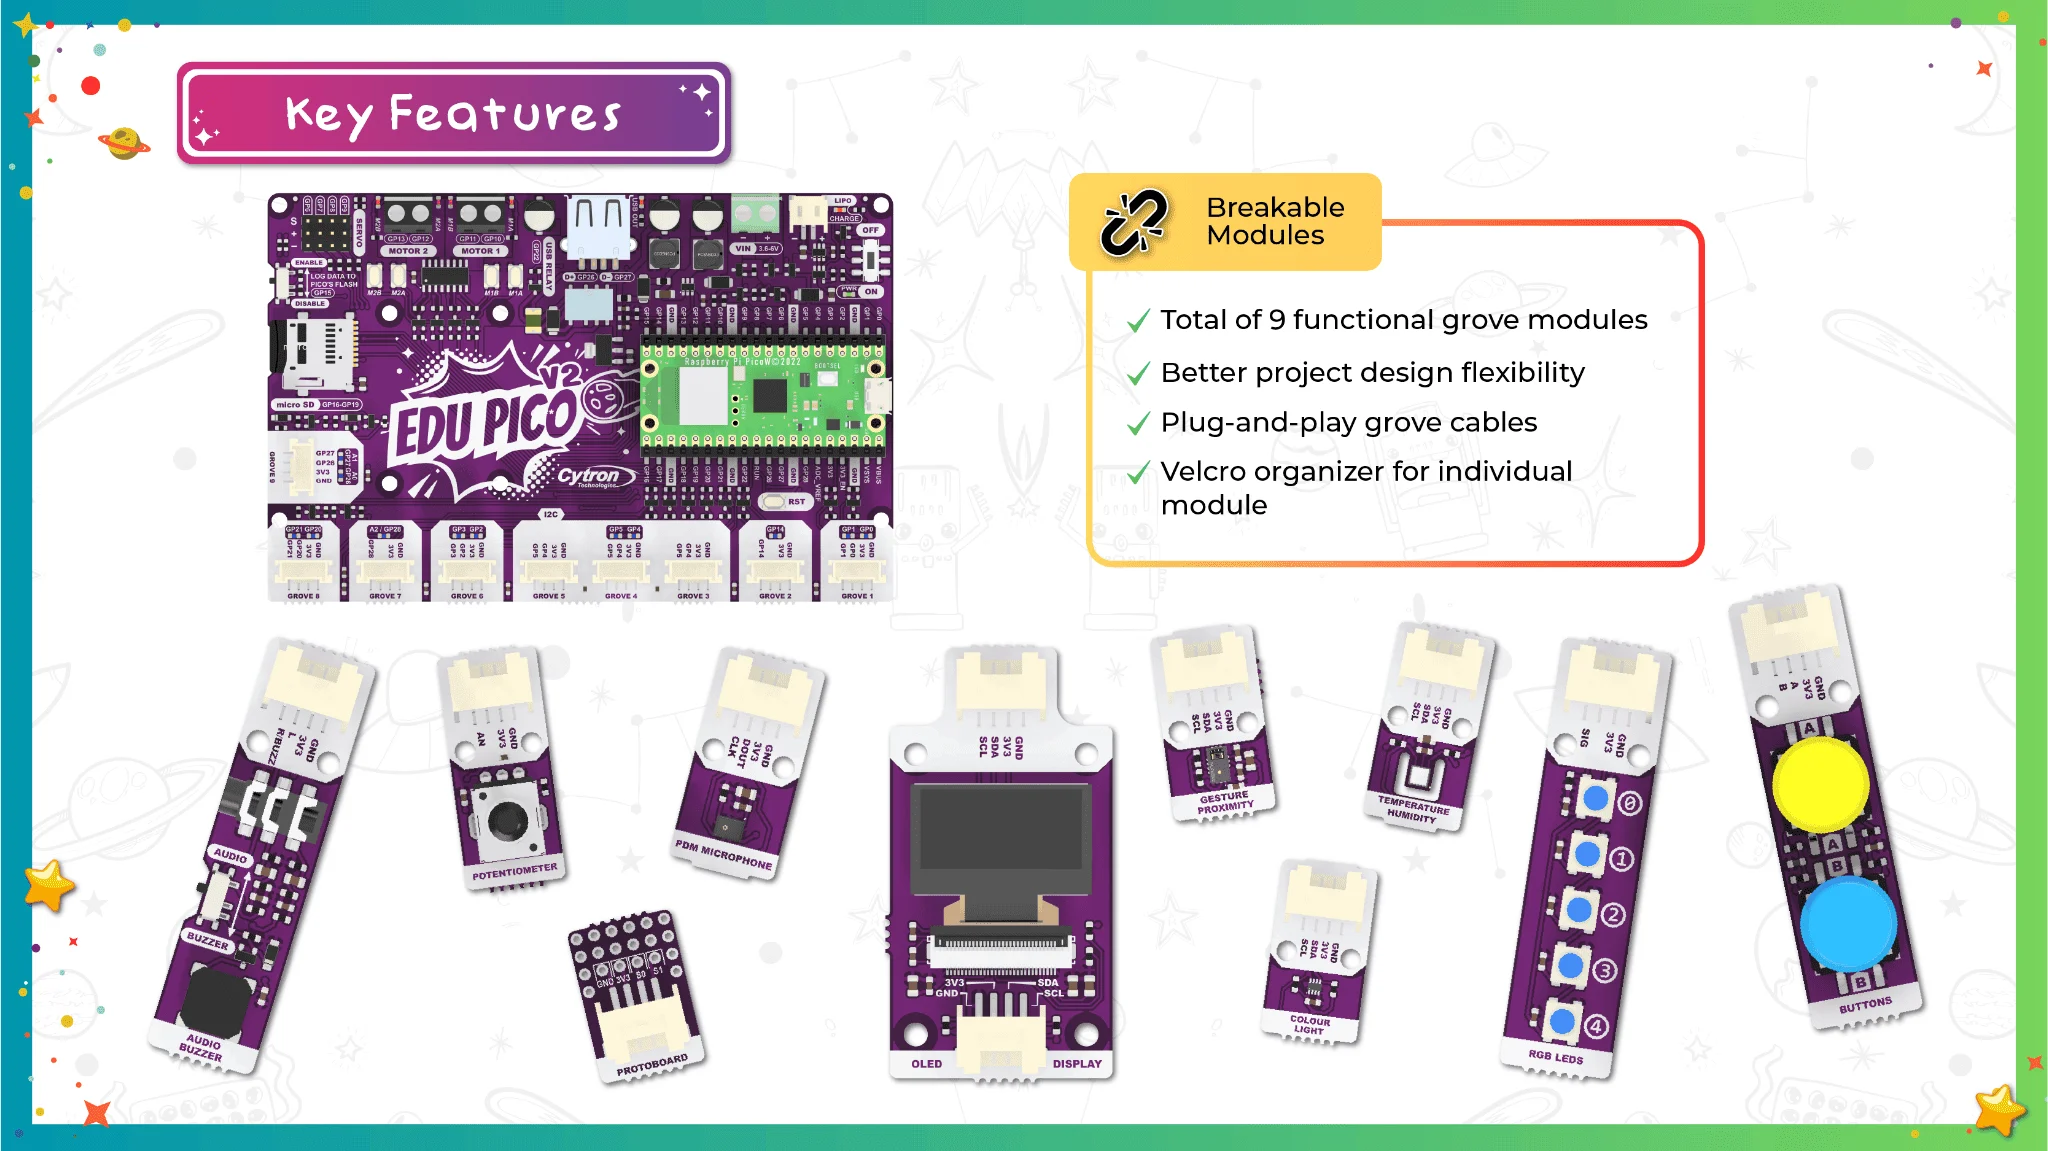
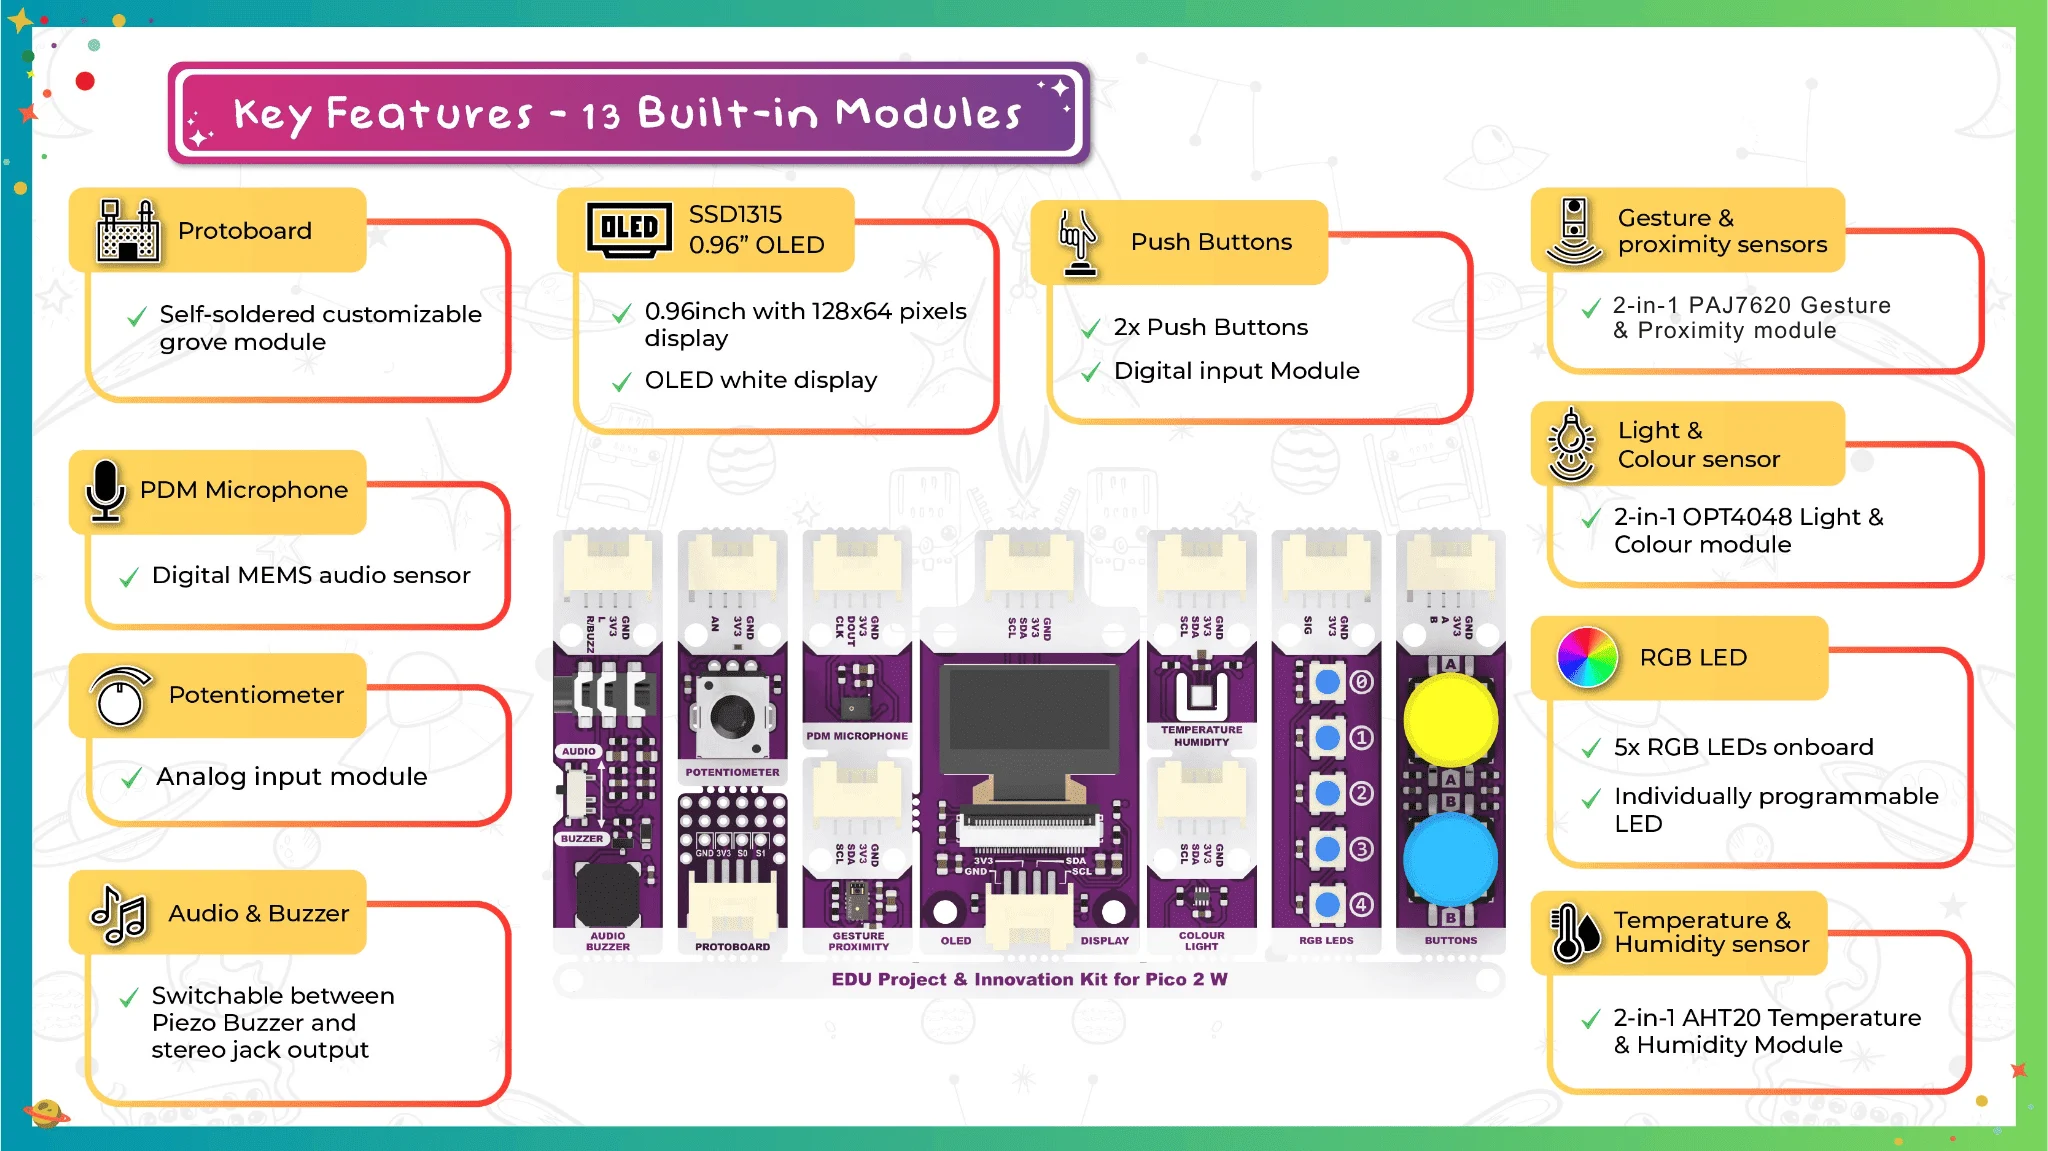
Dive into a hands-on adventure where the best way to learn is by doing. We have evolved the EDU PICO V2 to give you more physical and creative freedom by splitting our sensors into two dedicated, high-precision modules:
Dedicated Gesture Engine (PAJ7620): Faster, more responsive tracking.
Detects complex moves: clockwise, anti-clockwise, and depth (moving in/out).
High-Resolution Colour & Light (OPT4048): Professional-grade accuracy.
Zero interference for superior performance in any lighting.
Why the Split? Less Interference: Isolating light from gesture sensors means more stable data.
Code Optimization: Initialize only the driver you need, saving memory for your big ideas.
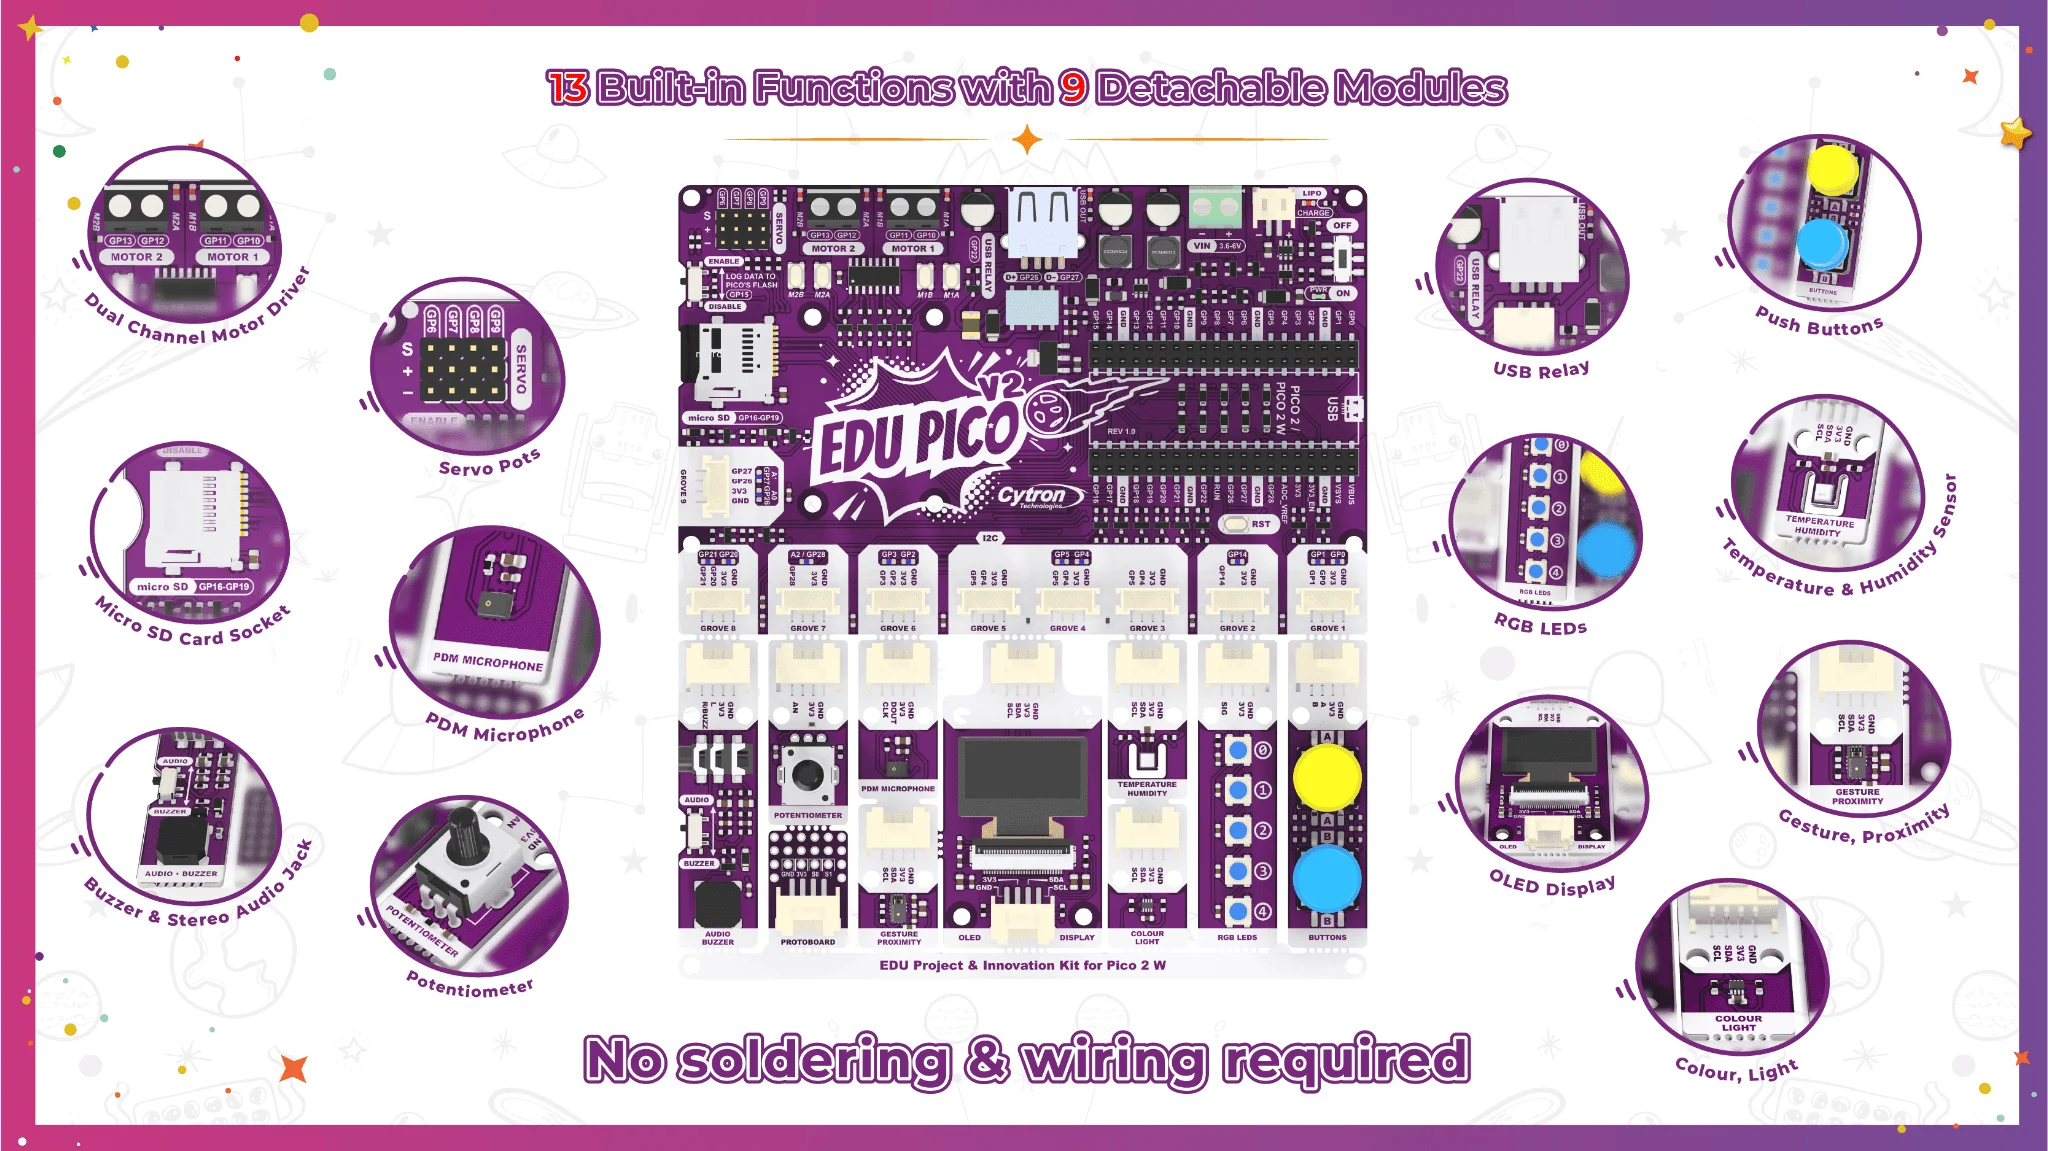
Ready to set sail? Break off the modules and integrate them directly into your own custom inventions!
Our kit comes with an updated EDU PICO V2 Guidebook, which now features AI prompting for more innovative projects. Learn how to use generative AI to innovate, troubleshoot, and expand your code using our custom prompt frameworks.
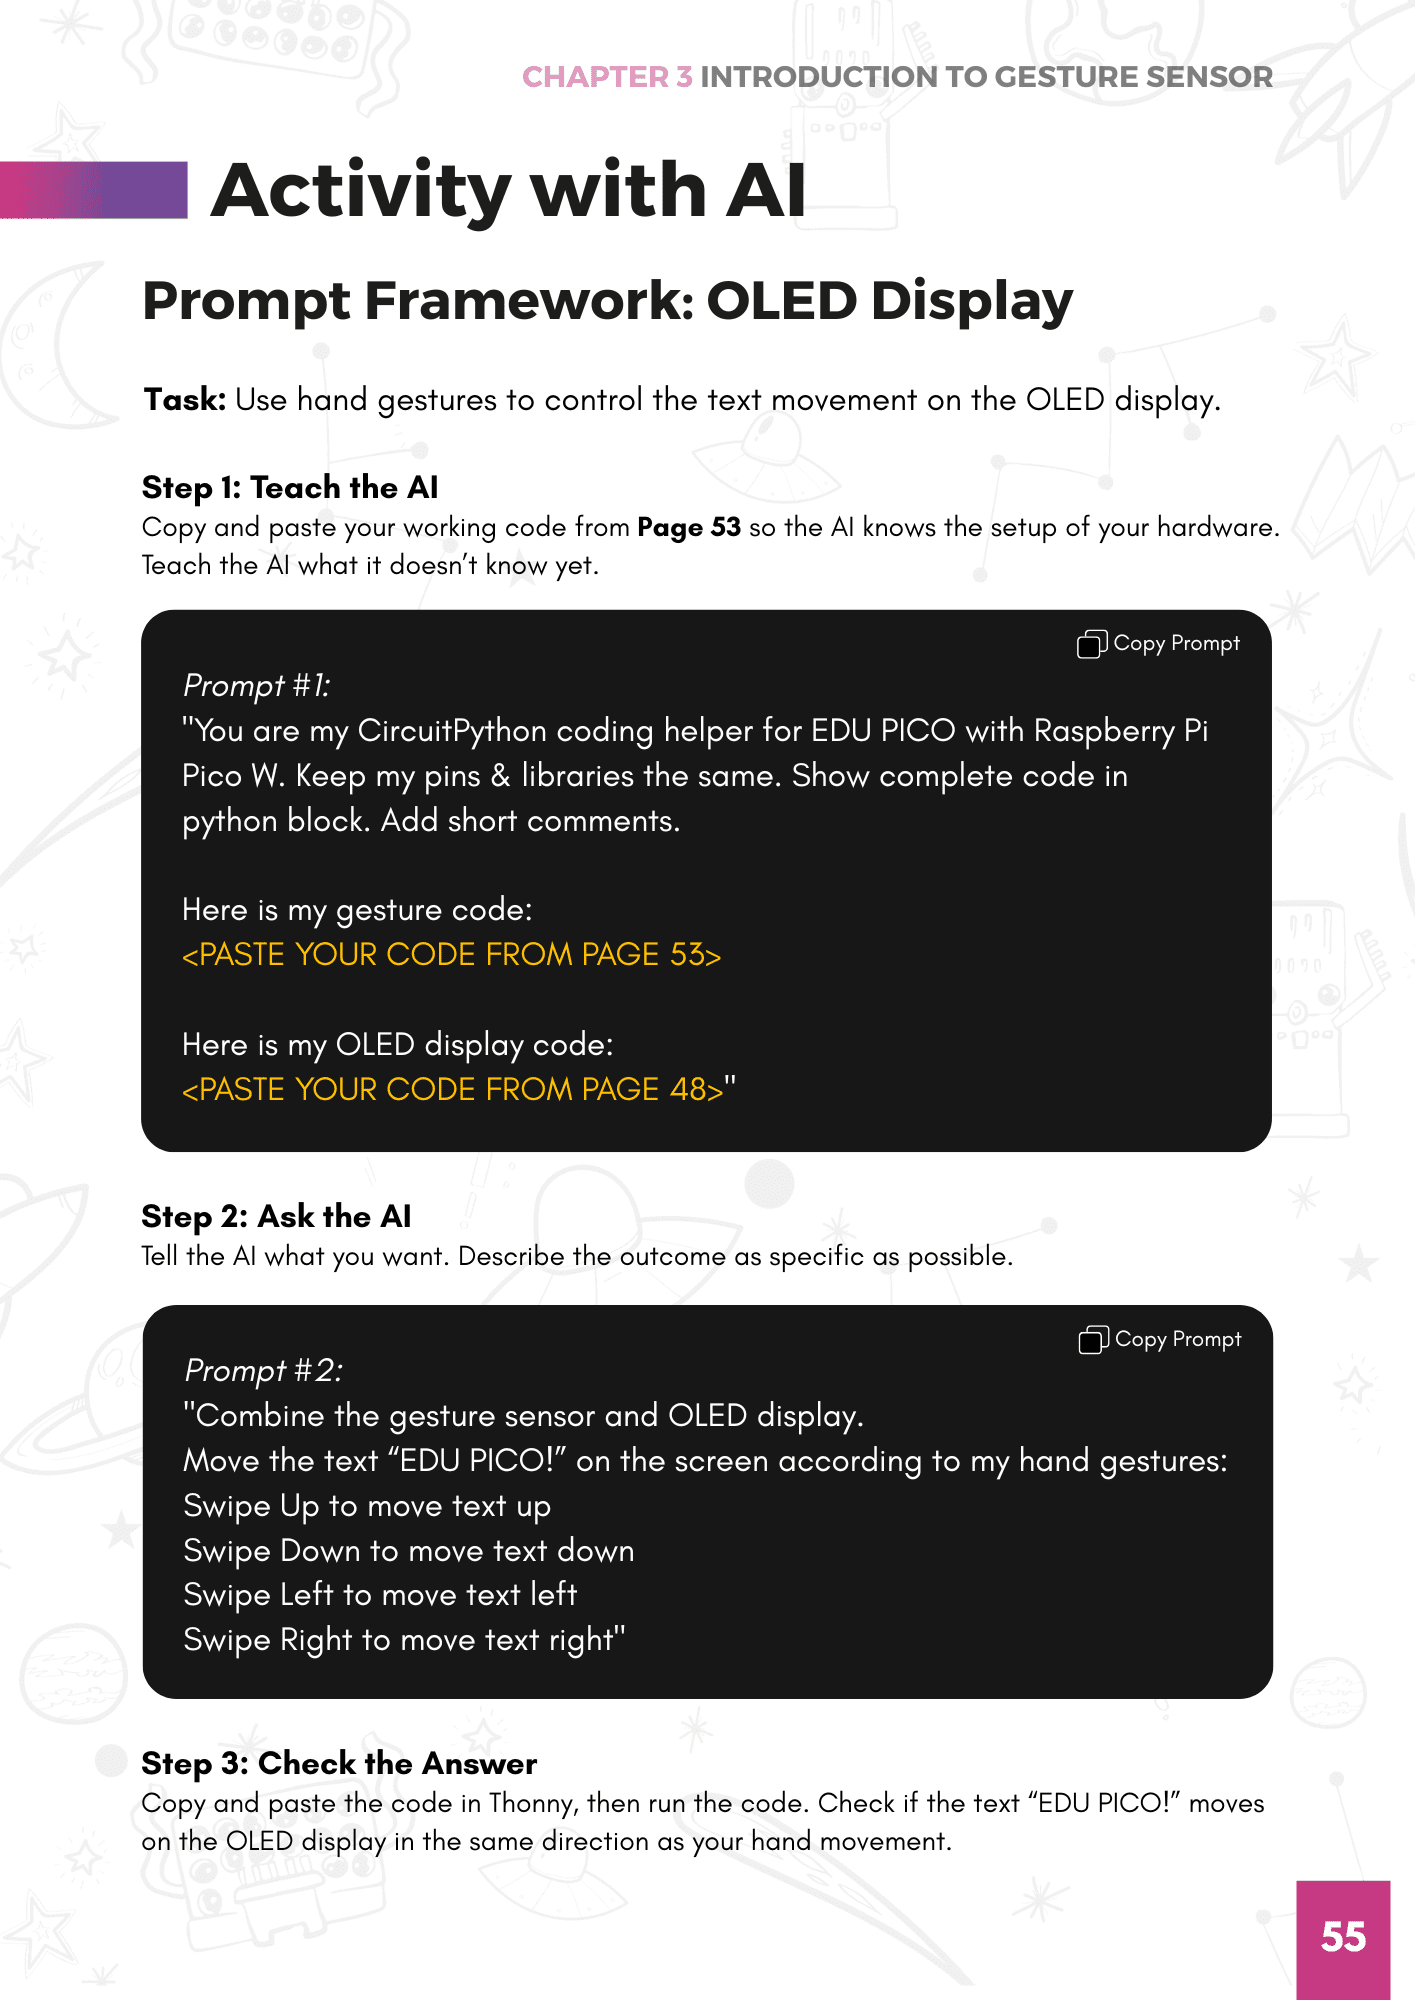
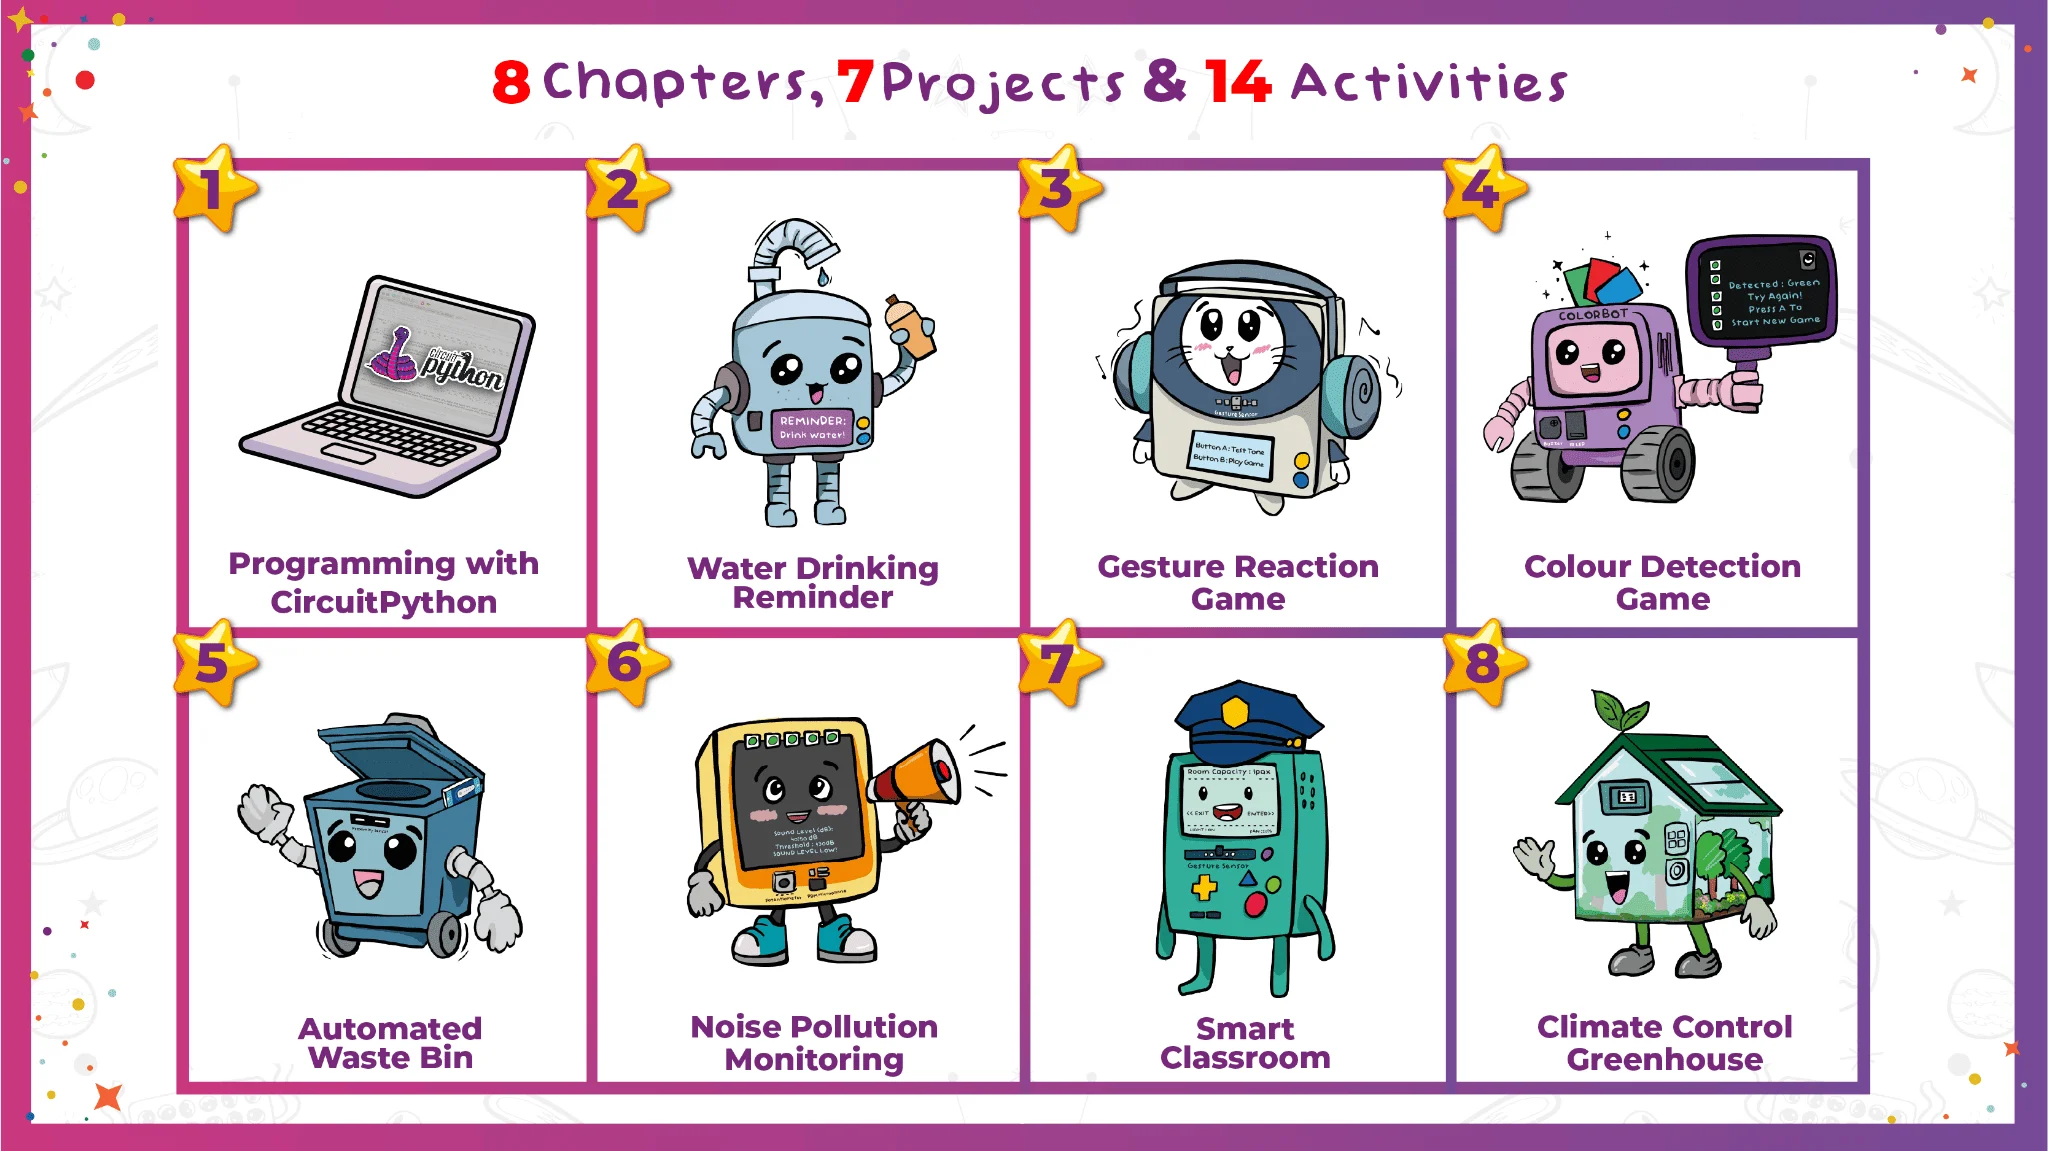
Ready to set sail on building your innovative projects? Break off the modules on the EDU PICO V2 board and start your journey with the most powerful EDU kit yet!
What's in the box?
1 x EDU PICO 2: Project & Innovation Kit (without Pico 2W)
What's on the board?
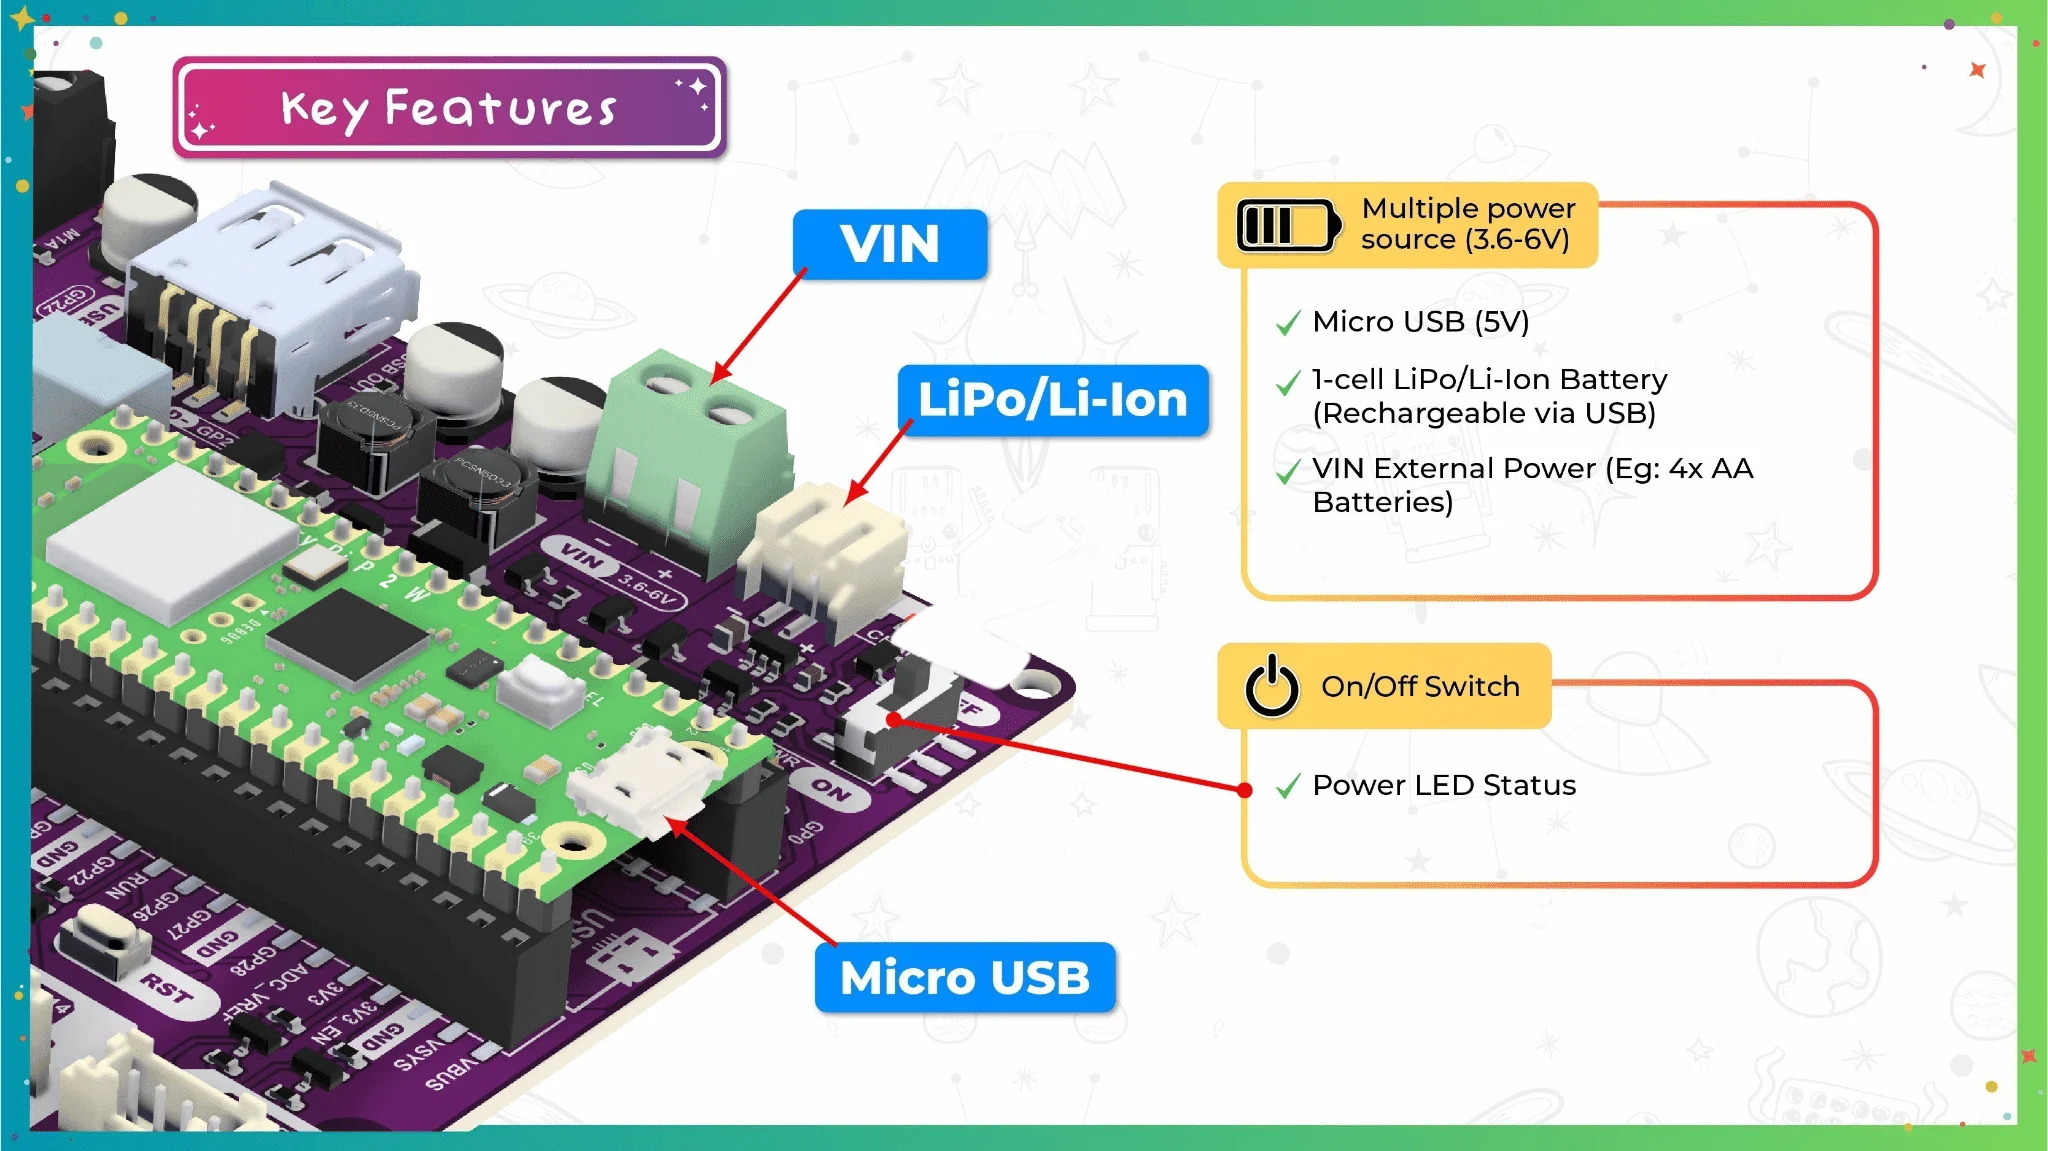
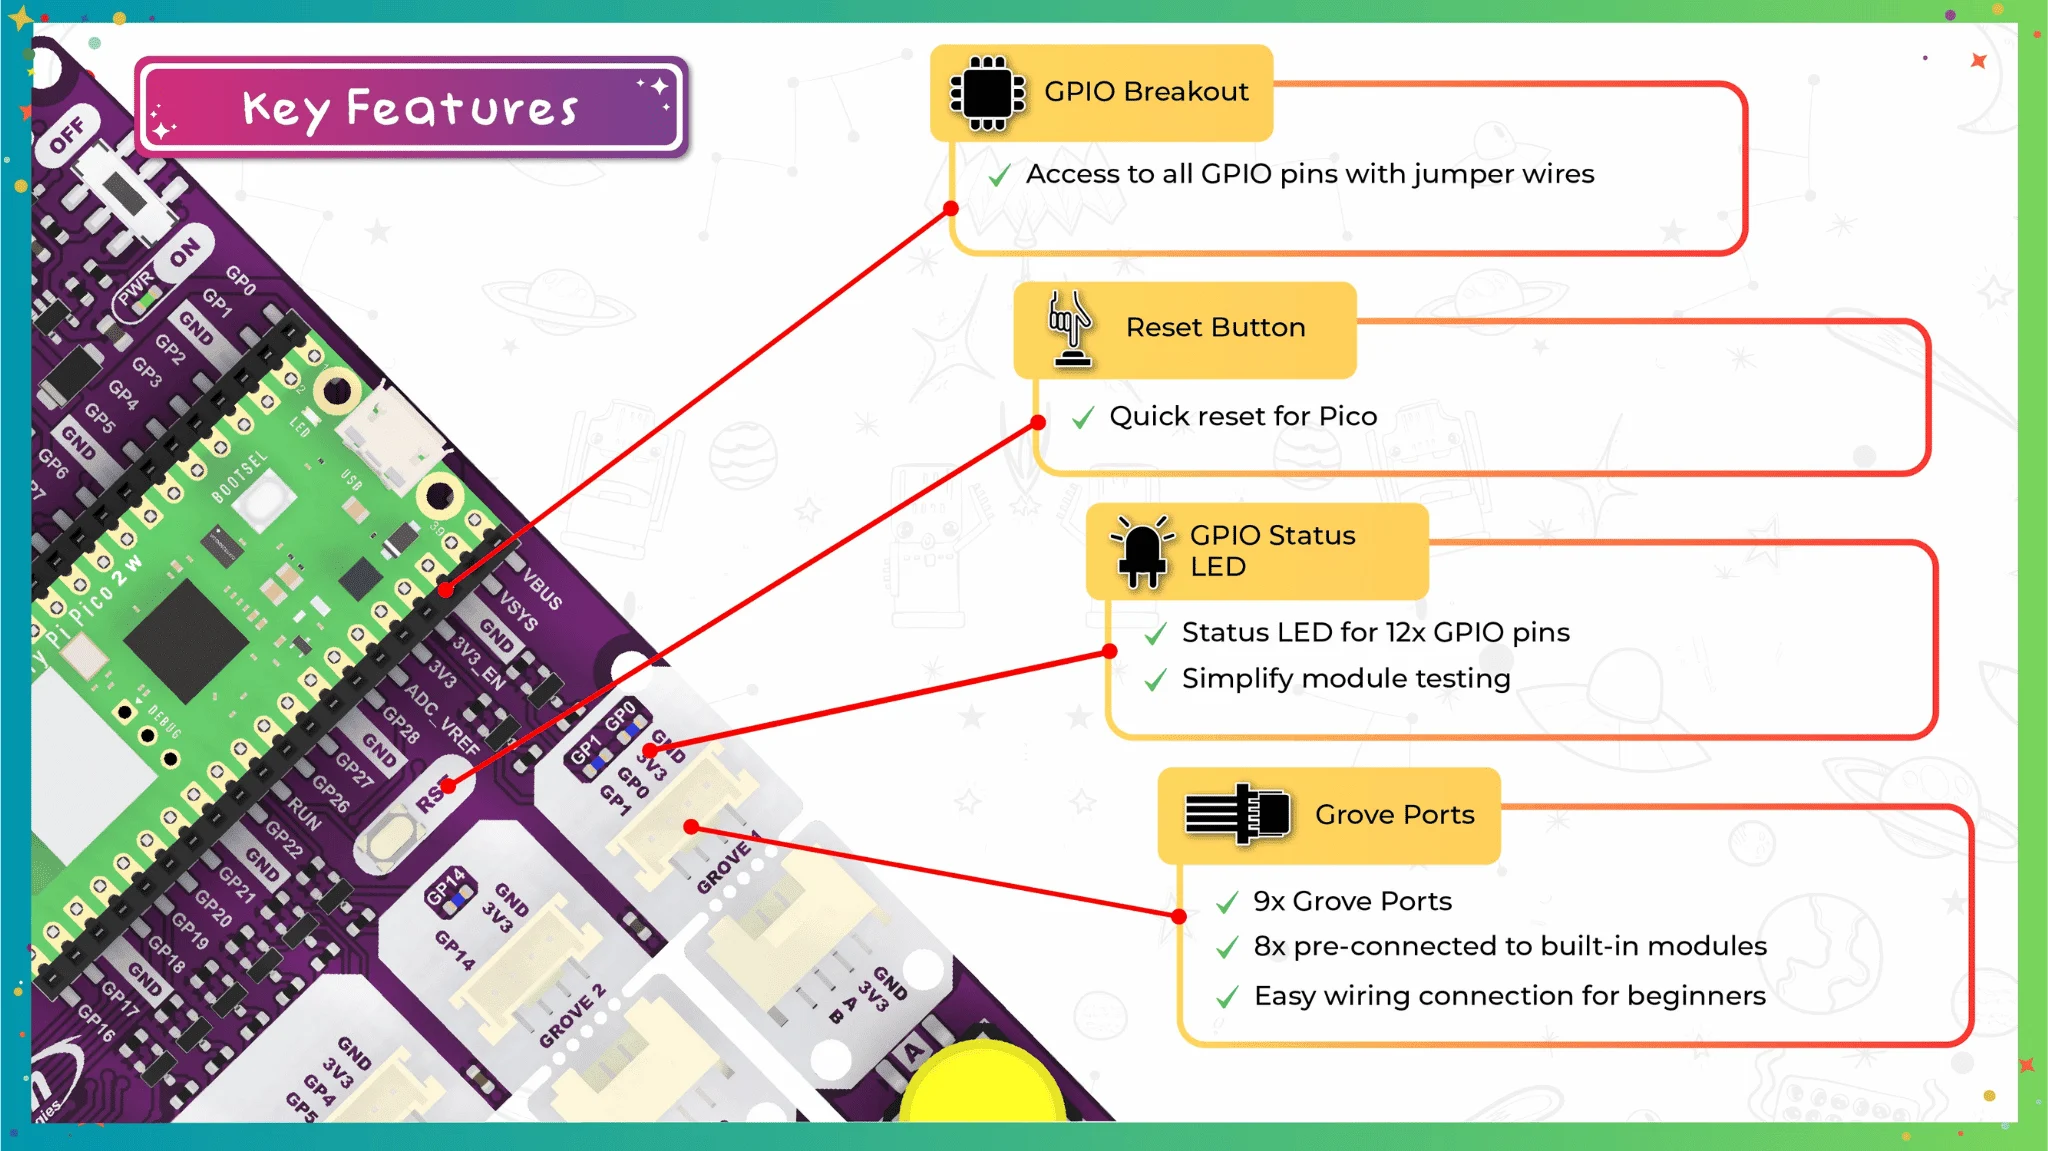
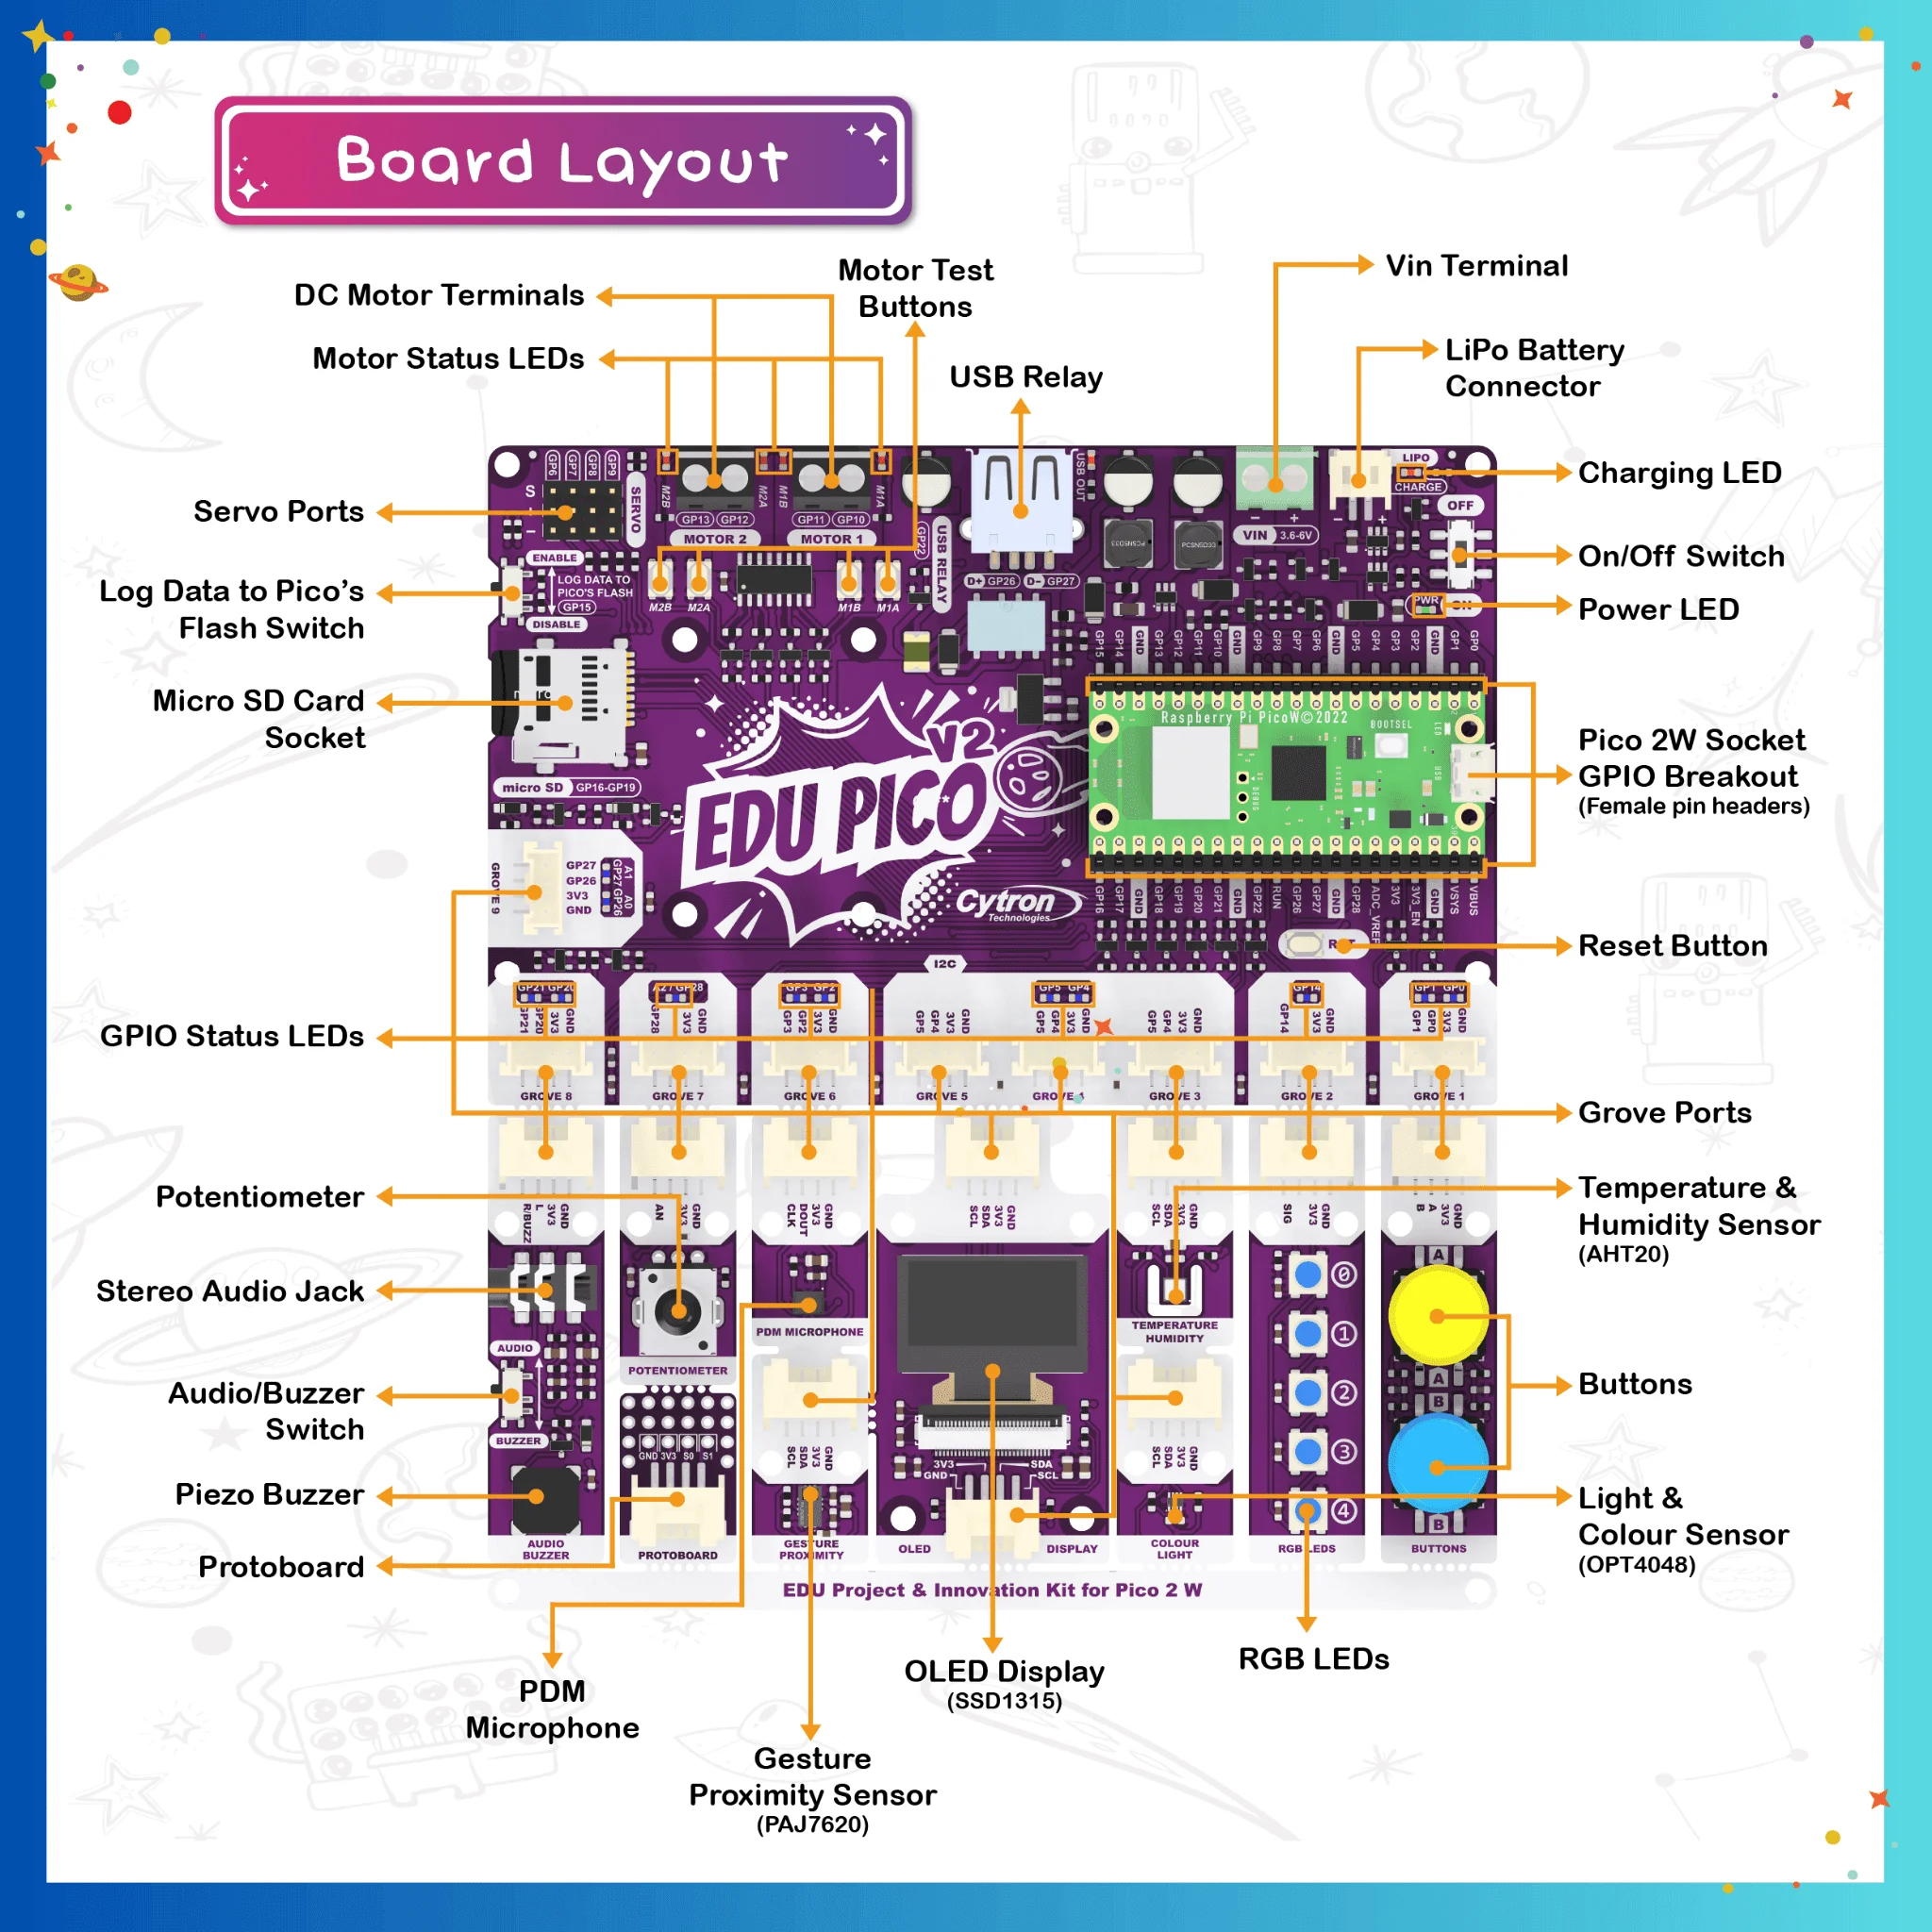
1 x Pi Pico Socket with GPIO breakout
1 x Power LED
1 x On/Off Switch
1 x Pi Pico Socket with GPIO breakout
1 x Power LED
1 x On/Off Switch
1 x LiPo Battery Connector
1 x Charge LED
1 x VIN Terminal
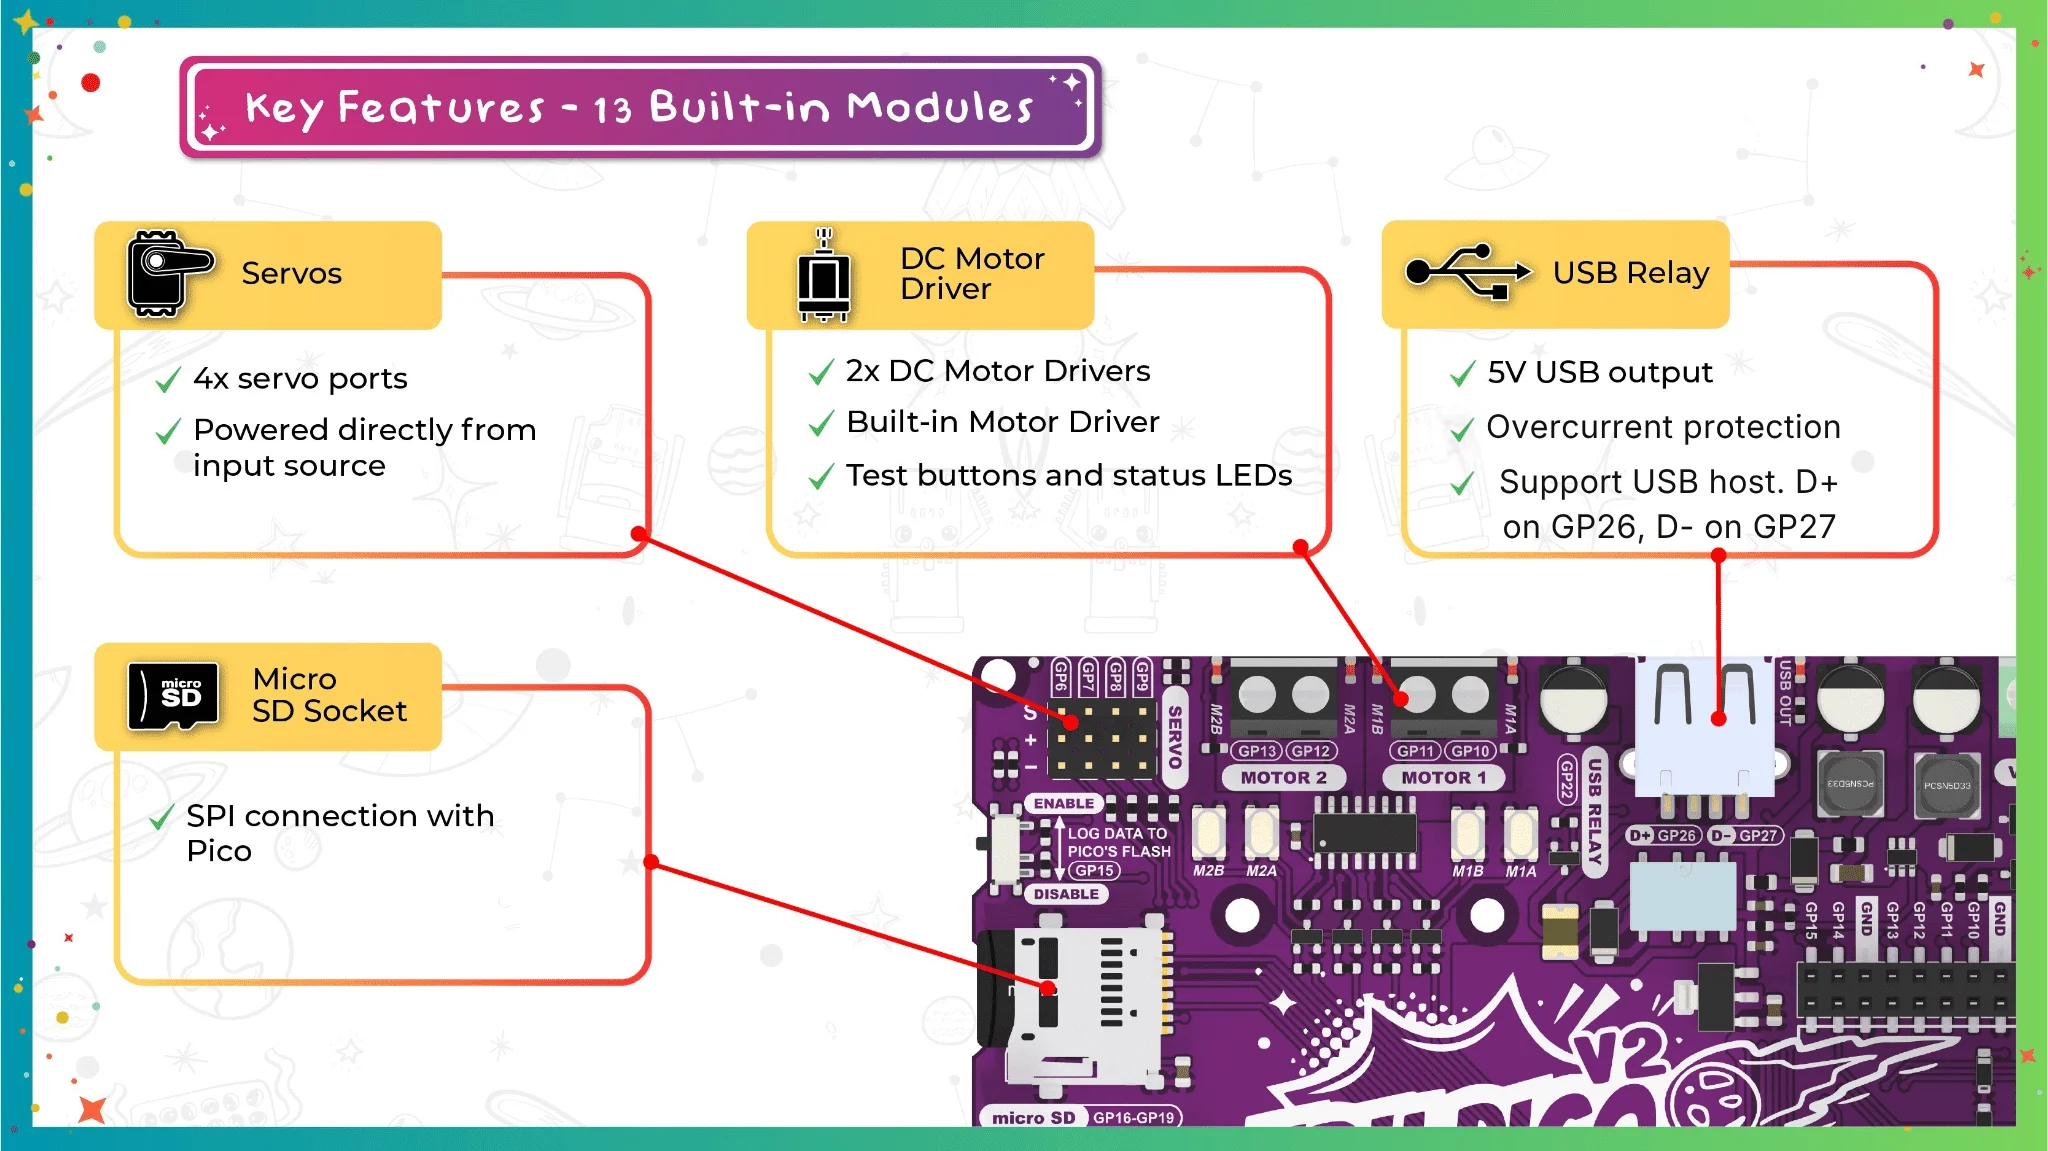
1 x USB Relay
2 x DC Motor Terminals
4 x Motor Test Buttons
4 x Motor Status LEDs
4 x Servo Ports
1 x Micro SD Card Socket
1 x Log Data to Pico's Flash Switch
9 x Grove Ports
12 x GPIO Status LEDs
1 x Reset Button
1 x Piezo Buzzer
1 x Stereo Audio Jack
1 x Audio/Buzzer Switch
1 x Potentiometer
1 x PDM Microphone
1 x Protoboard
1 x SSD1315 OLED Display
1 x AHT20 Temperature & Humidity Sensor
1 x OPT4048 Light & Colour Sensor
1 x PAJ7620 Proximity & Gesture Sensor
5 x RGB LEDs
2 x Push Buttons
Resources
Unlike other pressure sensors, you can easily attach a tube to it, to measure air pressure inside a close space. In particular we think this would be a great sensor for use with making DIY assistive tech "Sip & Puff" interfaces, or measuring the pressure within a vacuum chamber or other pressurized container.
Unlike most ported pressure sensors, this one uses I2C, it's really easy to use with any microcontroller. Inside is a silicone-gel covered pressure sensing gauge with a pre-calibrated and compensated 24 bit ADC. We have example code and libraries for Arduino or CircuitPython/Python. You can measure absolute pressure 0 to 25 PSI, which is a great range since ambient pressure here on Earth is about 14.5 PSI.
The port is made of stainless steel and is 3.7mm long and 2.5mm diameter. It doesn't come with tubing so be sure to purchase some tubing to attach to the port.
The sensor has been placed on a breakout board with 3.3V power regulation and level shifting so you can use it with any kind of microcontroller or microcomputer, from an Arduino compatible to Raspberry Pi
- Uses I2C address 0x18
- 0 to 25 absolute PSI measurement range
- App notes and datasheets for Honeywell MPR series micro pressure sensors
Product Dimensions: 17.8mm x 16.7mm x 7.5mm / 0.7" x 0.7" x 0.3"
What's in the box?
1 x Adafruit MPRLS Ported Pressure Sensor Breakout - 0 to 25 PSI

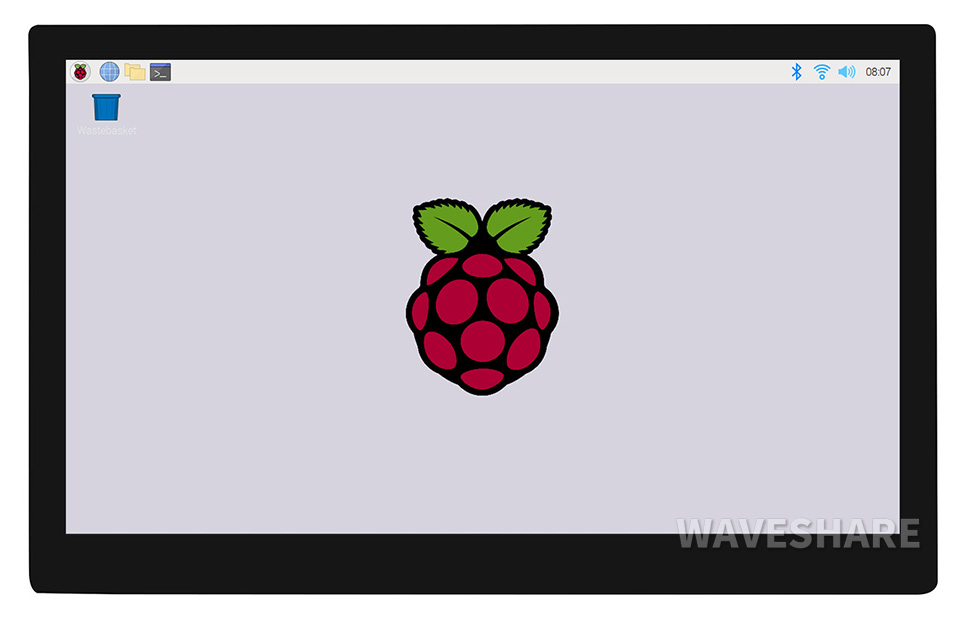
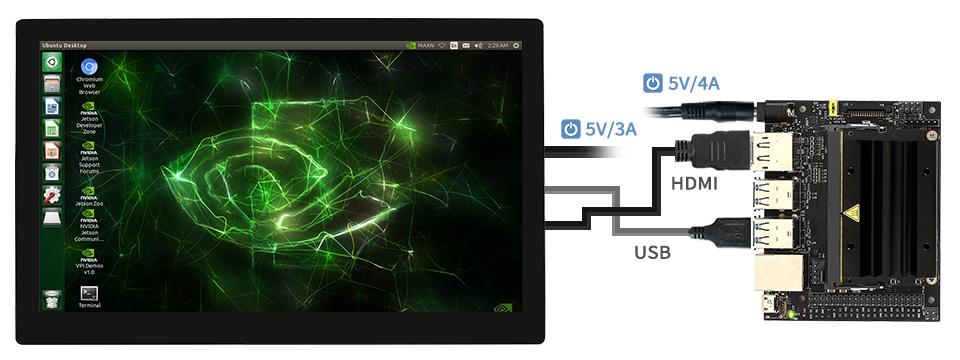
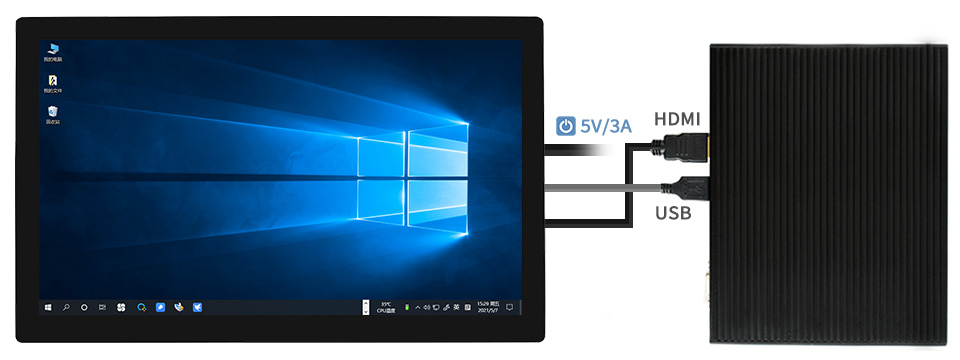
Supports Ubuntu / Kali / WIN10 IoT, single point touch, driver free
Supports Retropie, driver free
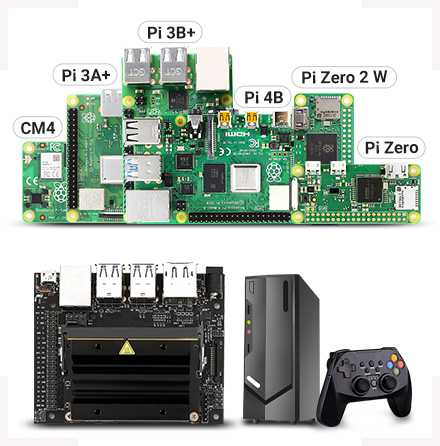
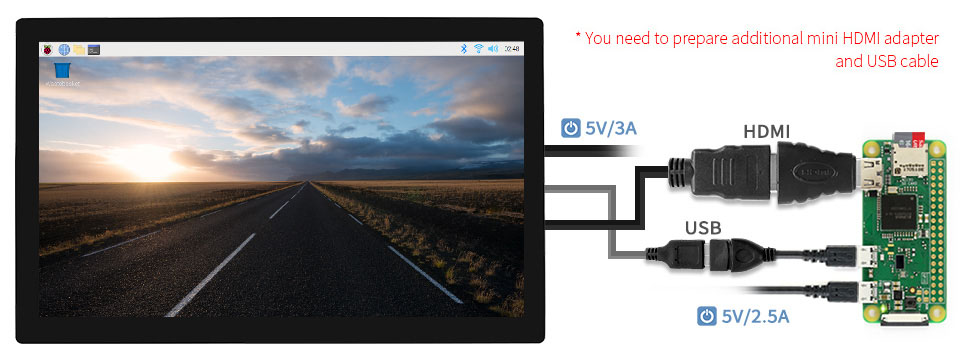
Supports all versions of Raspberry Pi
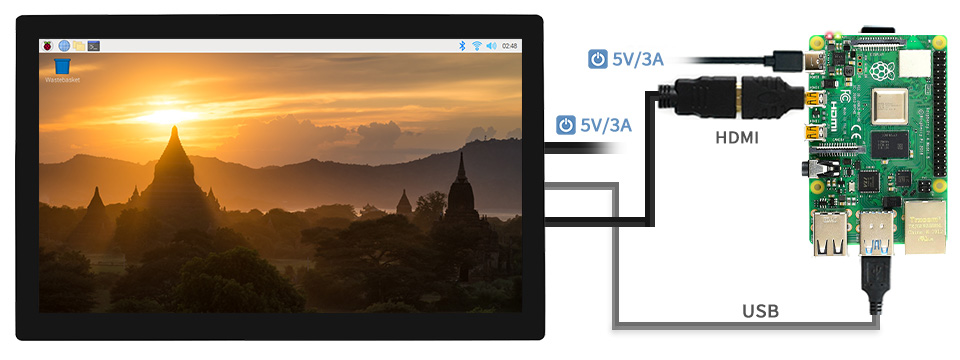
Working with Raspberry Pi 4
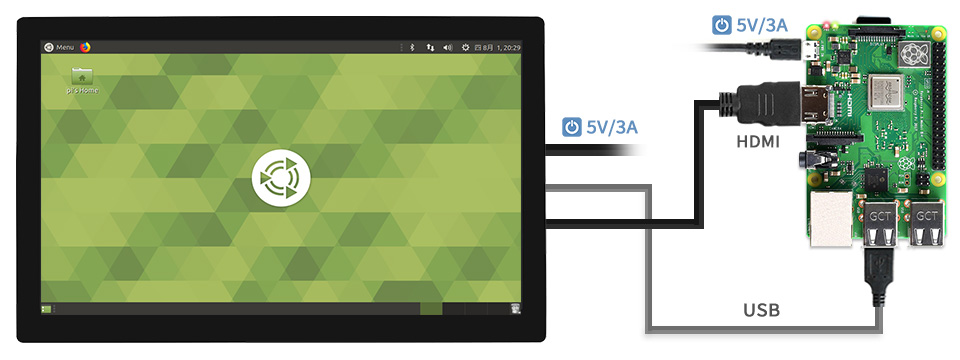
Working with Raspberry Pi 3B+
Working with Raspberry Pi Zero W
Working with AI Computer Jetson Nano
Working with mini PC
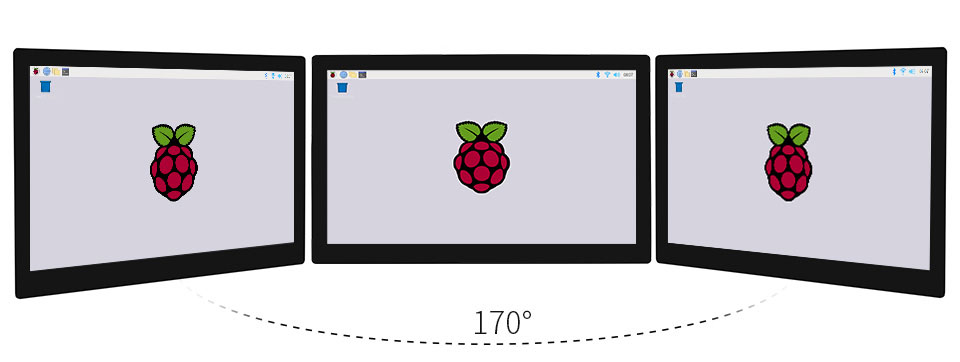
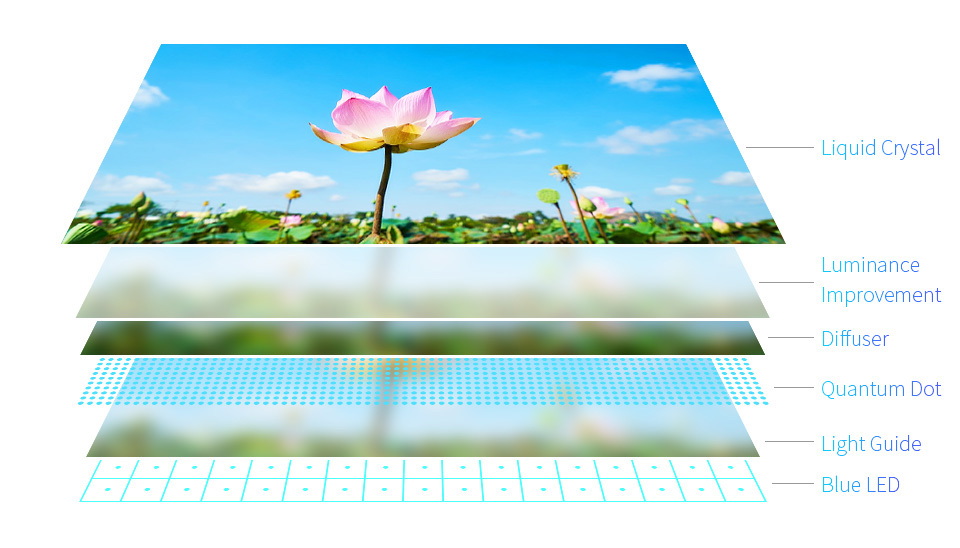
QLED Panel
Wider color gamut
Color gamut of this QLED display is up to: NTSC 96%, sRGB 100%
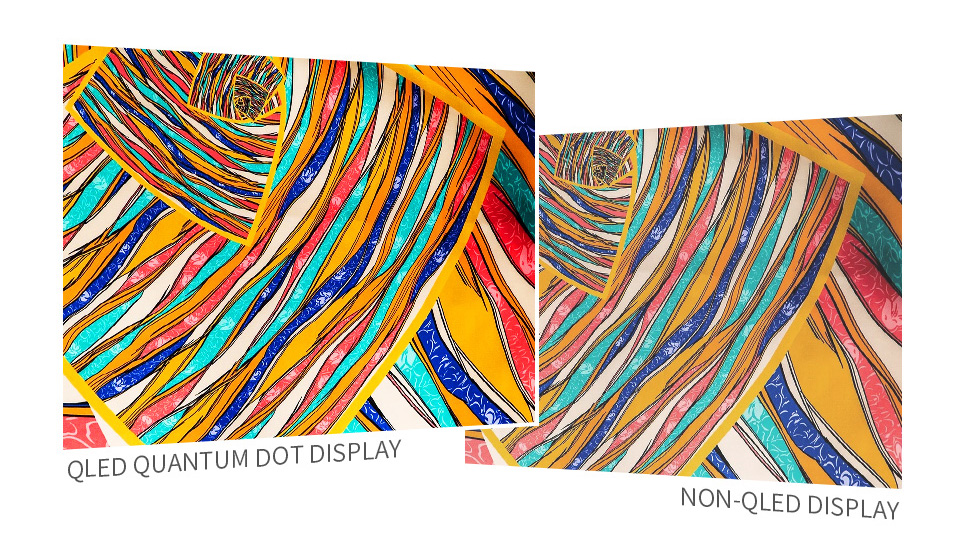
More pure chroma
Chroma of QLED increases 58.3%, makes the color more pure, more vivid
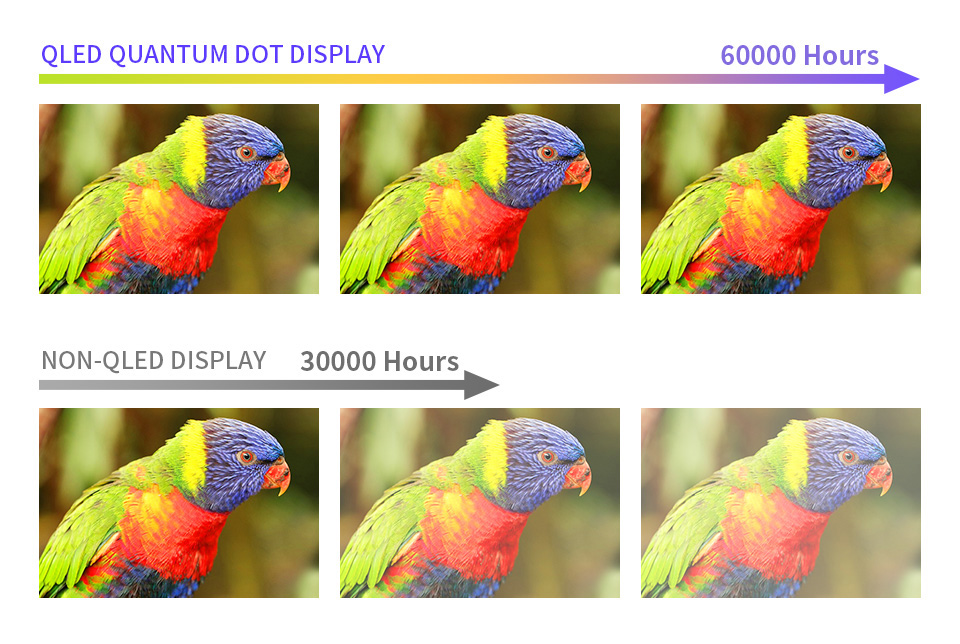
Longer lifetime
Due to its inorganic characteristic, the color life of QLED could be up to 60000 hours without color degradation

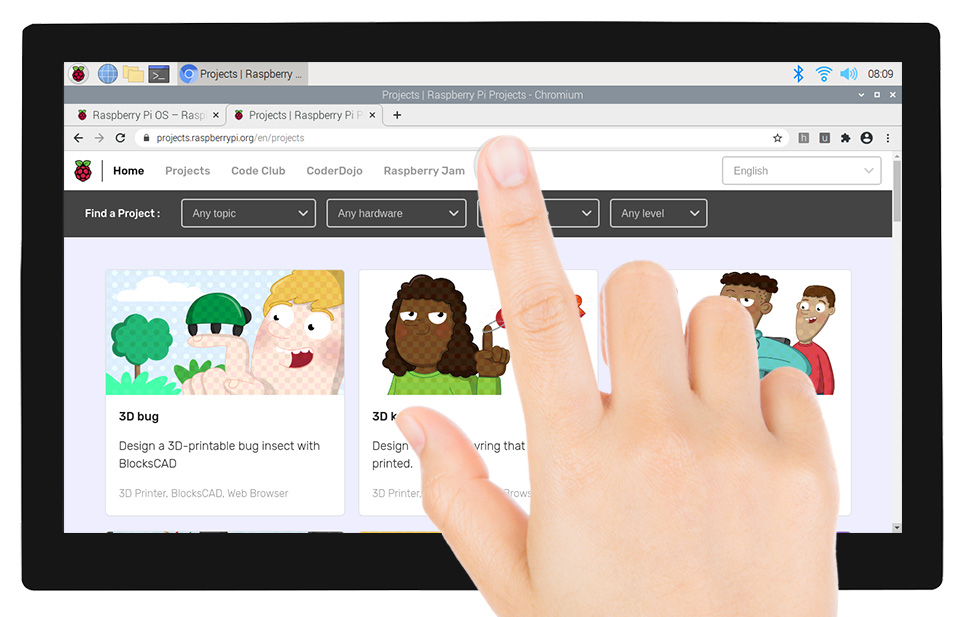
Up to 10-point touch, depending on the operating system. 2) up to 6H hardness G-G toughened glass panel.

* audio output via earphone/speaker port.
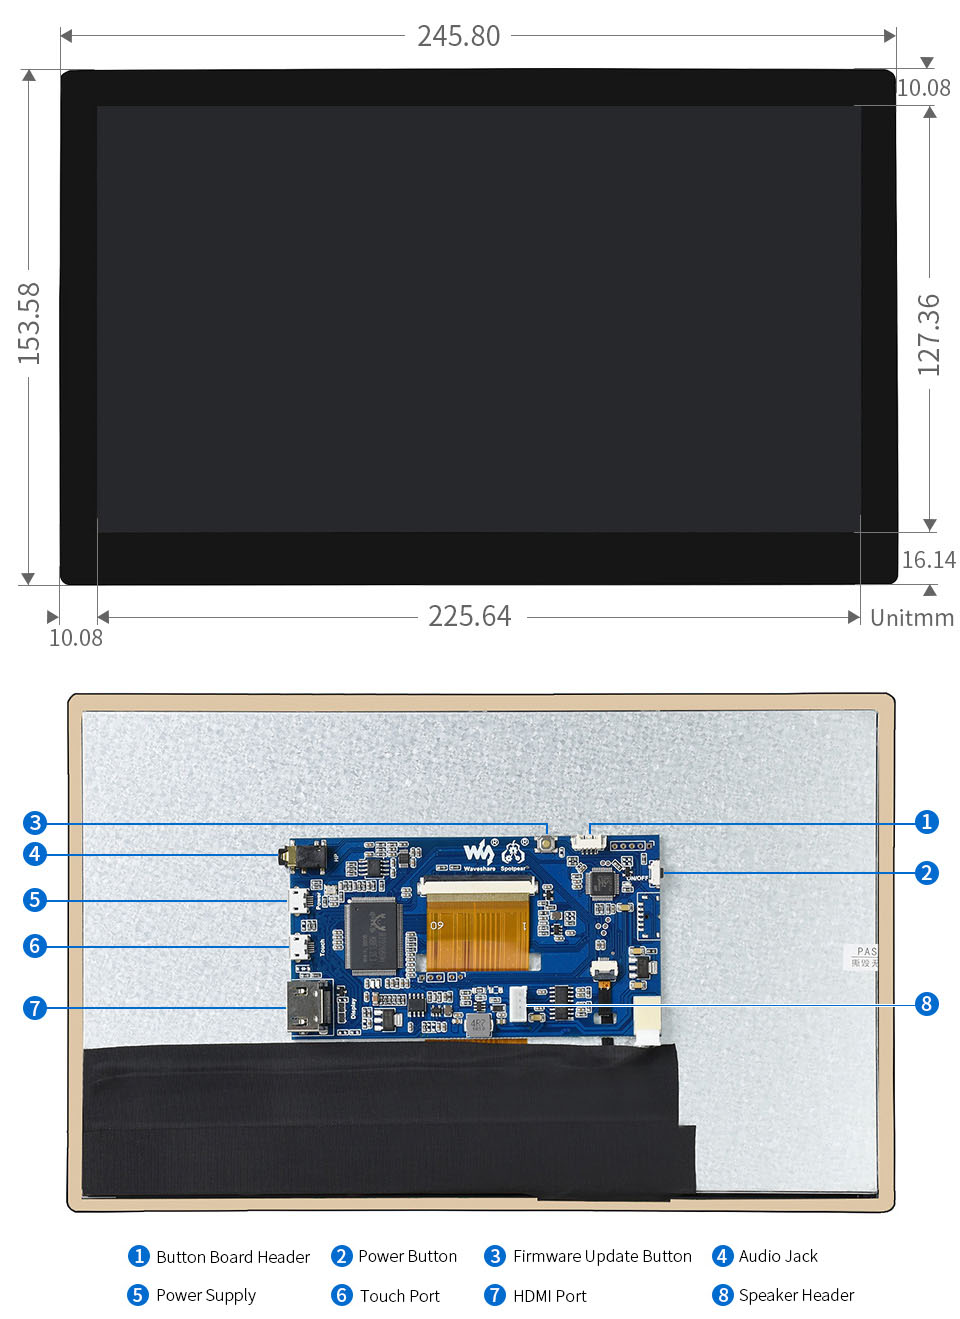
Resources
Build projects using Raspberry Pi hardware that interacts with our real world.
Computers are embedded into almost everything we own. Our doorbells, kitchen gadgets, vacuum cleaners, and media players are all powerful computing devices running software that someone has written.
Using the flexible Python programming language, Python Projects for Raspberry Pi shows you how to get the most out of the Pico range of microcontrollers and Raspberry Pi computers like Raspberry Pi 5.
Learn how to:
- Interact with sensors and motors
- Build a smart weather station
- Make your own games console
- Add web interfaces to your projects
- Recognise gestures with machine learning
- Get the most out of your Raspberry Pi Pico with MicroPython
- Extend Python with C
Perfect for intermediate users who want to sense, control, and take over the world with homemade digital assistants, smart devices, and robots.
What's in the box
1 x Python Projects for Raspberry Pi book
Ideal for intricate circuit prototyping and point-to-point modifications, this ultra-thin 30AWG red wire is the finest gauge in our inventory. Supplied on a generous spool of approximately 10 meters per colour, this tin-plated copper wire offers exceptional solderability and holds its shape reliably when routed around tight spaces. Also known as wire-wrapping wire, it is a staple for any regular electronics workbench. We highly recommend pair-using it with dedicated 30AWG wire strippers to prevent damaging the core.
Specifications
Colour: Red, Blue, Green, Yellow, Black, White
Gauge: 30AWG (0.255mm diameter / 0.05 mm² cross-section)
Length: 10m per spool
Conductor: Tin-Plated Copper (Oxidation Resistant)
Insulation: Silicon (Rated up to 200°C)
What's in the box?

- GPIO pins and headers on top
- USB-C for power and data
- The Qwiic Connector
What's in the box?
1 x UNO Q Acrylic Case parts(remove the protection film)
4 x Nonskid rubber pads
1 x Screwdriver
1 x Screws and standoffs pack
There are four different ways in which we can power up the Arduino. The most convenient of which, after programming it with your USB cable is the 9V DC 2.1mm barrel connector.
Specifications
- Wide input range, high precision voltage.
- Overload protection
- Short circuit protection
- Over temperature protection
- Input:100-240V AC 50/60Hz
- Output: DC 9V 1000mA
- Plug: EU Plug
- Dimension: 70mm x 80mm x 28mm
- Cable length: about 100cm
- DC Plug Dimension: 5.5mm x 2.1mm
- Colour: Black
- EU type
What's in the box?
1 x 9V 1A AC to DC Power Supply
You will also need a euro plug adapter
Mobile Module
- Mobile module: 4G LTE-FDD (Cat 4) – 75Mbps DL, 50Mbps UL; LTE-TDD (Cat 4) – 65Mbps DL, 35Mbps UL; DC-HSPA+ – 42Mbps DL, 5.76Mbps UL; 3G – 384 kbps DL, 384 kbps UL, 2G – 236.8 kbps DL, 236.8 kbps UL, 2G GPRS – 85.6 kbps DL, 85.6 kbps UL
- 3GPP Release: Release 9
- USB 2.0 - Calyx 4G / EBD021; Calyx 5G Red Cap / EBD070
40-Pin GPIO header
- PWR_KEY: Modem turn on/off. Digital Input, 0 - 3.3 V logic level, active High, to activate use pulse (≥500 ms)
- Modem wakeup: Wake up modem from a sleep mode. Digital Input, 0 - 3.3 V logic level, active High - Calyx 4G / EBD021;
- Modem reset: Resets the modem. Digital Input, 0 - 3.3 V logic level, active High
Power
- USB type C: 5 VDC
- 40-pin GPIO header: On a 40-pin header, 5 VDC and 3.3 VDC
Physical Interfaces
- Status LEDs: 1 x Power, NET IND, NET STAT
- SIM: 1 x SIM slot (Nano SIM - 4FF), push-pull
- Power: On a 40-pin header/USB power
- USB: USB Type-C receptacle
- Antennas: 2 x SMA for Mobile
Physical Specifications
- Weight: 57 g
- Mounting options: With included mounting kit
- Dimensions (W x H x D): 56mm x 23.11mm x 95.48 mm
Operating Environment
- Operating temperature: -40 °C to 75 °C
What's in the box?
1 x EBD021 CALYX embedded Pi HAT+
1 x standoffs kit
1 x 40-pin GPIO header extender
1 x USB Type-C to USB Type-A accessory
1 x QSG (Quick Start Guide)
Antennas are not included. You will need two of them for the EBD021.
Resources
You will find more information at their Support Page