Search
Search Criteria
Products meeting the search criteria
1. Standard stripboard is great for prototyping and building circuits but it can be time consuming to use with components with certain pin configurations such as IC's. As much time has to be spent breaking tracks to ensure no shorts exist across opposite component pins. This board gets around that problem by having isolated groups of pins.
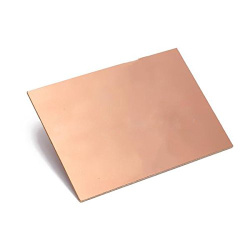
2. Solderable PCB breadboards, single-sided PCB, matches breadboards with Power Rails.
These boards are especially useful for preserving a prototype or experiment you just created on a solderless breadboard by soldering all the pieces in place.
Specifications:
Material: Bakelite
Length: 100mm
Width: 50mm
Thickness: 1.2mm
Hole Diameter: 1mm
What's in the box:
1 x Single Sided Copper Prototype PCB Breadboard
Resources:
Introduction to soldering
Video: How to solder properly
The secrets to good soldering
General Specification | |
Model | Mini CNC3018 (Without Laser Module) |
Frame Material | Aluminum Alloy |
Color | Silver |
Table Area | Approx. 340x160mm |
Working Area | Approx. 340x160x40mm |
Product Weight | 7.5kg |
Control Software for Spindle | GrblControl |
Control Software for Laser | Litefire |
System Requirements | Windows XP SP3, Win7, Win8, Win10. |
Adapter Plug | 2-Pin US Plug |
Adapter Input Voltage | AC 110-240V 50/60Hz |
Adapter Output Voltage | DC 24V 4A |
Features | 1. Aluminum Profile Stable Construction 2. 3 Axis Movable, Powerful Spindle Motor 3. Contains Quickstart Guide of GRBL Software 4. 340x160x40mm Working Area, Meet Most Amateur DIY Needs 5. Engrave Wood, Plastic, Acrylic, PCB, or Similar Material Can Not Engrave Metal, Steel, Aluminum. |
Technical Parameters | |
Working Voltage | DC 24V |
Interface | USB |
Stepper Motor | 42 Stepper Motor, Voltage: 12V, Phase Current 1.3A, Torque 0.25N.m |
Spindle Motor | 775 Spindle Motor (12-36V) 24V: 7000r/min, 36V: 9000r/min |
Spindle Motor Shaft Diameter | 5mm |
Features:
Now we recommend the laser module (2500mW Blue Laser Module) produced by the original manufacturer.
Prototyping board designed for the Raspberry Pi Pico with the Pico pinout marked on the PCB.
If you done using a breadboard for Pico and are ready to take your prototype to solder, you will love this board.
It can be tricky to work out which pin is which when using a Raspberry Pi Pico
with prototyping board. The MonkMakes Pico Proto PCB solves this problem by
labeling the Pico pins on the PCB.
The MonkMakes Pico Proto PCB makes it easy to make soldered prototypes using the Raspberry Pi Pico. You can solder the Pico to the prototyping board using the castelations around the edge of the board, or using header pins, or even solder header sockets onto the Pico Proto PCB so that you can easily swap out the Pico.
Specifications:
The layout of the Pico Proto PCB is modelled on a 400-point breadboard, and after the Pico is soldered to the PCB, there are 10 more rows, that can be used for through hole components
WARNING: Low voltage, low current usage only. Maximum 50V at 3A.
What's in the box:
1 x Pico Proto PCB
Resources:
Instructions