
PiShop Laser


The Raspberry Pi Display 2 Stand is a custom-designed, sturdy accessory to securely hold the official Raspberry Pi 7-inch touchscreen display in an optimal position.
Features
- Compatibility: Tailored to fit the Raspberry Pi Display 2 and integrate seamlessly with various Raspberry Pi models like the Raspberry Pi 5 or Raspberry Pi 4.
- Material: Crafted from black and clear acrylic.
- Cable Management: The front of the display is raised to house keyboard cables. The stands have openings to route cables neatly if necessary eg mouse cable.
- Compact Design: Lightweight and space-saving, perfect for desks, workbenches, or portable setups.
- Easy Assembly: Comes with all necessary screws and tools for quick setup.
Ideal for use in DIY projects, kiosks, media centers, or as a control interface, the Raspberry Pi Display 2 Stand enhances usability and provides a stable foundation for your Raspberry Pi touchscreen setup.
What's in the box?
1 x Acrylic frame for Raspberry Pi Display 2
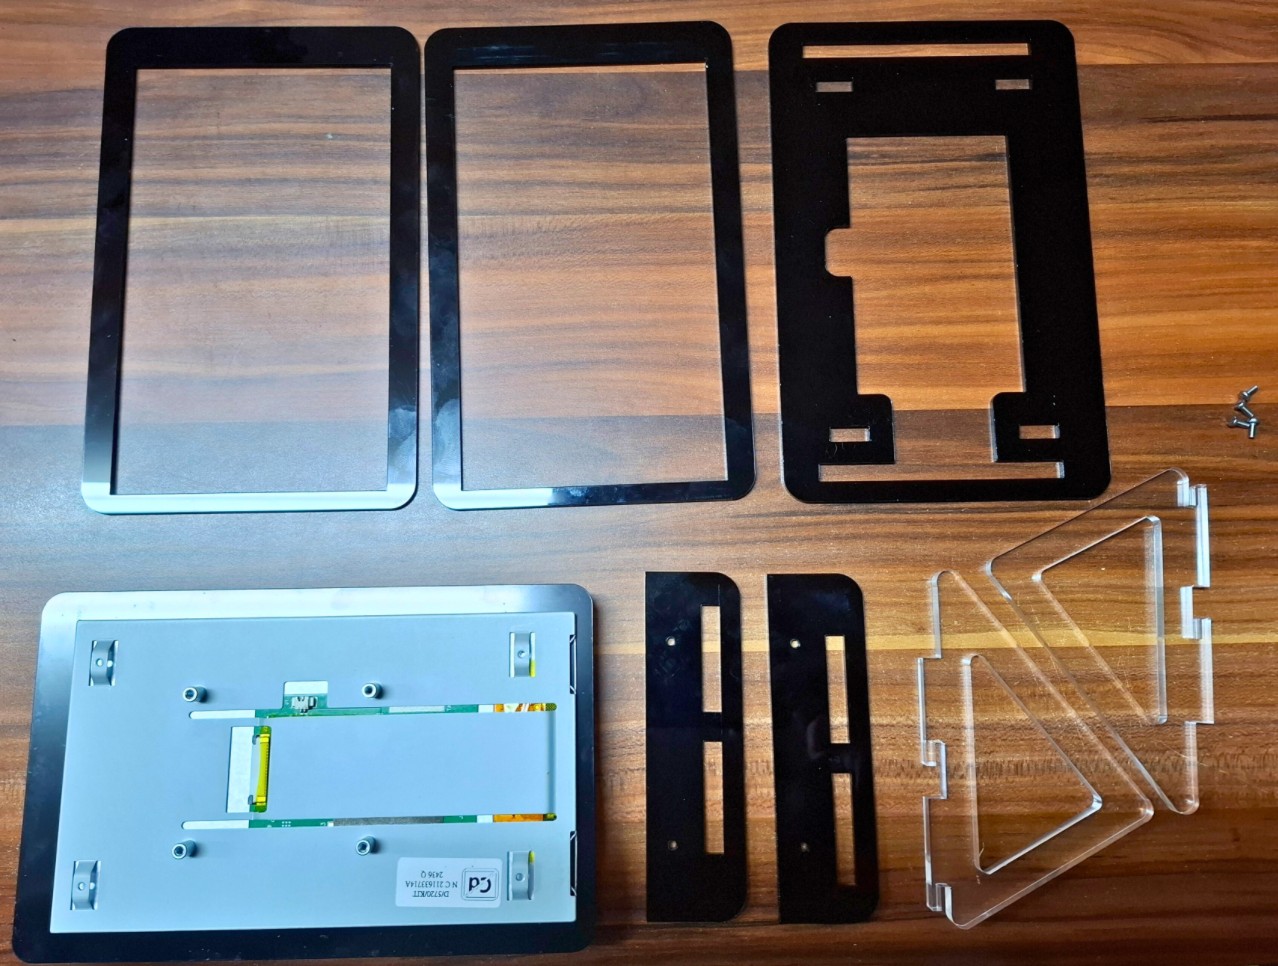
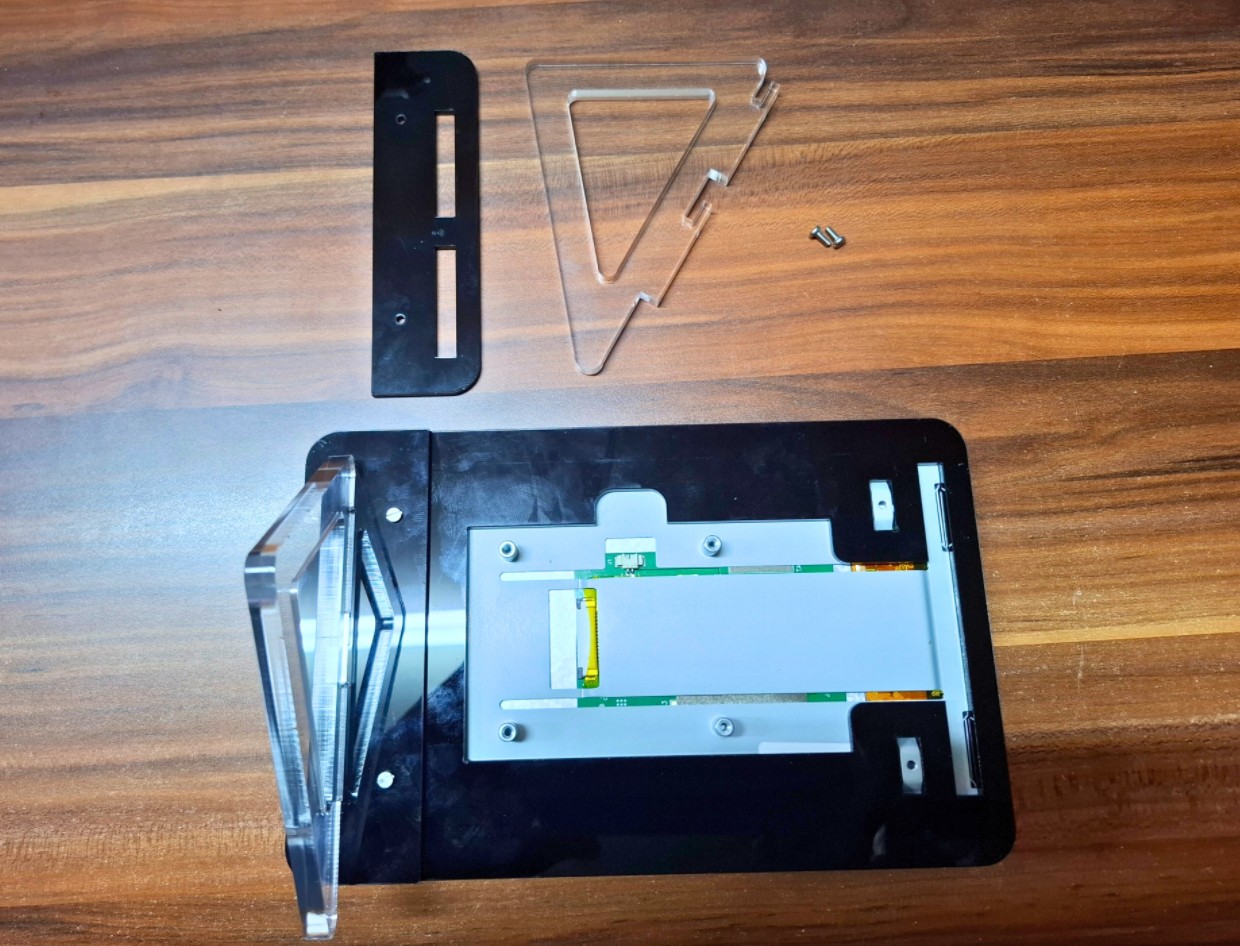

This DIY case requires assembly. You will need a small precision flathead screwdriver.
Clear 3mm Acrylic Panels to protect your Raspberry Pi 5.
- Open for 40PIN GPIO, PCIe, DSI/CSI Interfaces
- Easy To Pull & Plug TF Card On The Bottom
- Will work with RPi3 B/B+, RPi4 and RPi5 boards
- 75/100 VESA mounting plate included
- Before you mount the VESA plate, turn the case to have your RPi cables facing up/down/left/right as per your environmental requirements.
You can easily mount this plate to our
- Official Raspberry Pi Red & White monitor
- Official Raspberry Pi Black monitor
- Mecer 19.5" 16 x 9 TFT LED Wide Monitor
- LG 20MK400H 19.5inch monitor
What's in the box?
1 x Top plate
1 x VESA plate
4 x M4 Nylon screws
4 x Acrylic spacers
4 x M2.5x5mm MF standoffs
4 x M2.5x18mm FF standoffs
8 x M2.5x6 screws
Resources
How To Install
The VESA board was designed to have the cables on your Pi face any direction that you might require. Keep this in mind when attaching the plate to your Monitor/TV
- Install the M2.5x5 MF standoffs on the VESA plate with the M2.5 screws on the monitor side of the plate and the male side of the standoffs facing away to mount the RPi.
- Use the M2.5x18 FF standoffs to screw down the RPi on the short standoffs.
- This would be a good time if you wanted to mount an active cooler onto your RPi 5.
- Use the M2.5x6 screws to screw down the top plate on the 18mm FF standoffs
- You are now ready to mount the VESA plate onto your monitor/TV. Turn the case to have your RPi cables face in whichever direction works best for you.(up/down/left/right) Push the M4 nylon screws through the VESA plate, through the spacers and screw them into your monitor VESA holes.
- All done. You can now plug in your cables, drives etc. and start up your RPi.

Specifications
- ID: 4.5mm
- OD: +-7.5mm
- Height: 6mm
- Material: Clear Acrylic
What's in the box?
1 x acrylic spacer

This DIY case requires assembly. You will need a small precision flathead screwdriver.
- 40PIN GPIO
- DSI/CSI Interfaces
- Wall mounting holes
- Airflow Vents On The Top And Front
- Easy To Pull & Plug TF Card On The Bottom
- Clear 3mm Acrylic Panels to protect your Raspberry Pi 4.
What's in the box?
1 x PI4 Acrylic Case A acrylic parts(remove the protection film)
1 x Nonskid rubber pad (4PCS)
1 x Screwdriver
1 x Screws and standoffs pack
You may also want to grab a 30mm fan and 30mm grill cover. You will also need four M3x16 screws with M3 nuts to mount the fan.
Resources
The Case Consists Of 6 Layers Of Acrylic Panels. Install According To The Following Steps
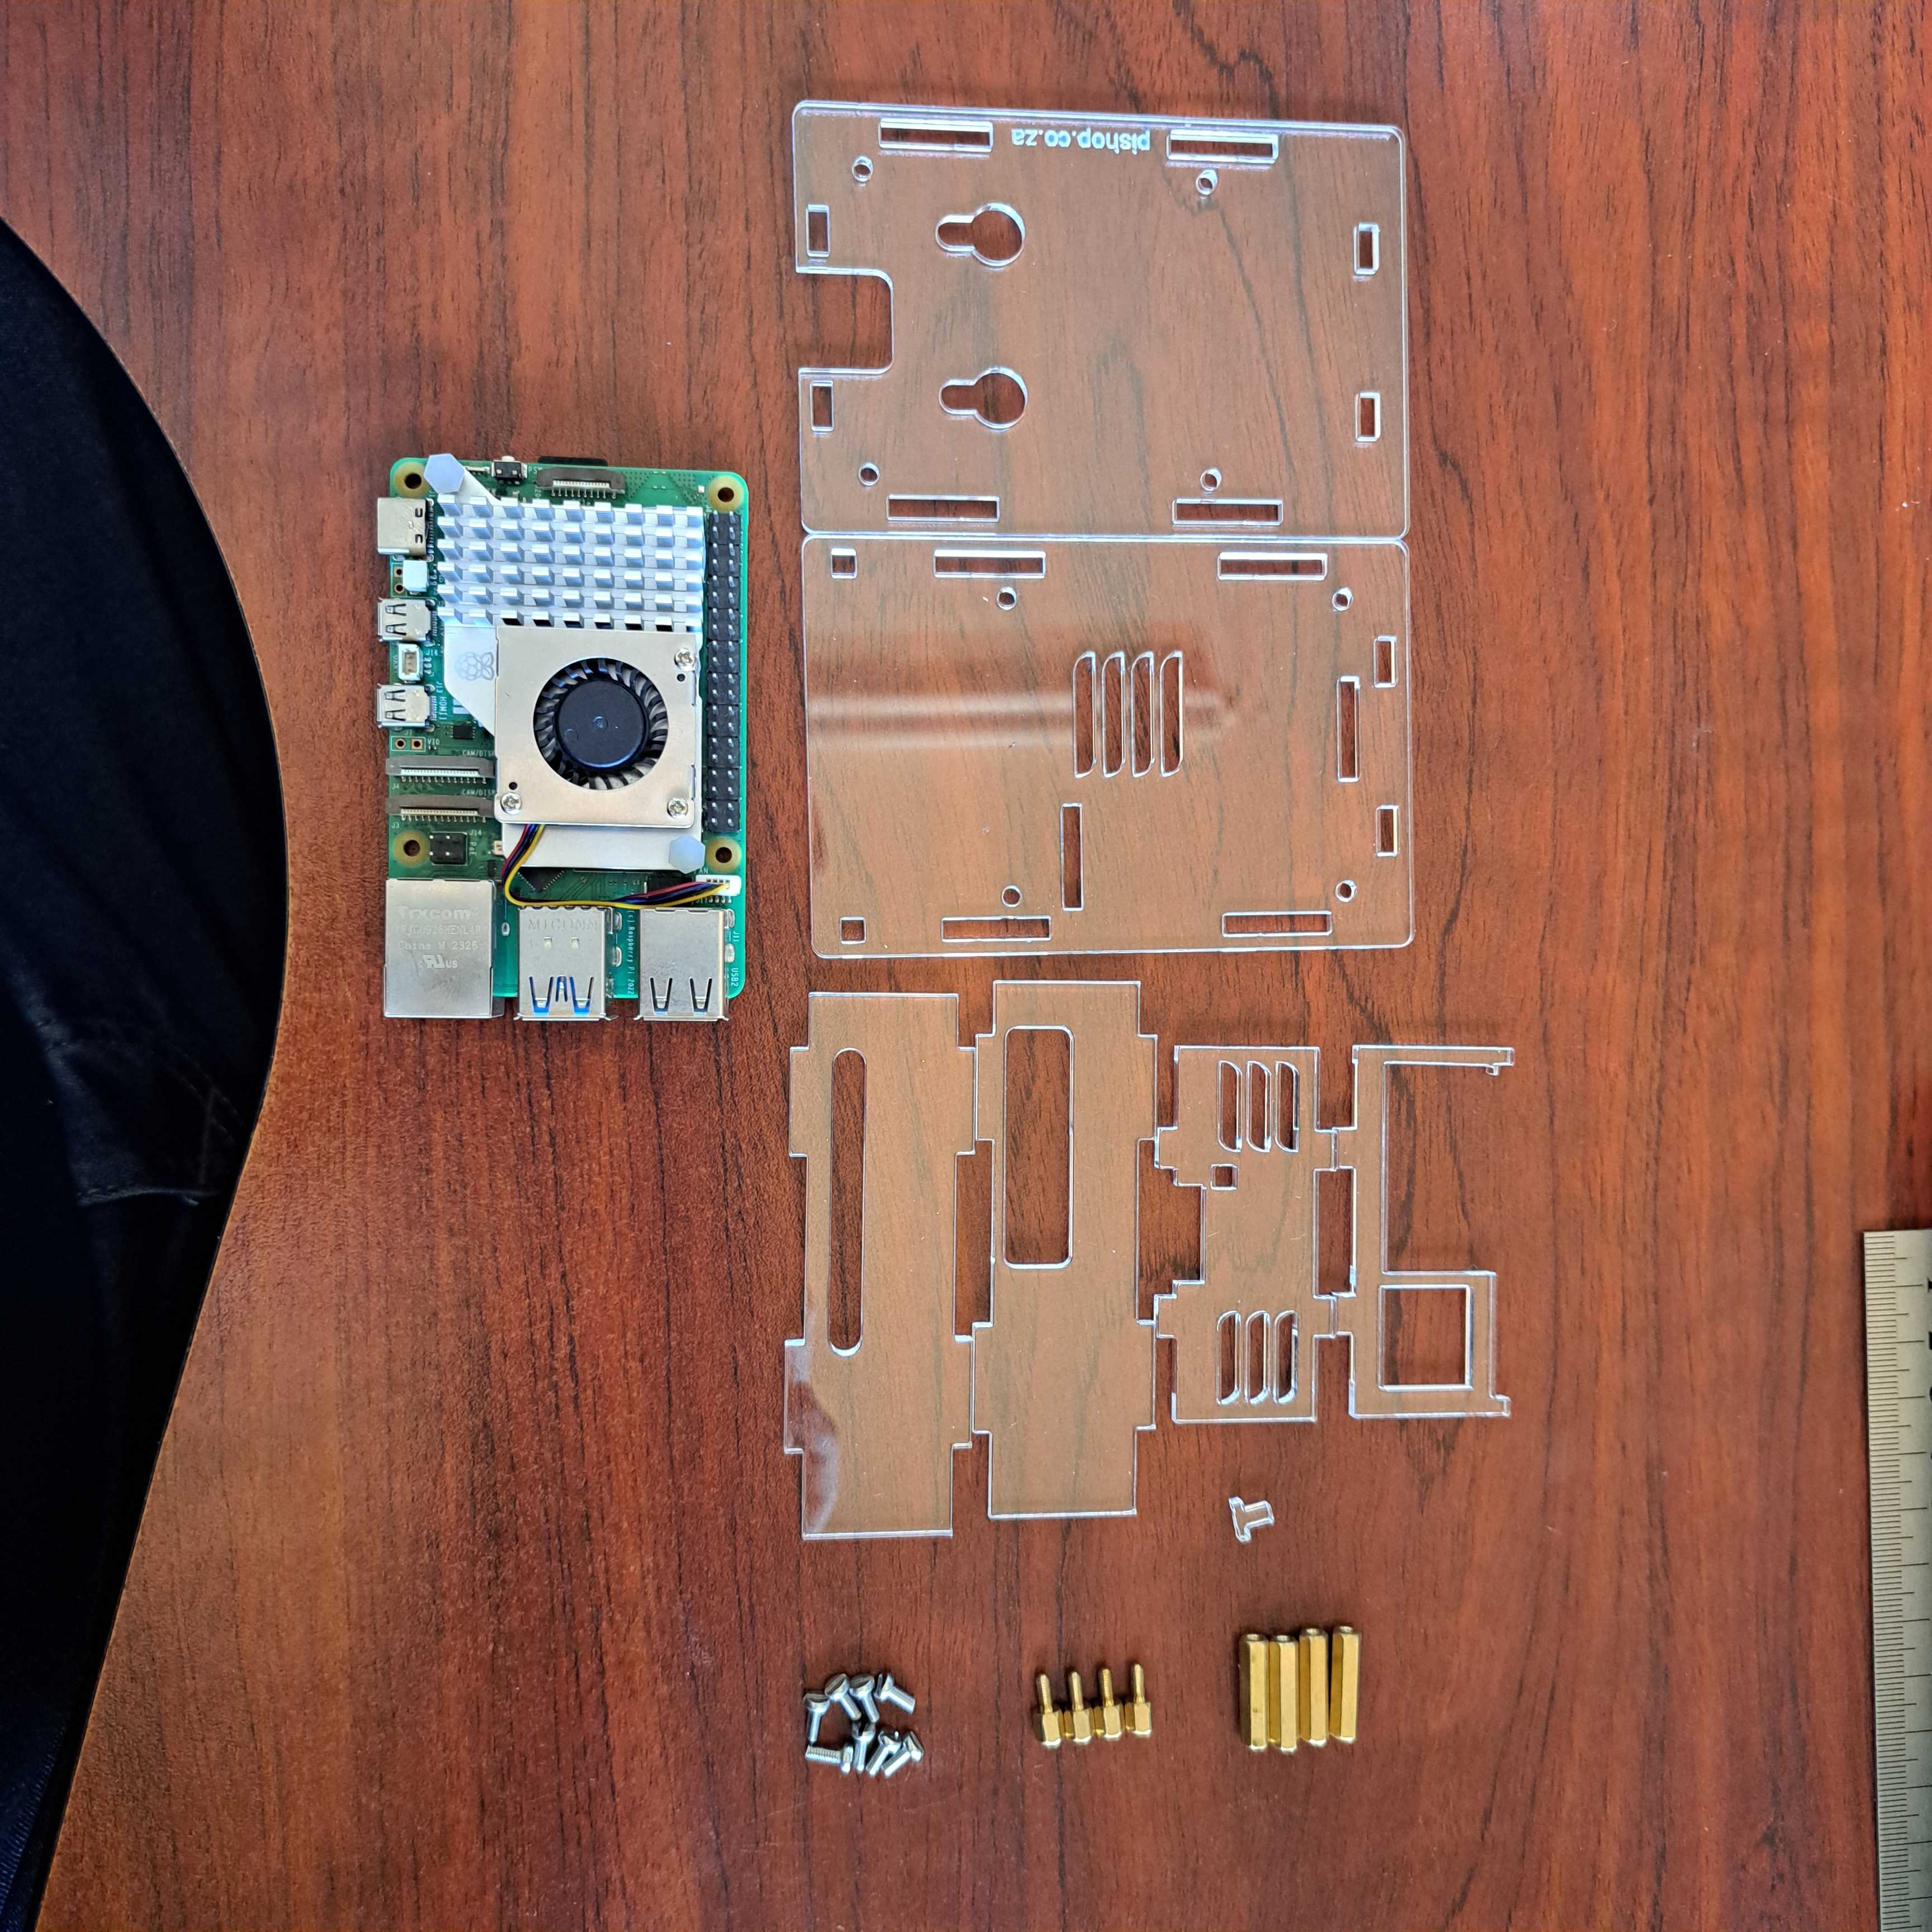
1. Install the active cooler on the Raspberry Pi 5.
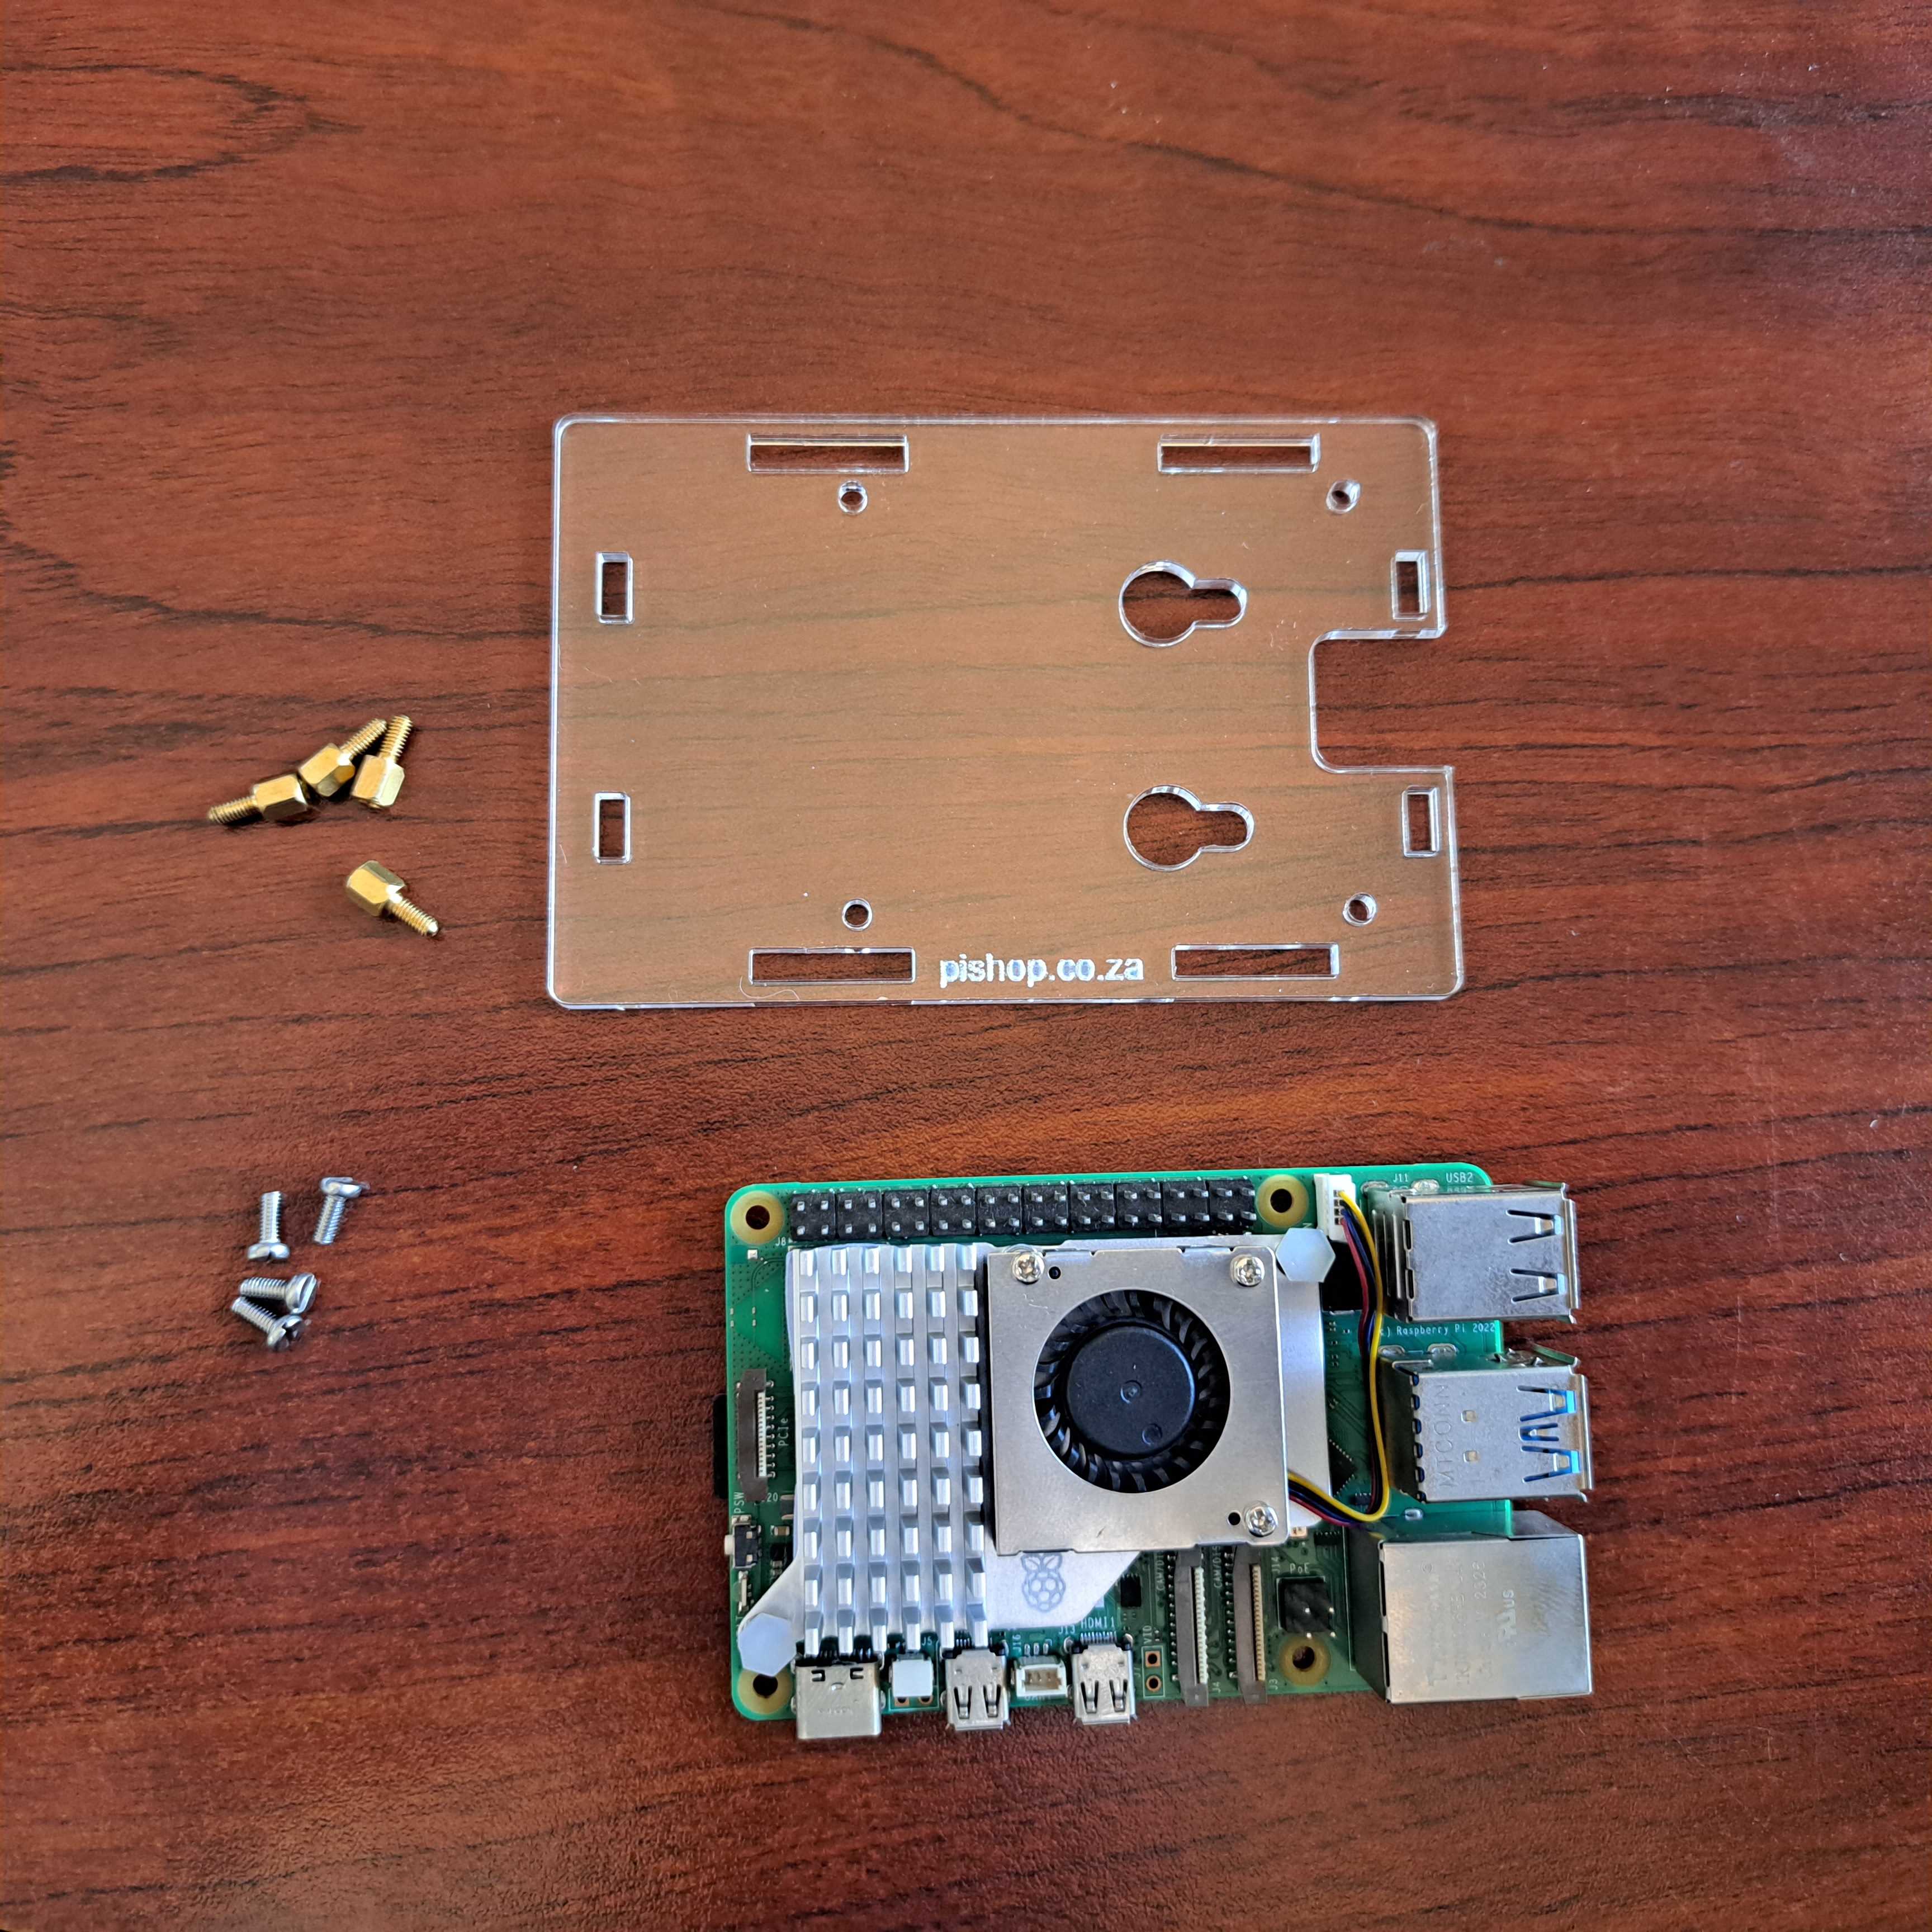
2. Install the short standoffs and screws onto the 1st acrylic panel, please pay attention to the orientation.
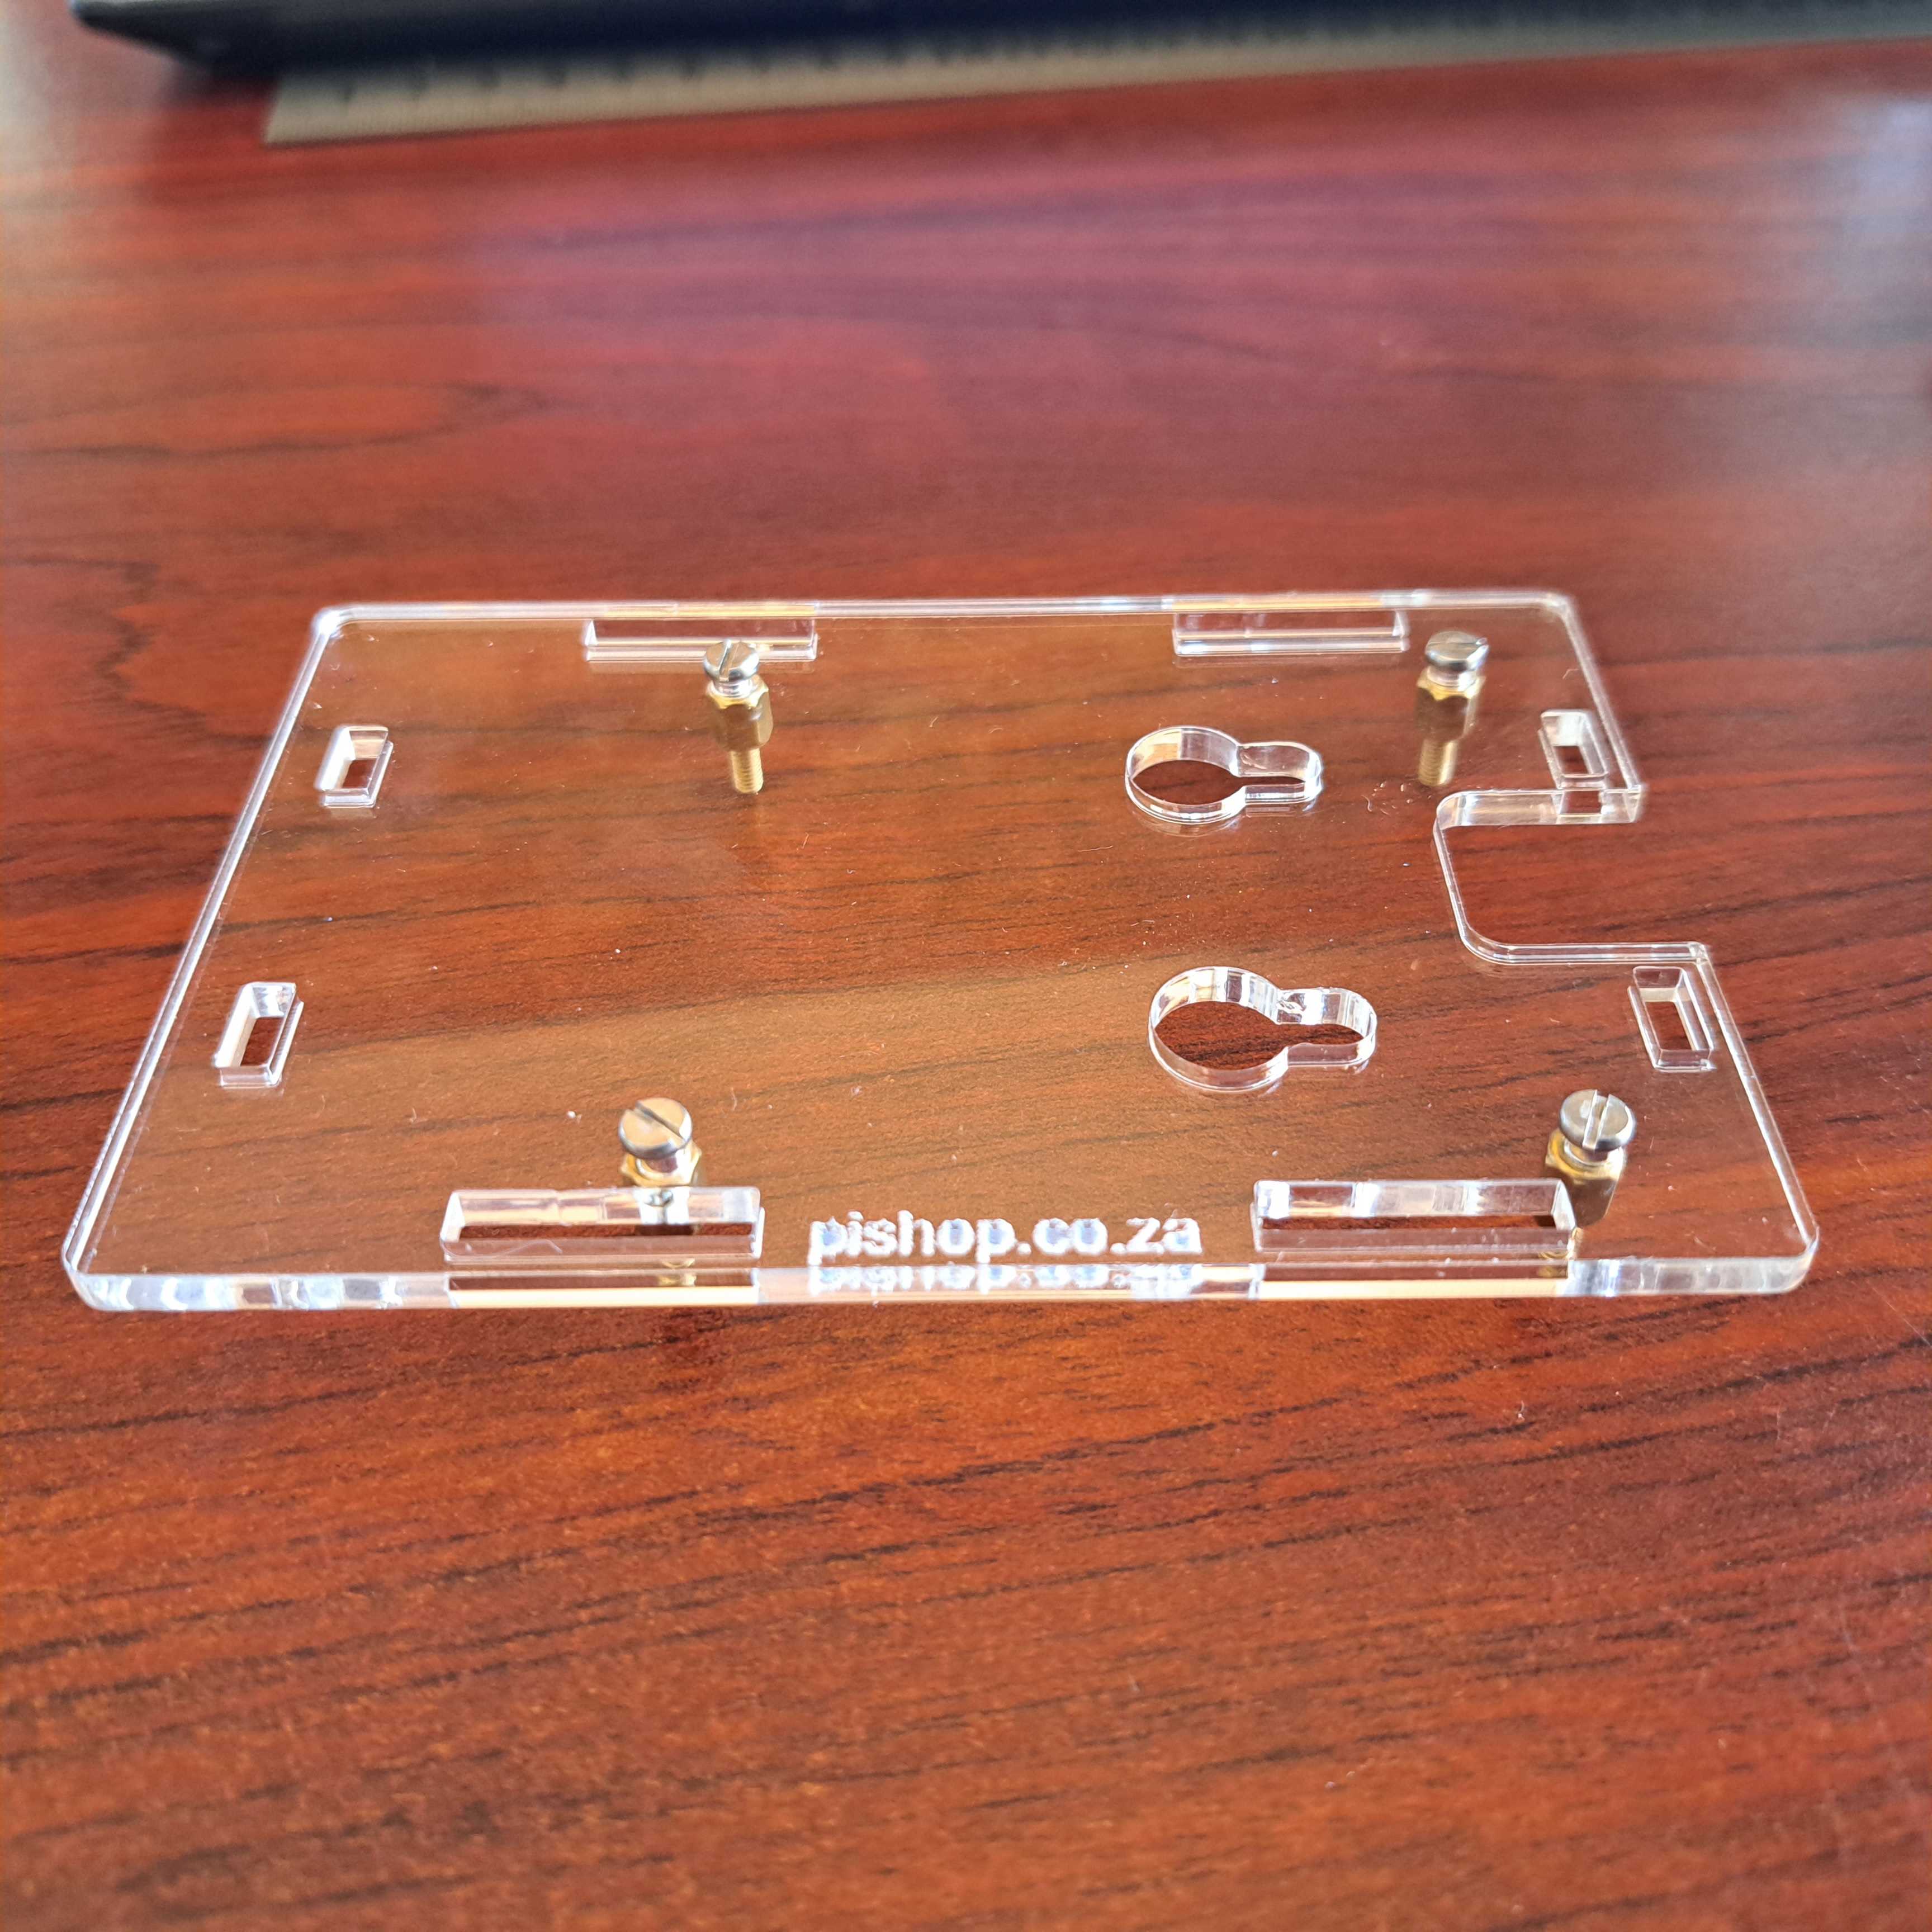
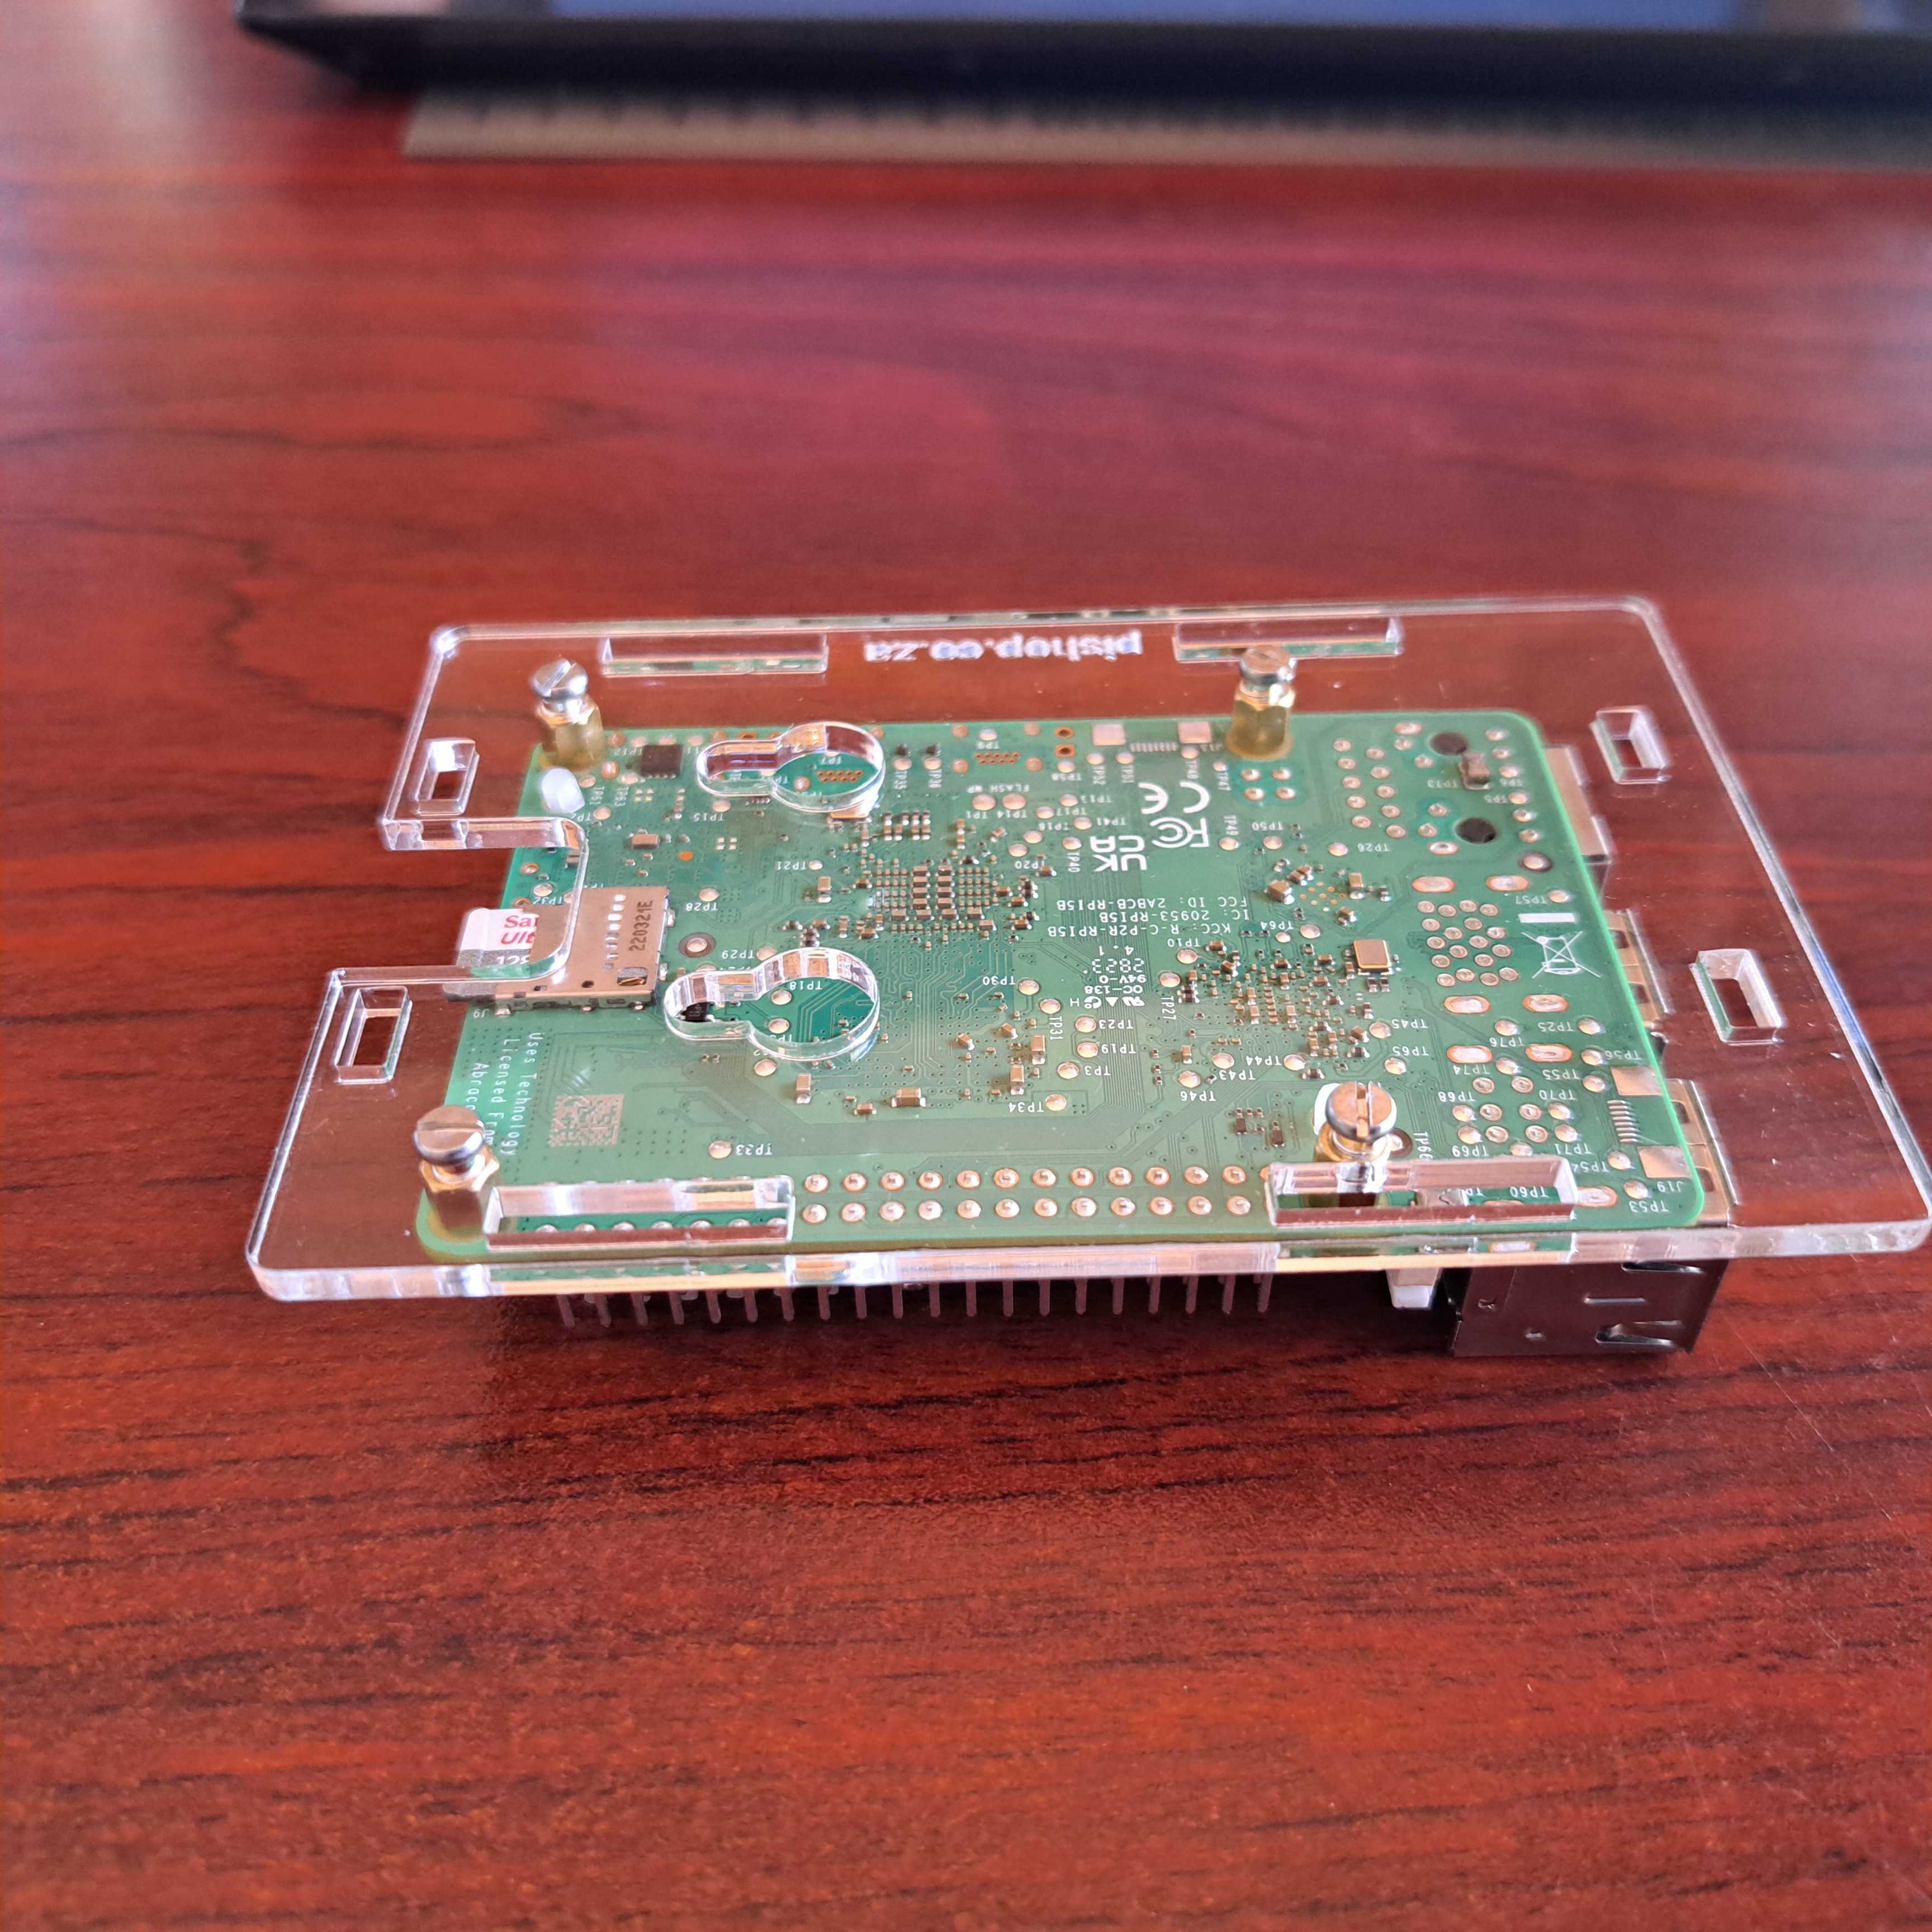
3. Install the long female to female standoffs on the RPi board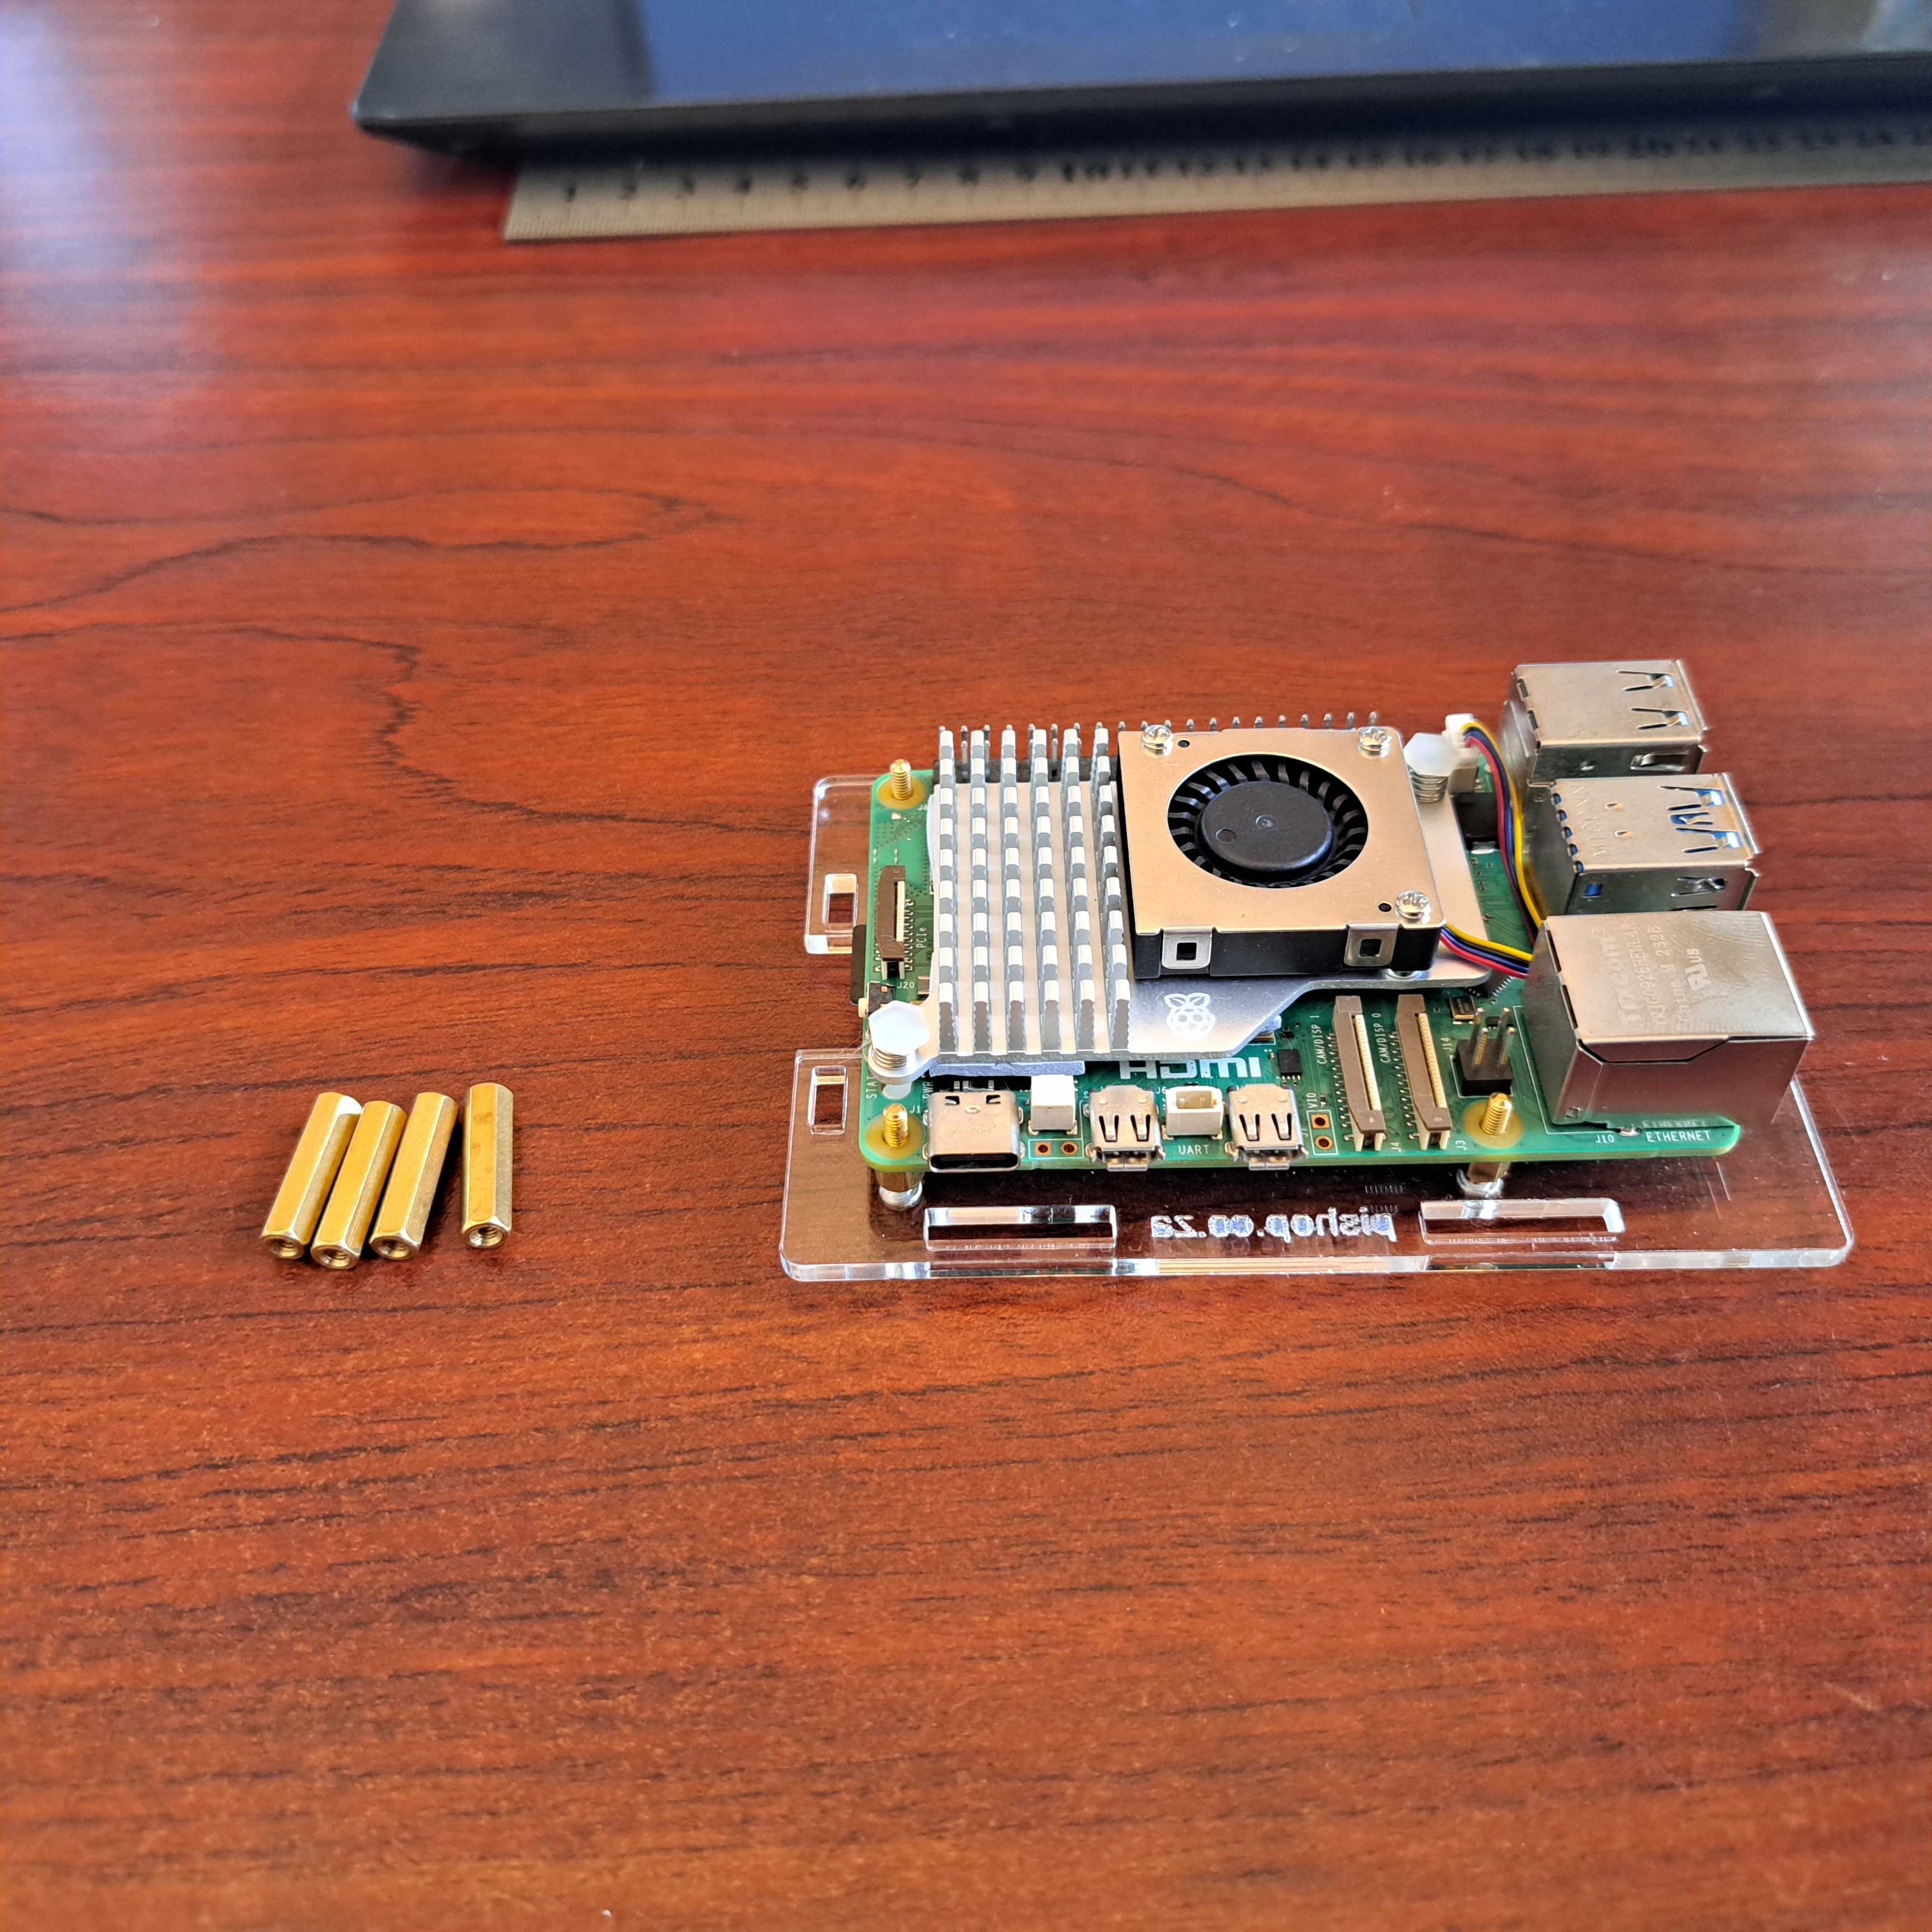
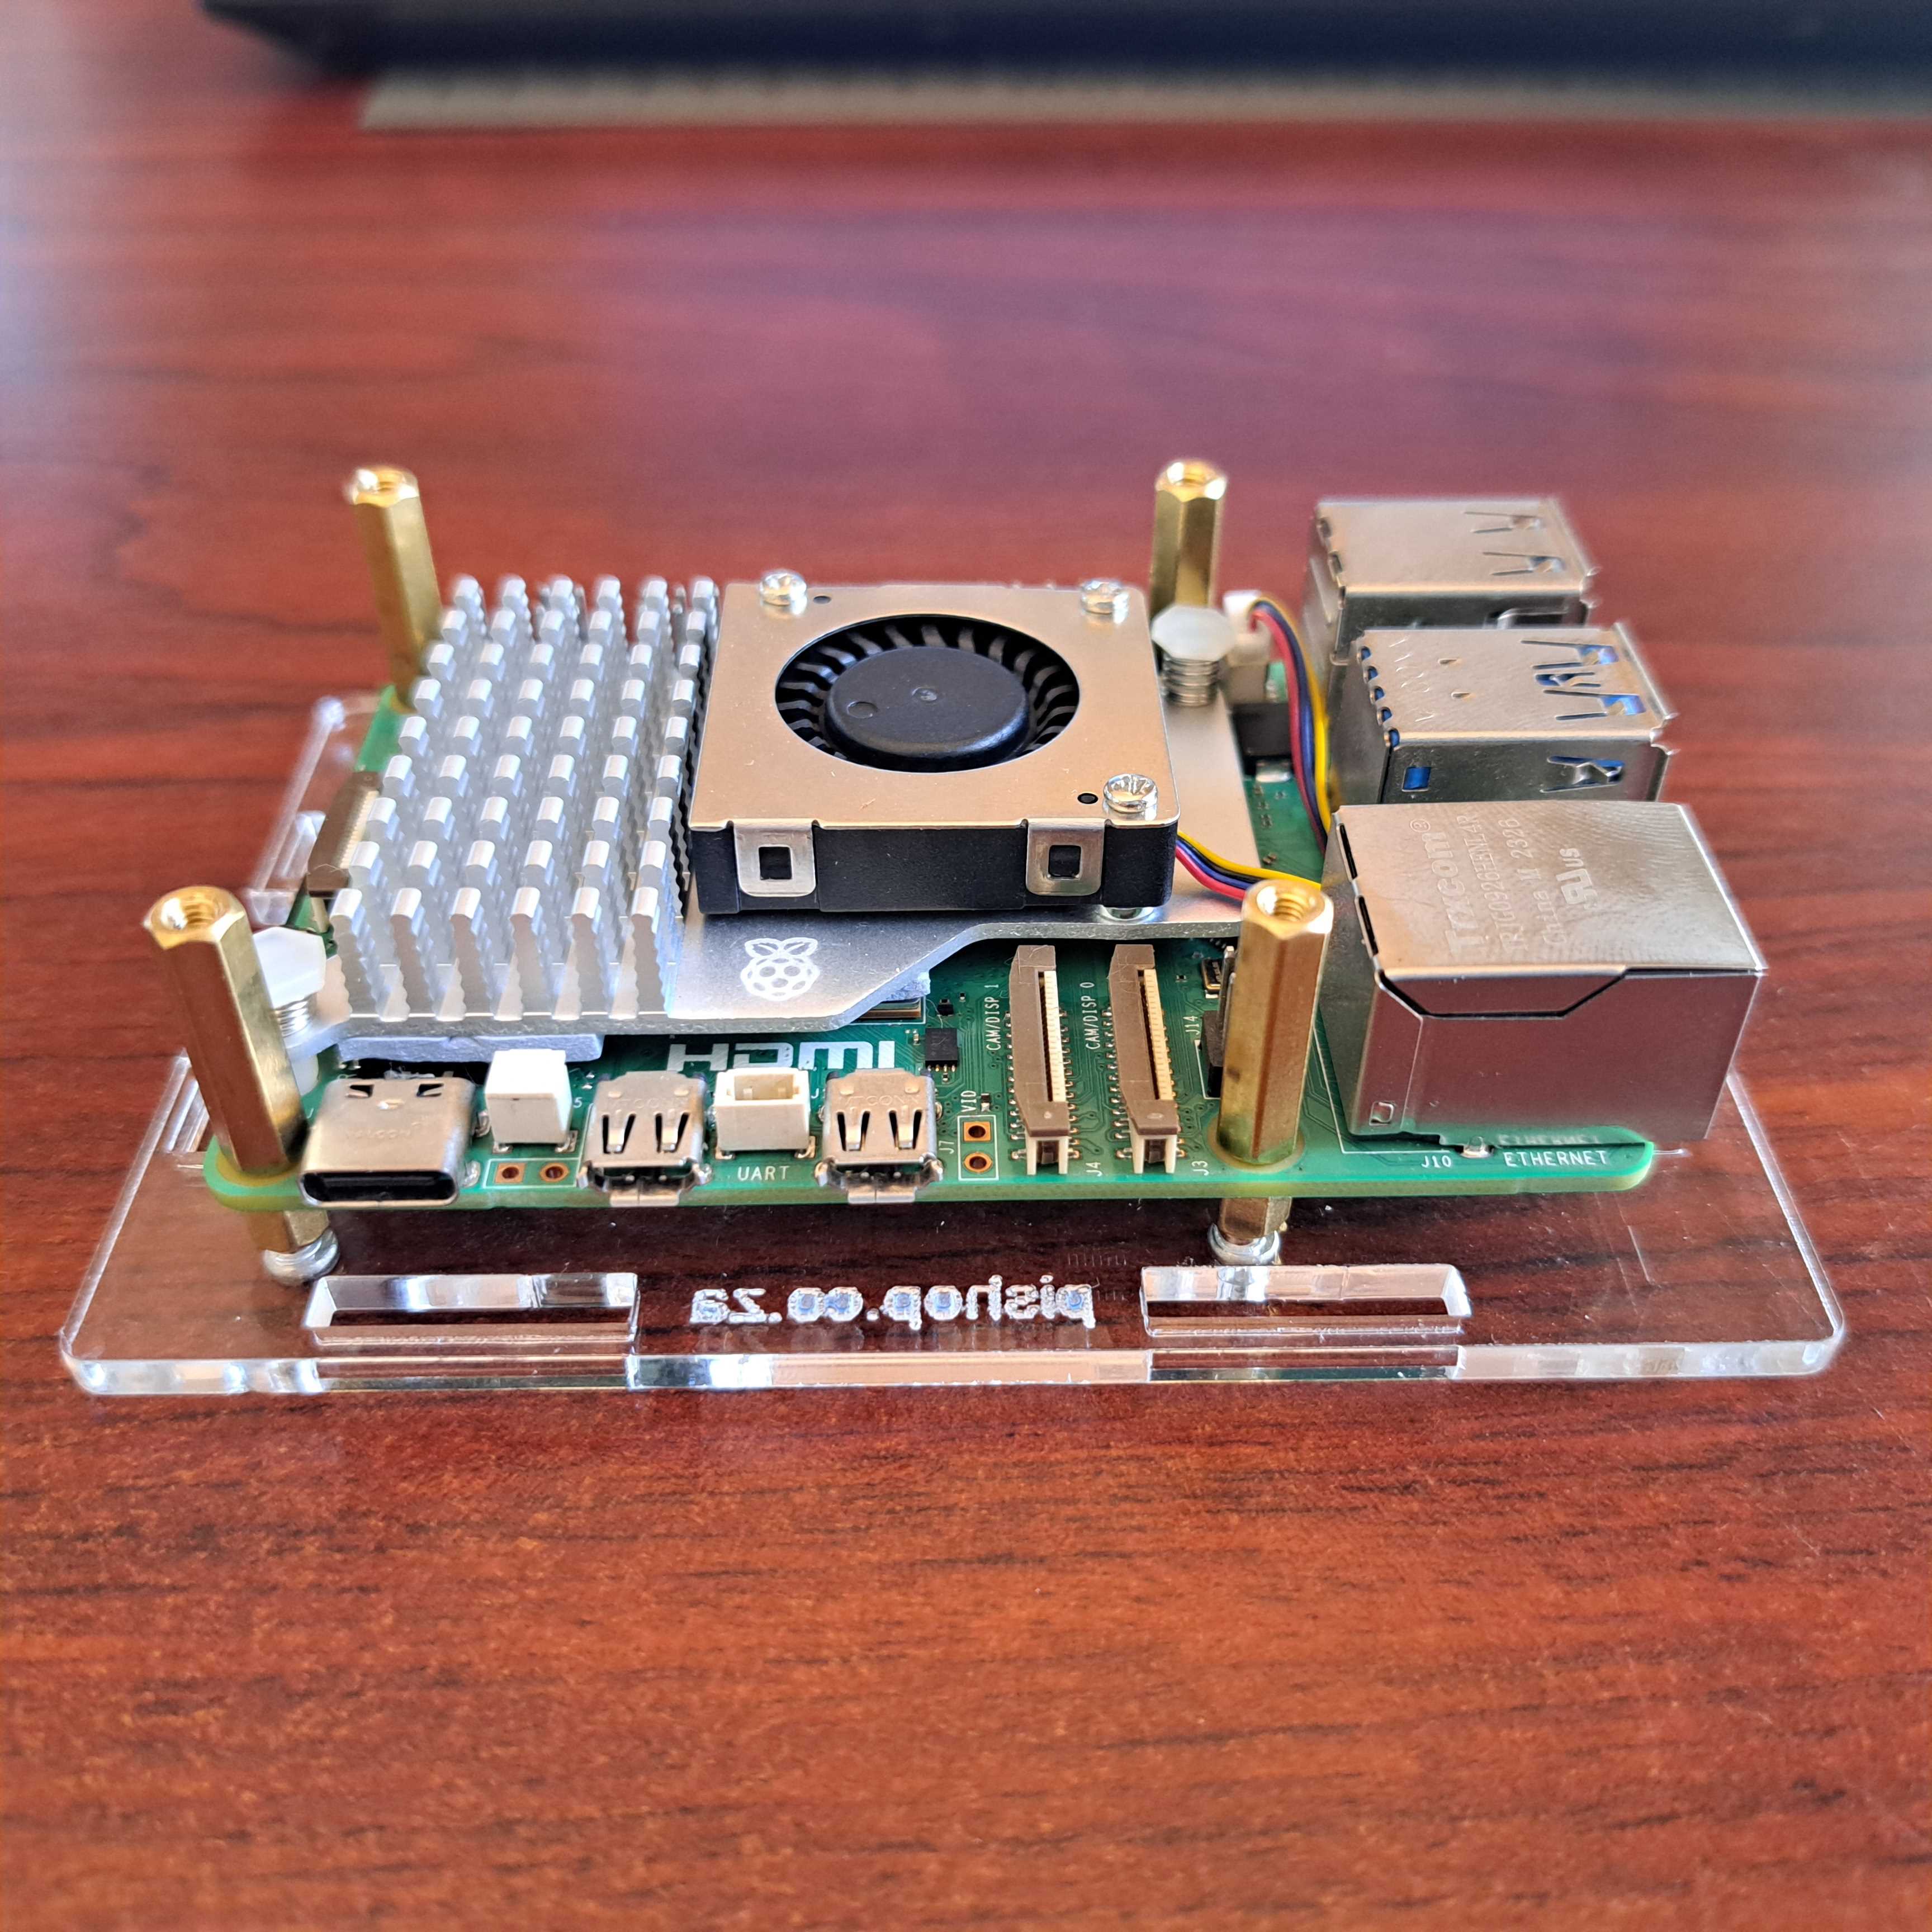
4. Install the 4 acrylic panel to the sides of the Raspberry Pi 5.
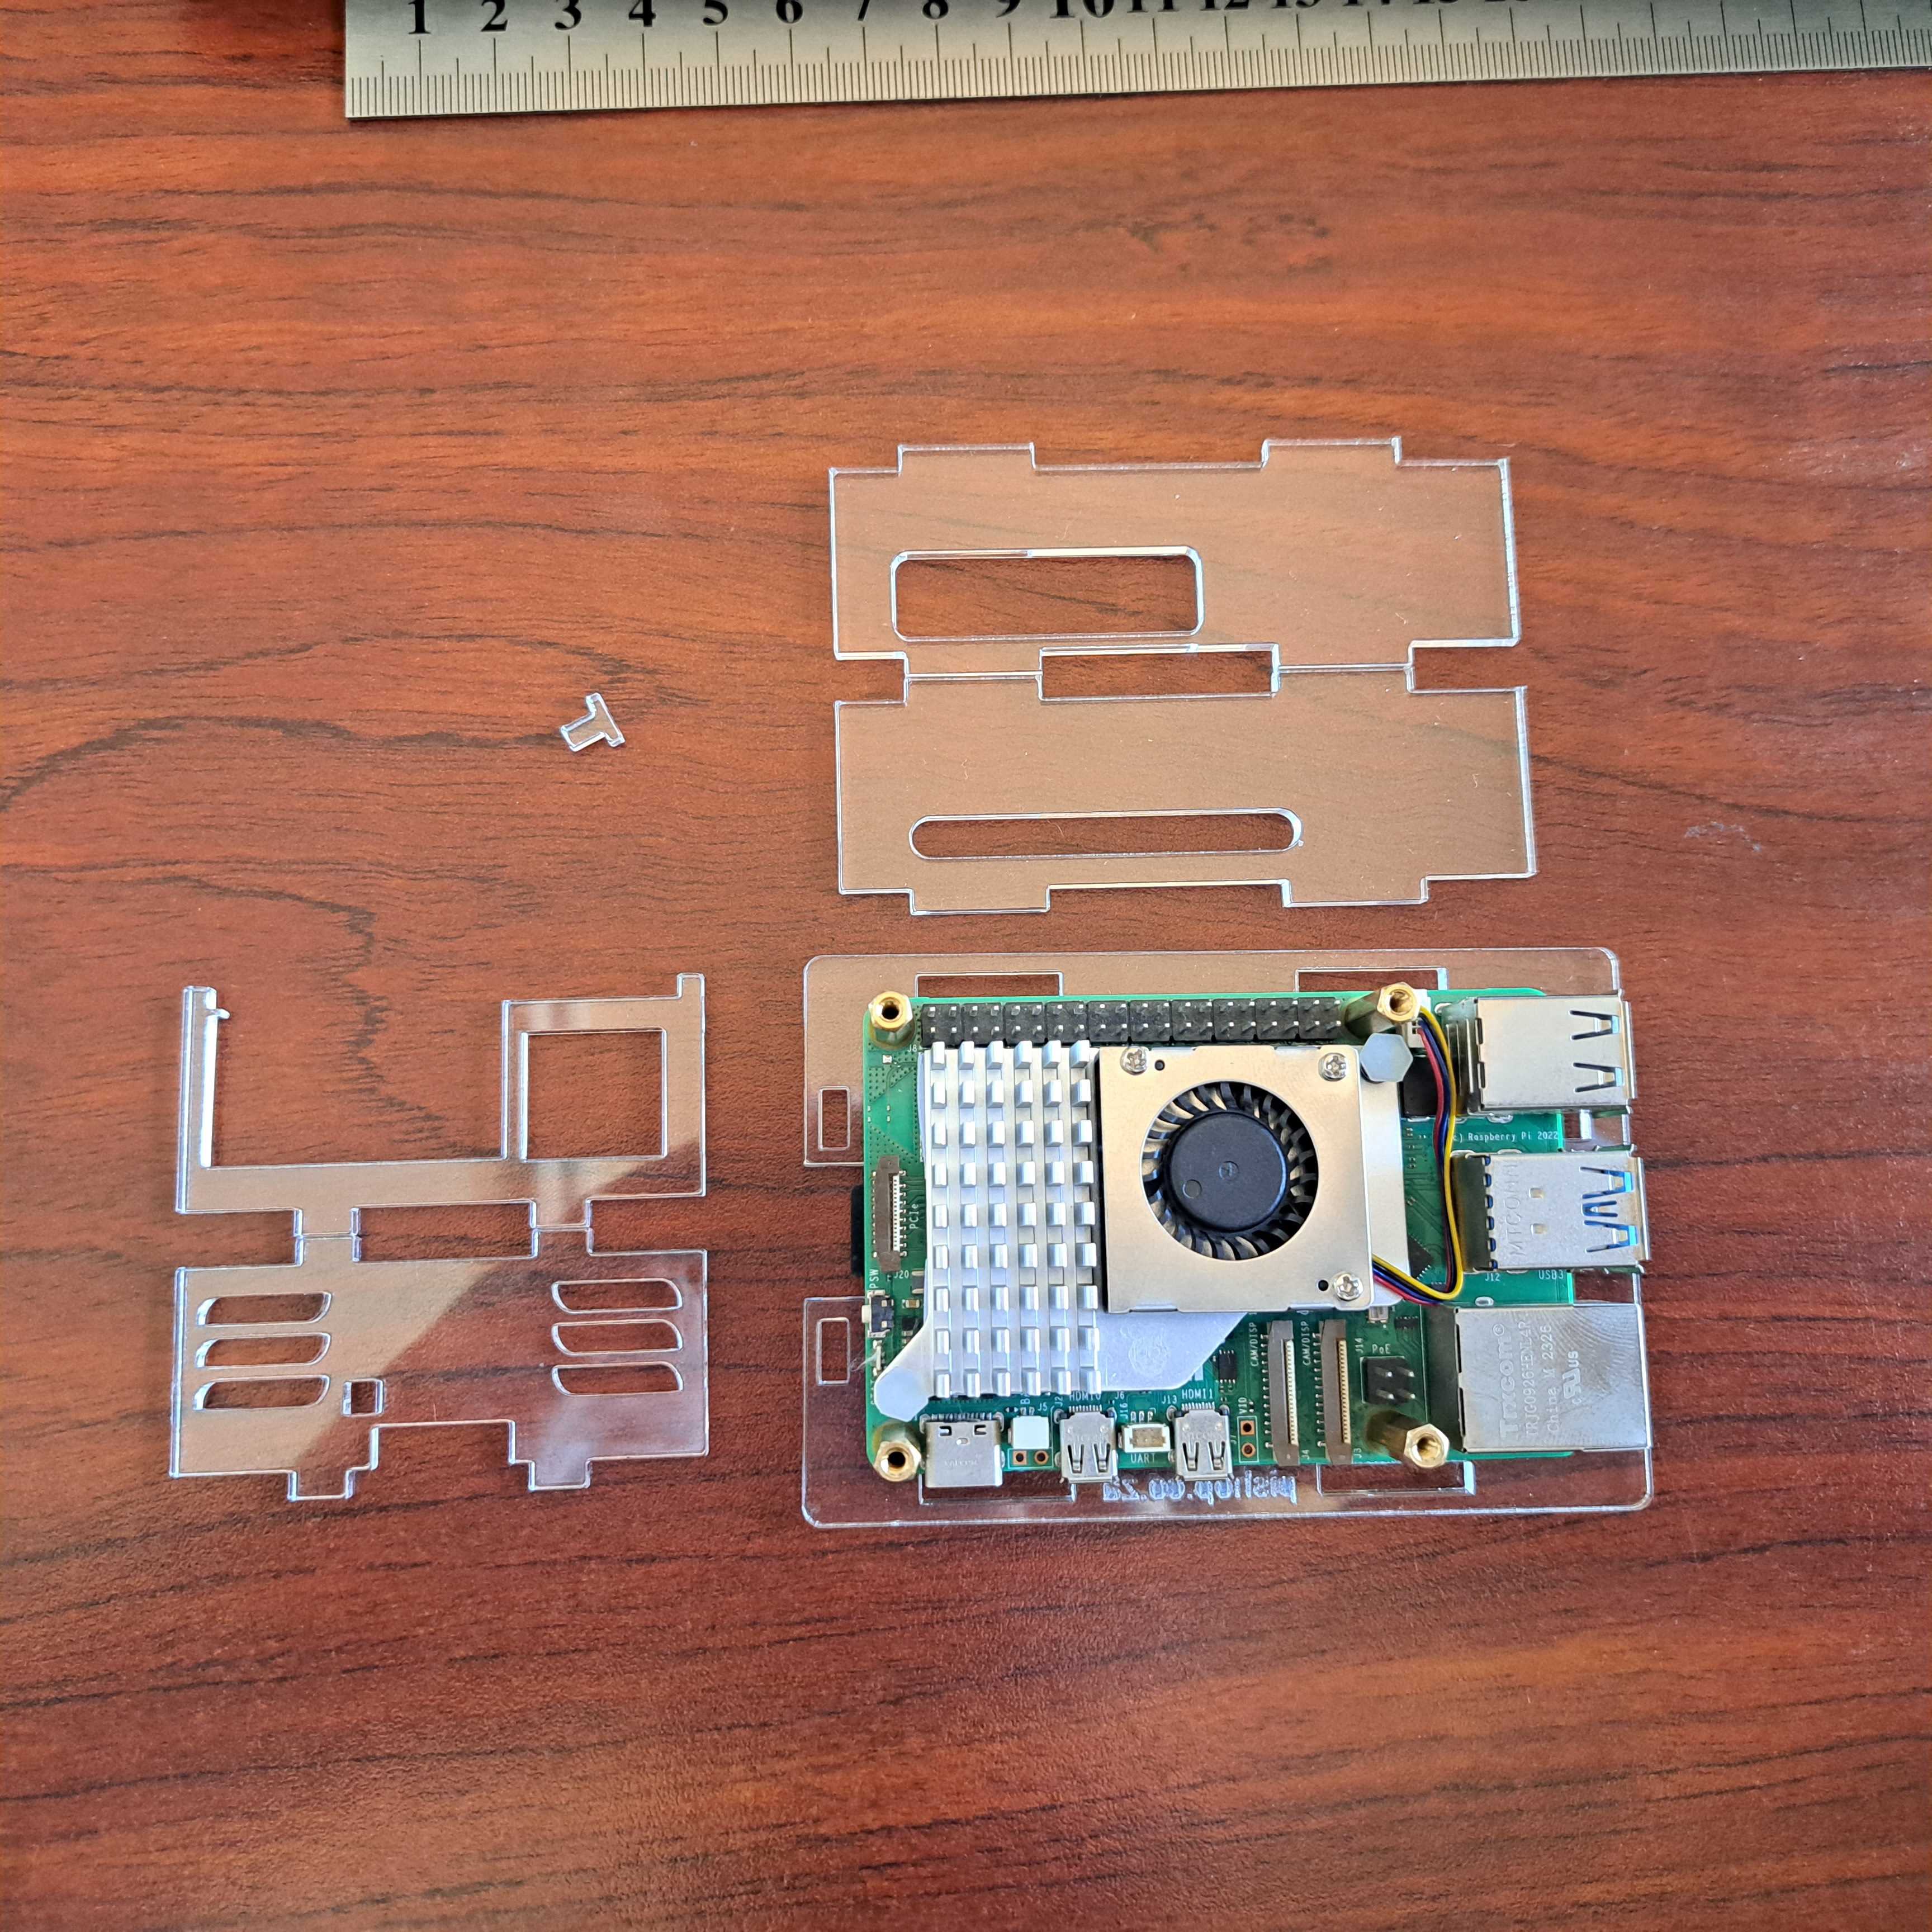
Don't forget to install the little power button first.
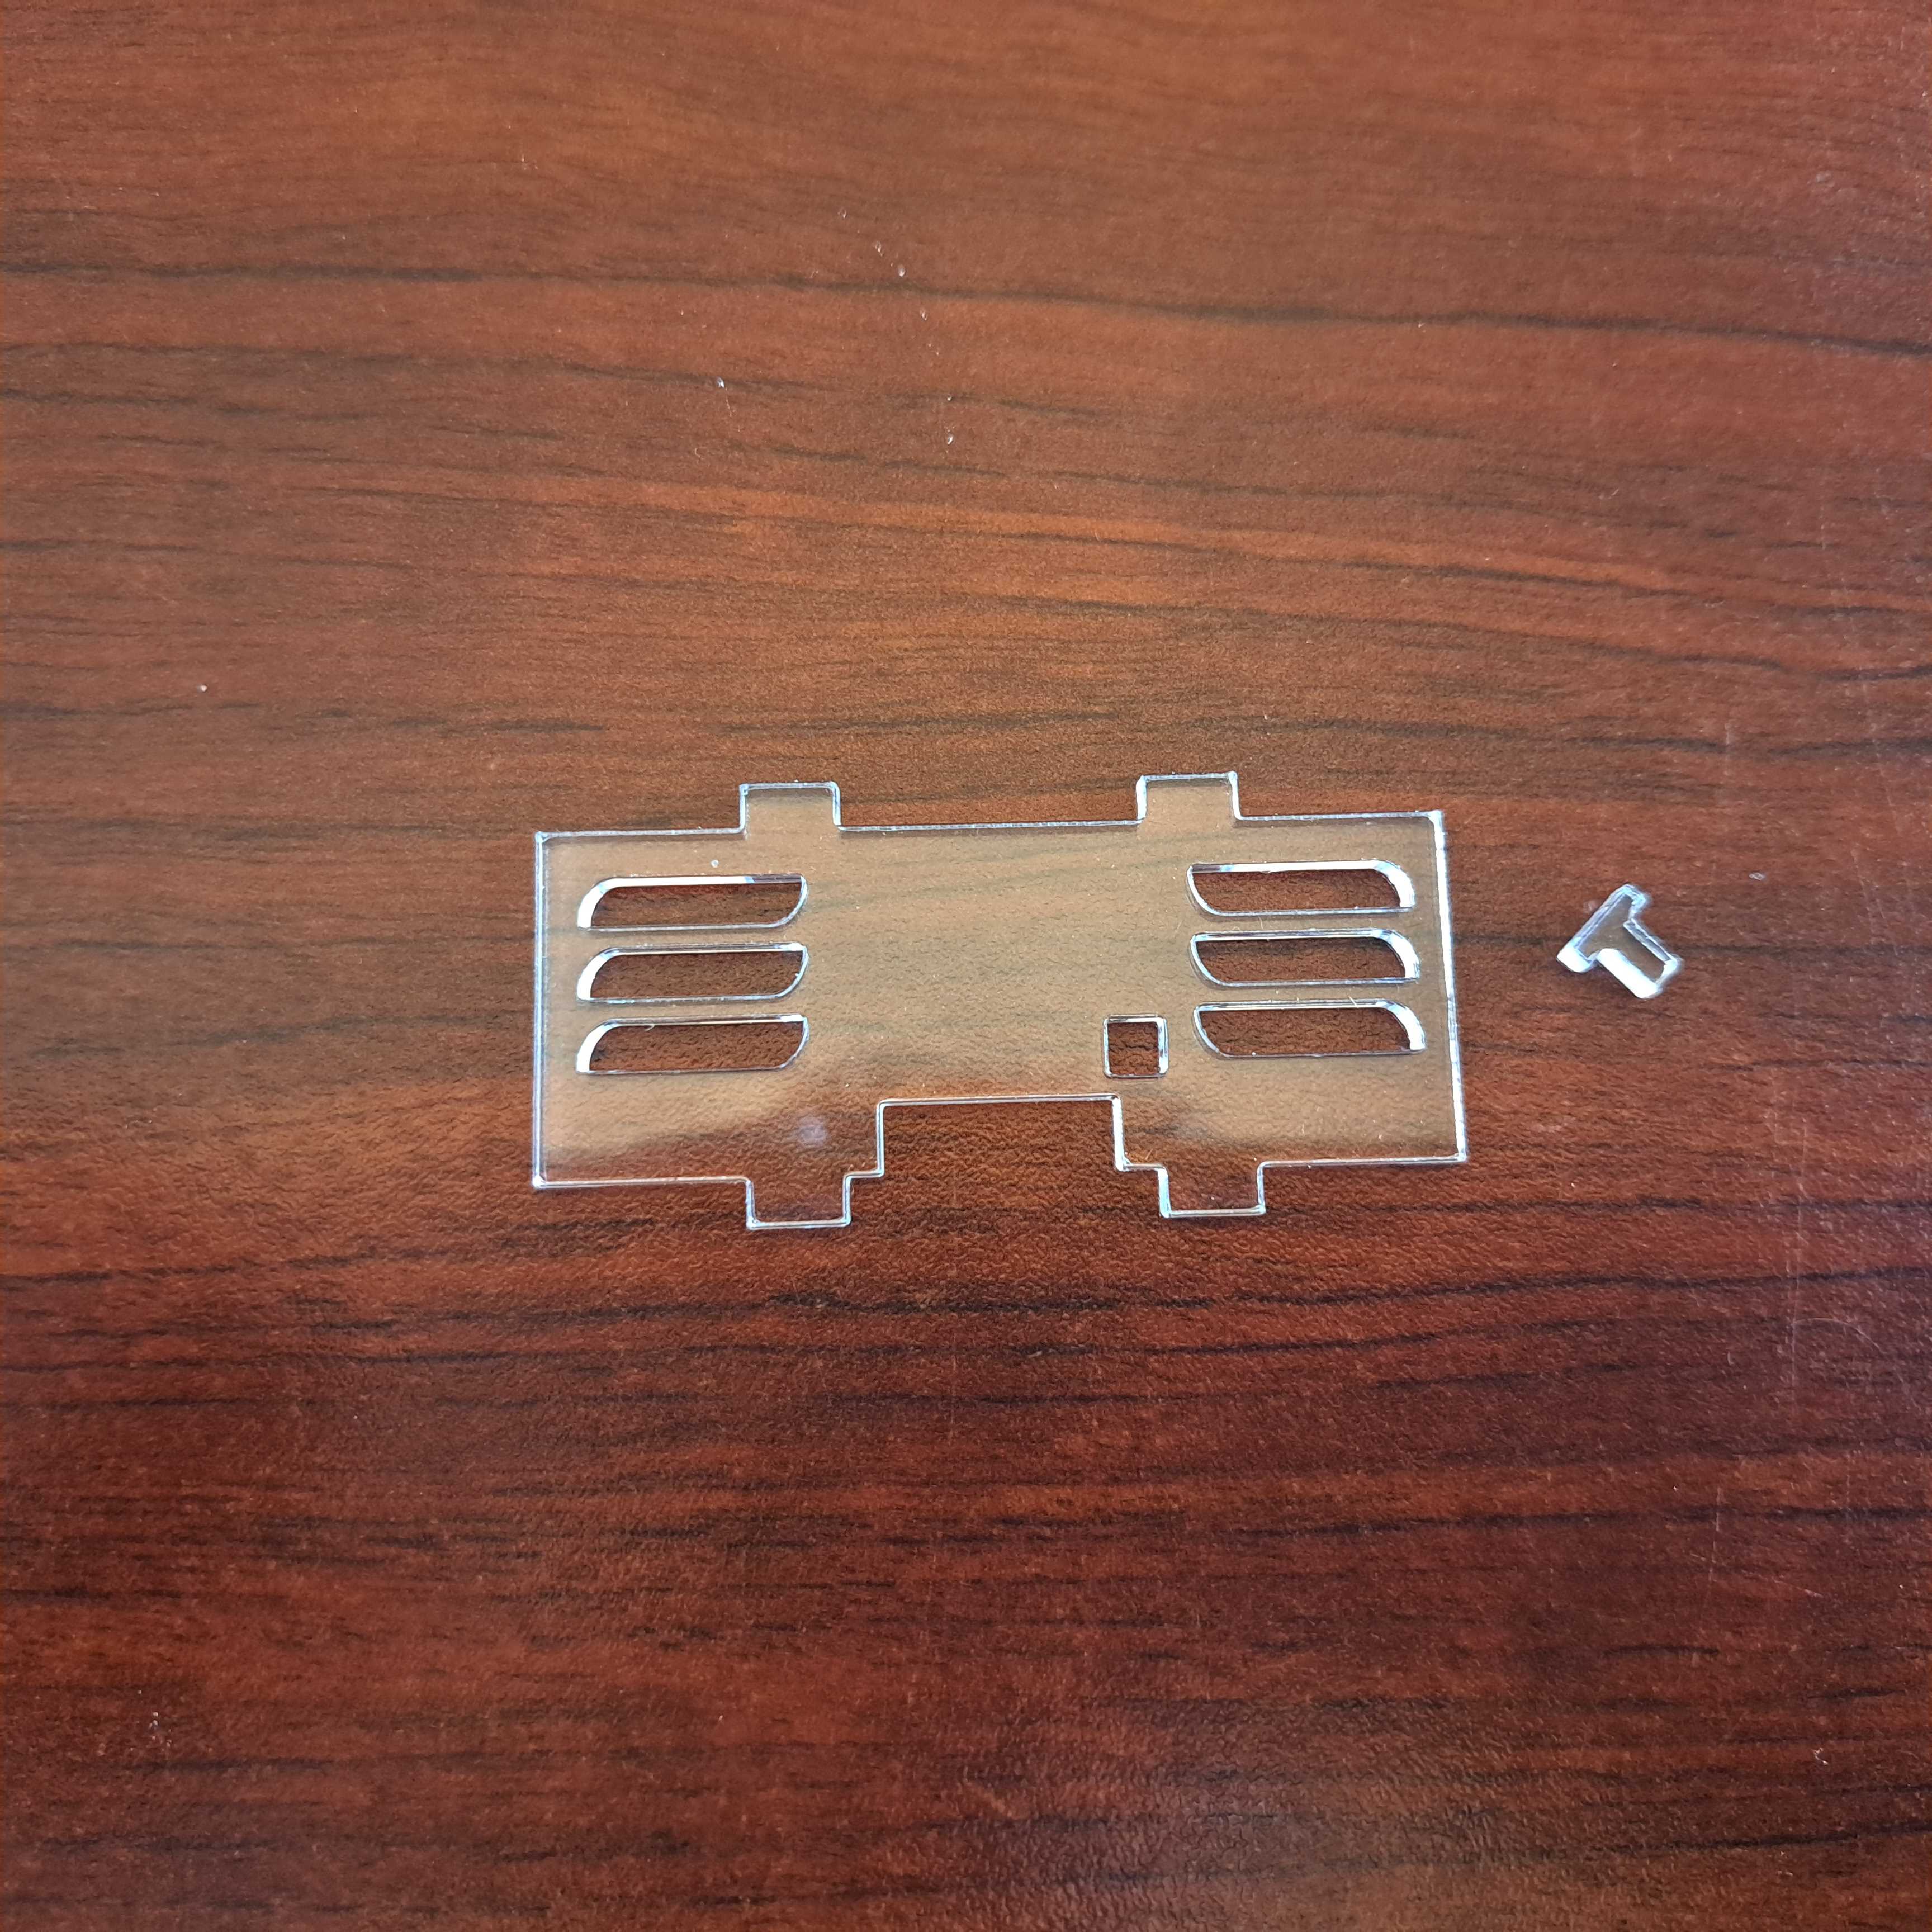
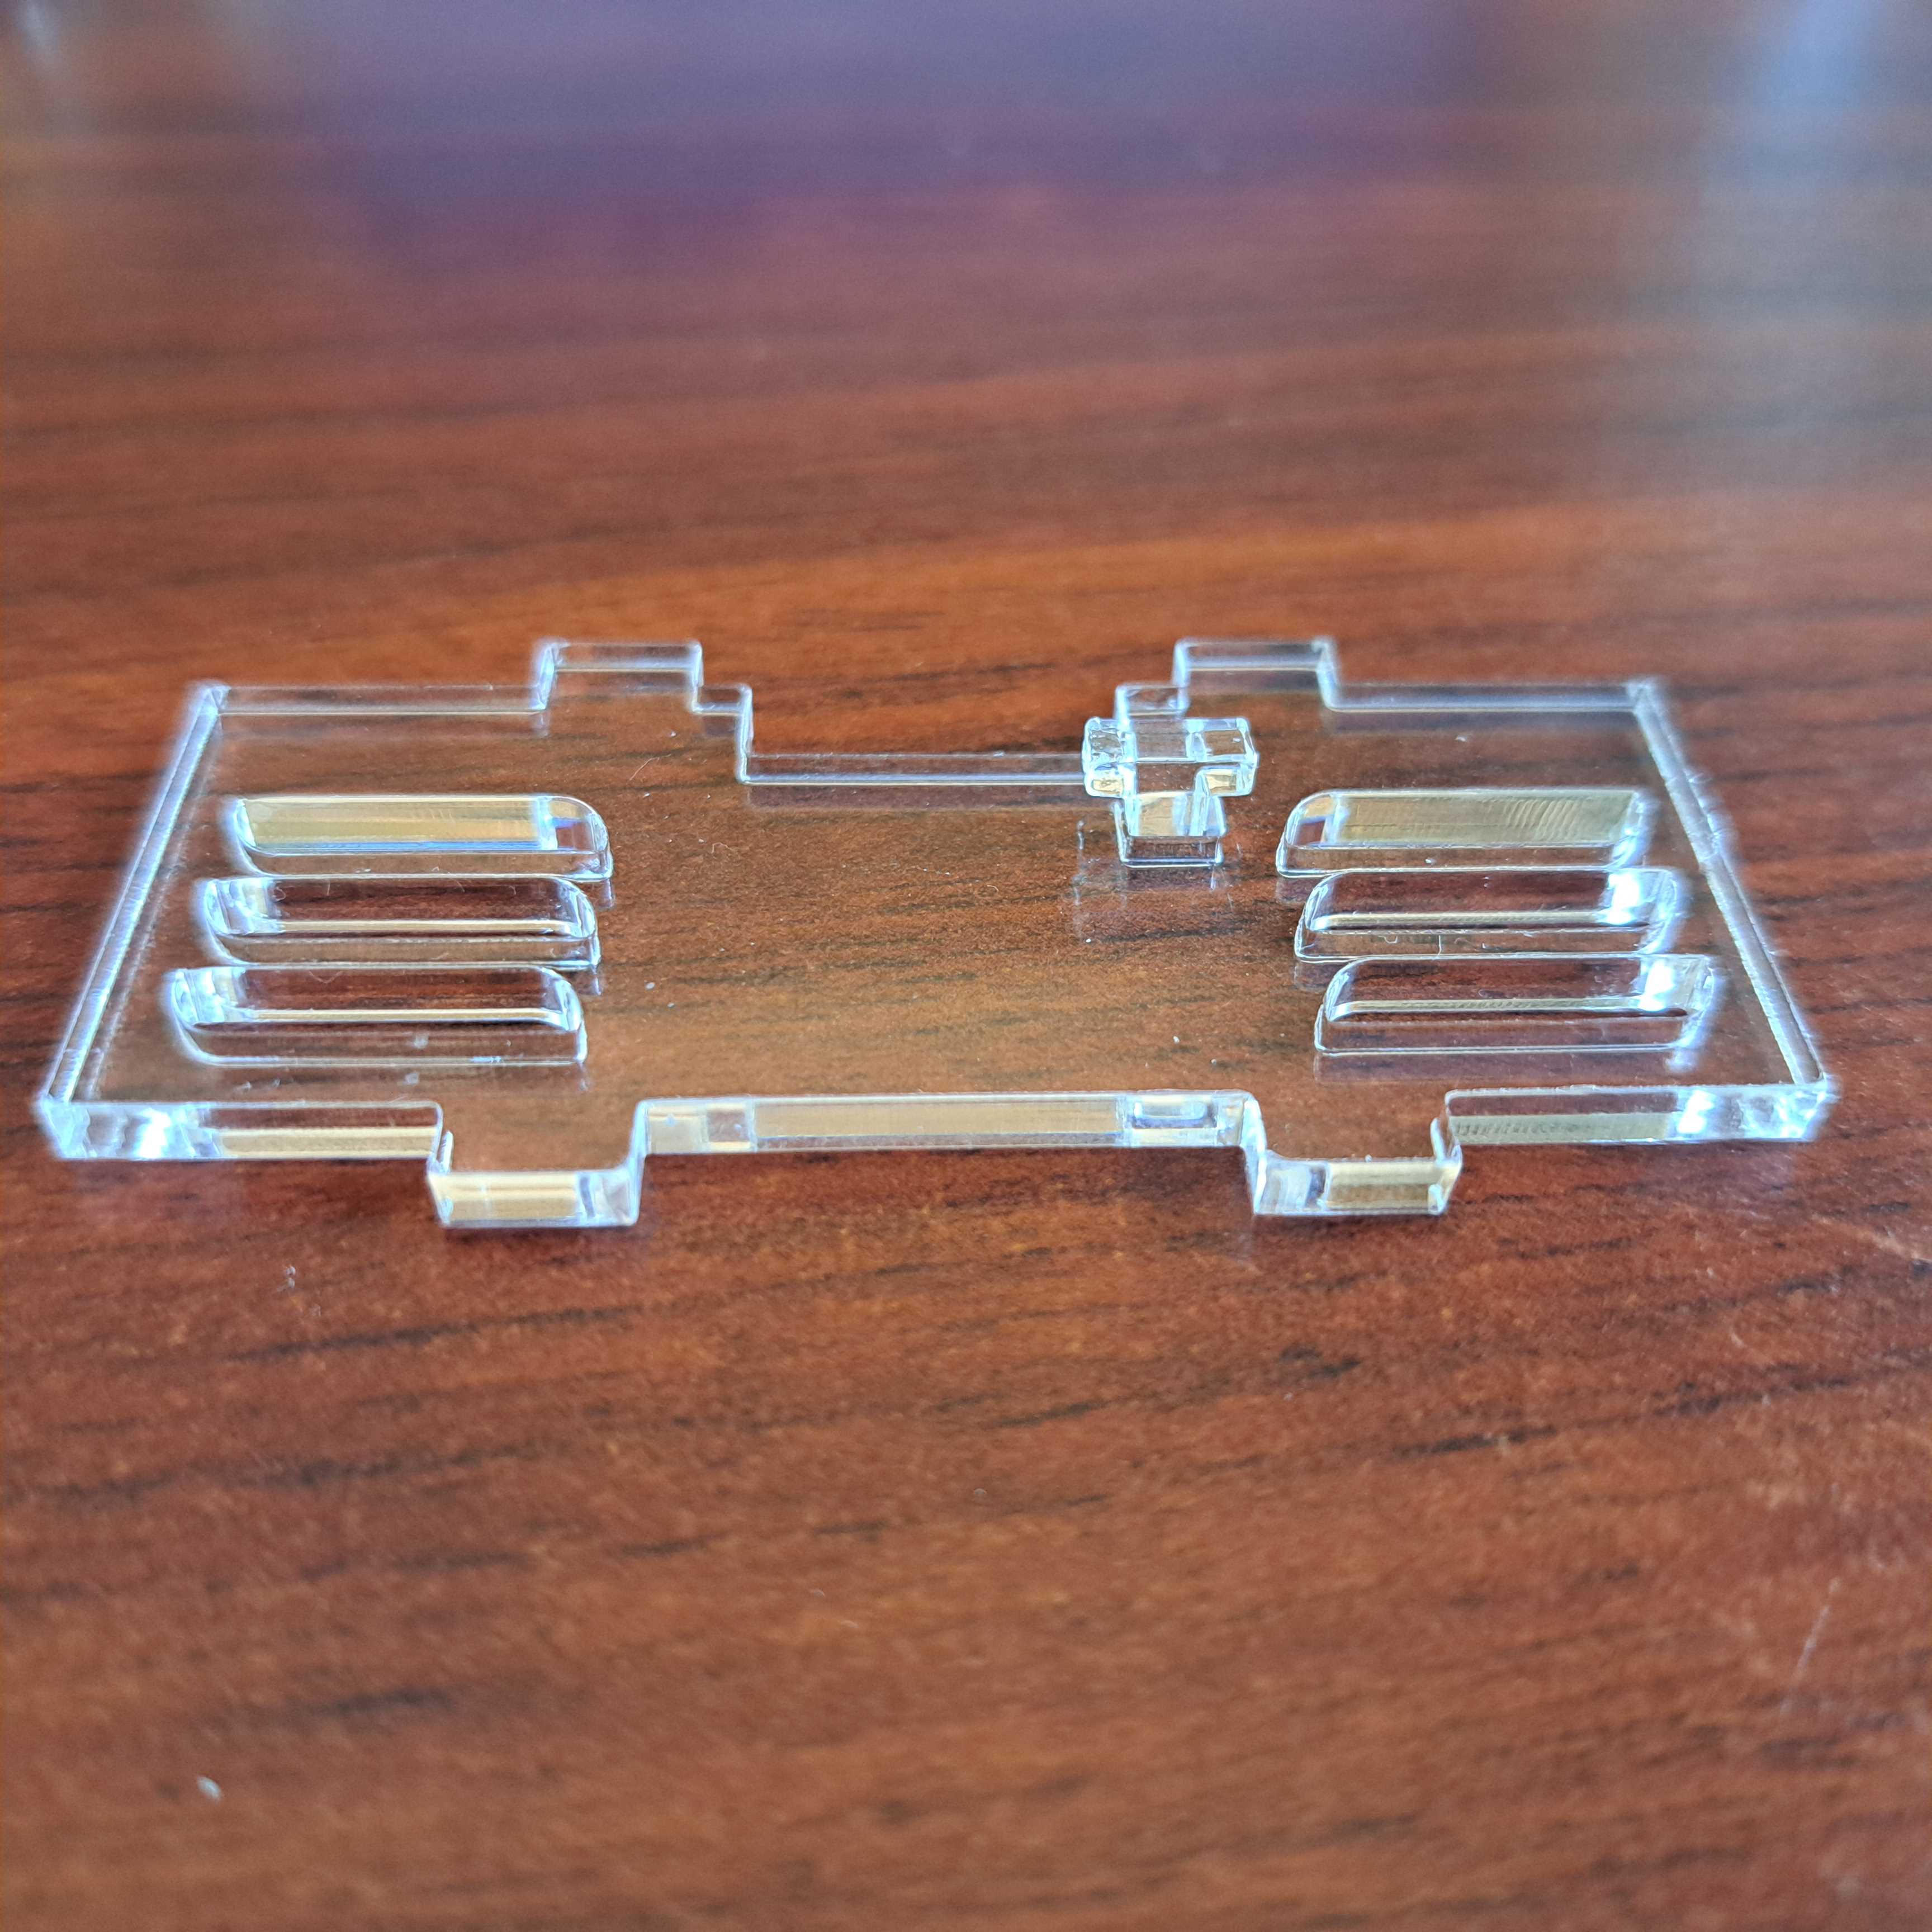
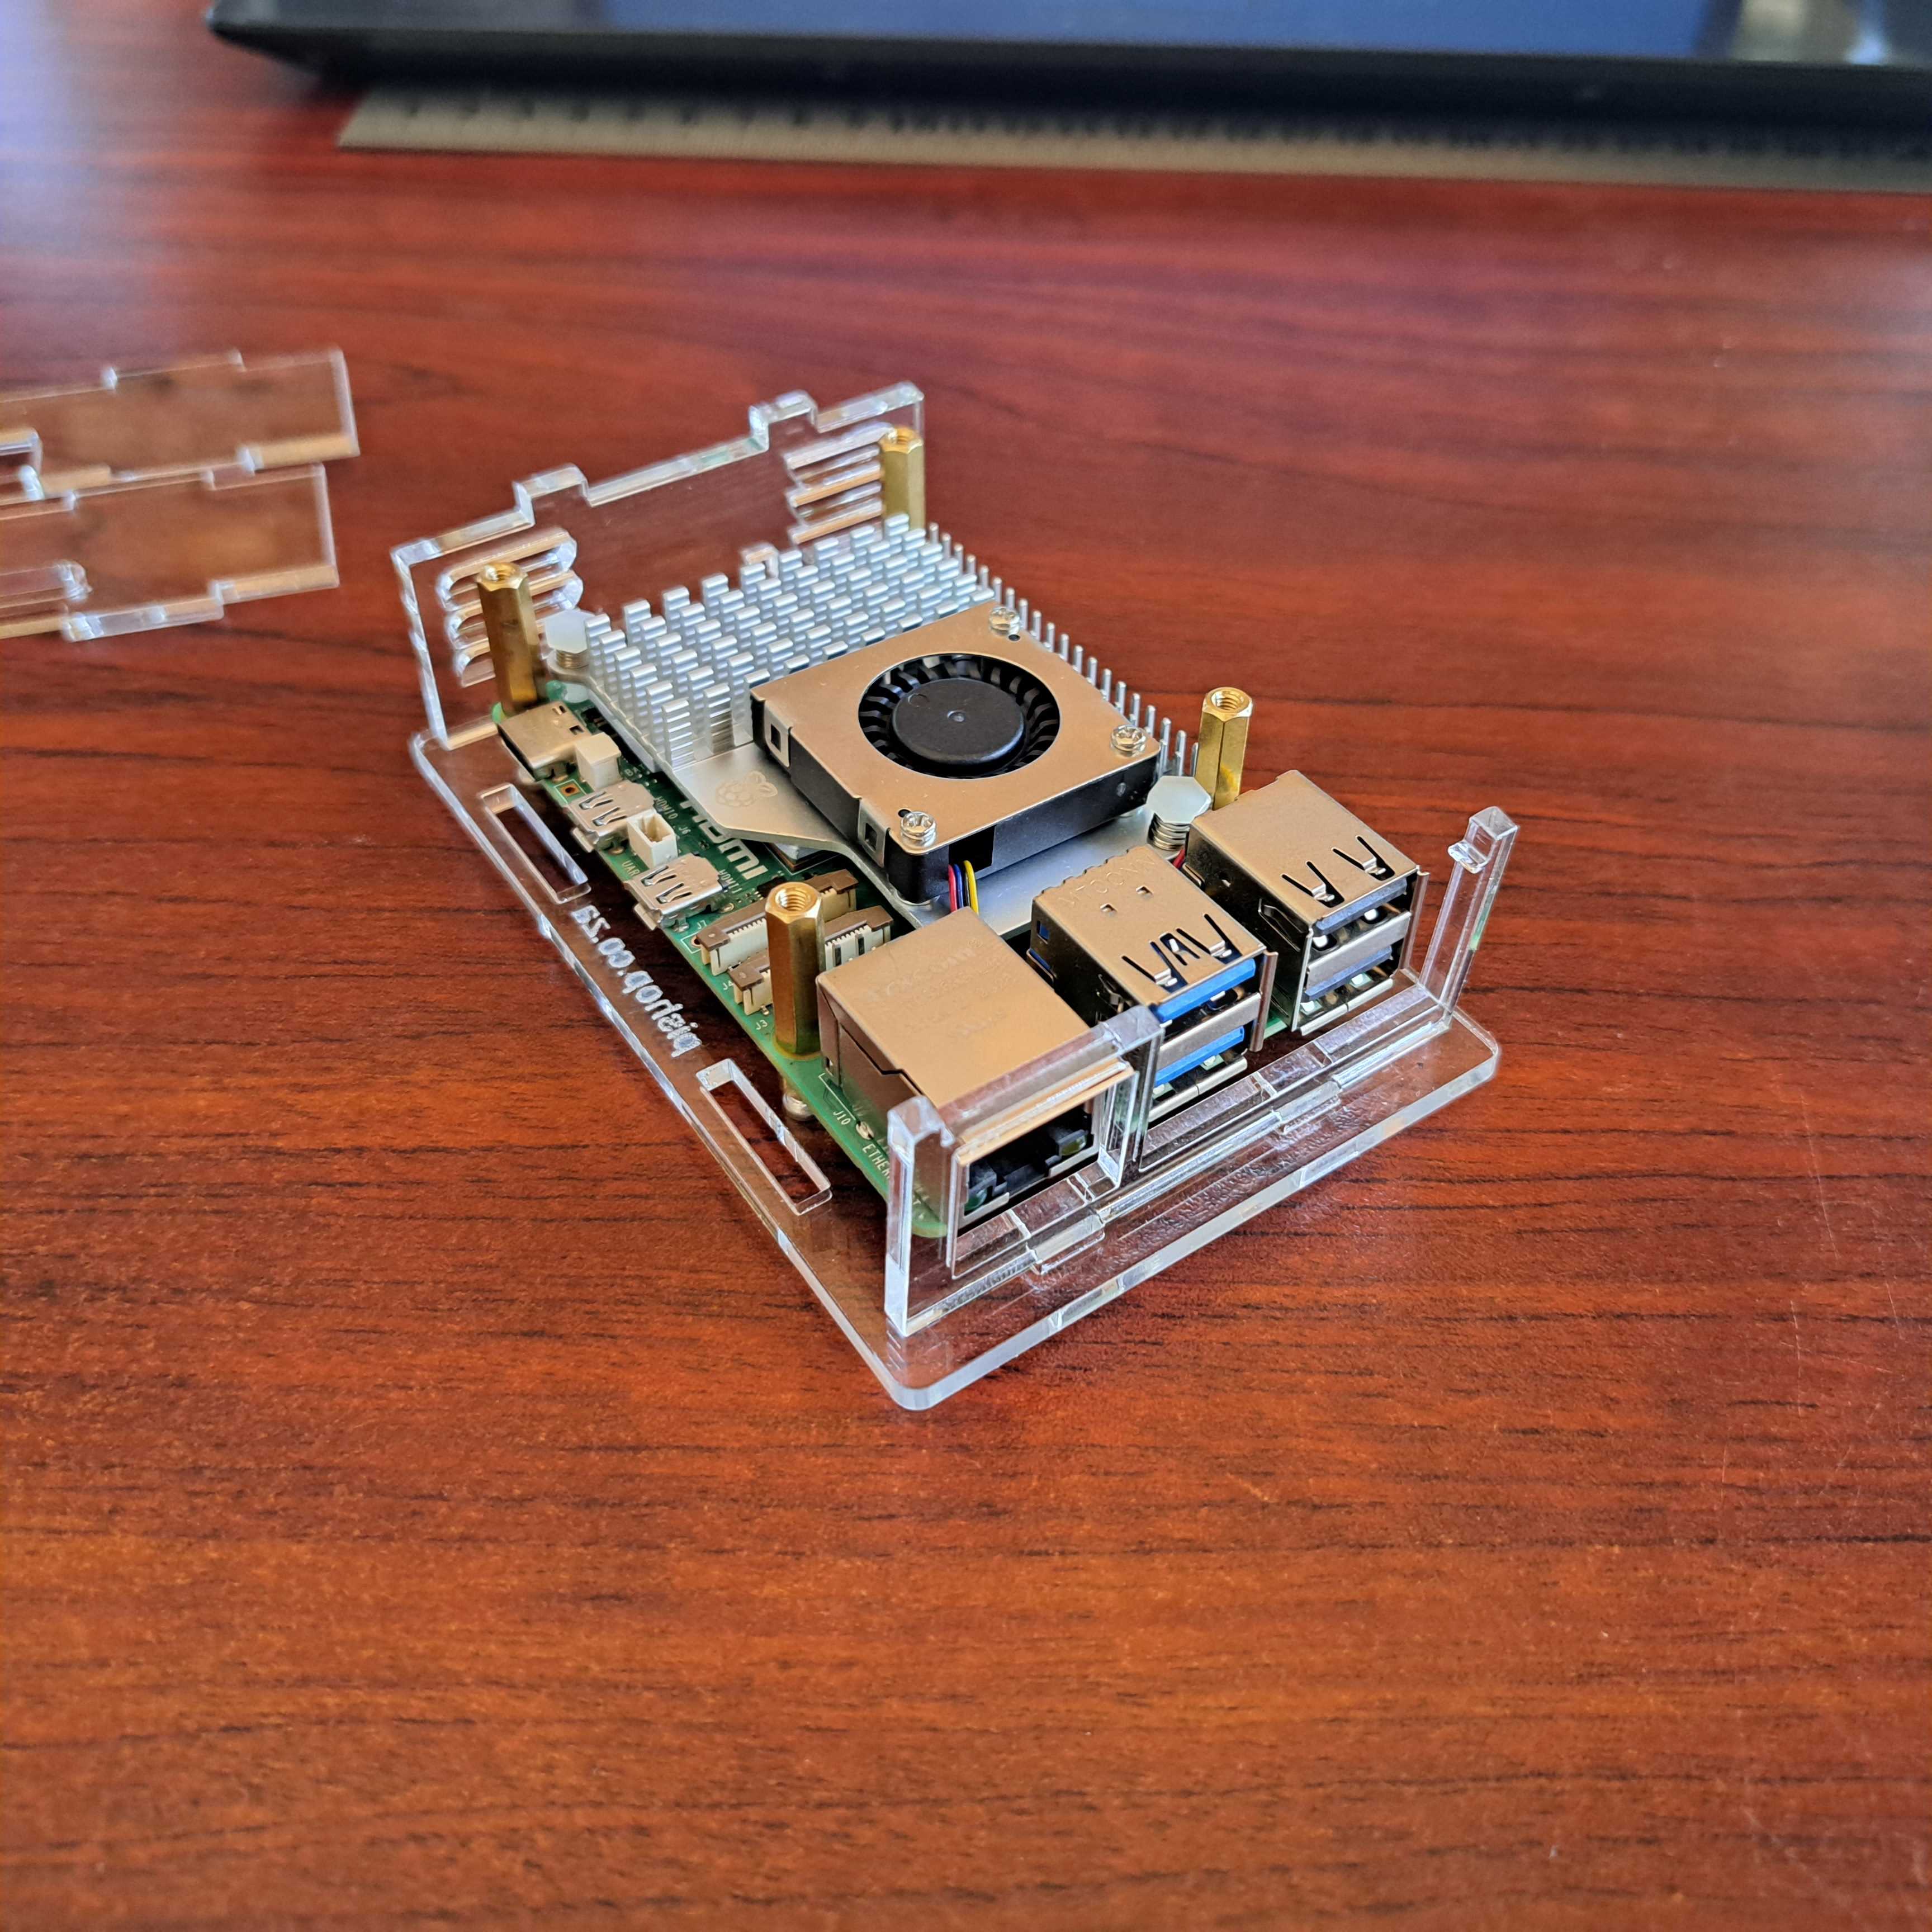
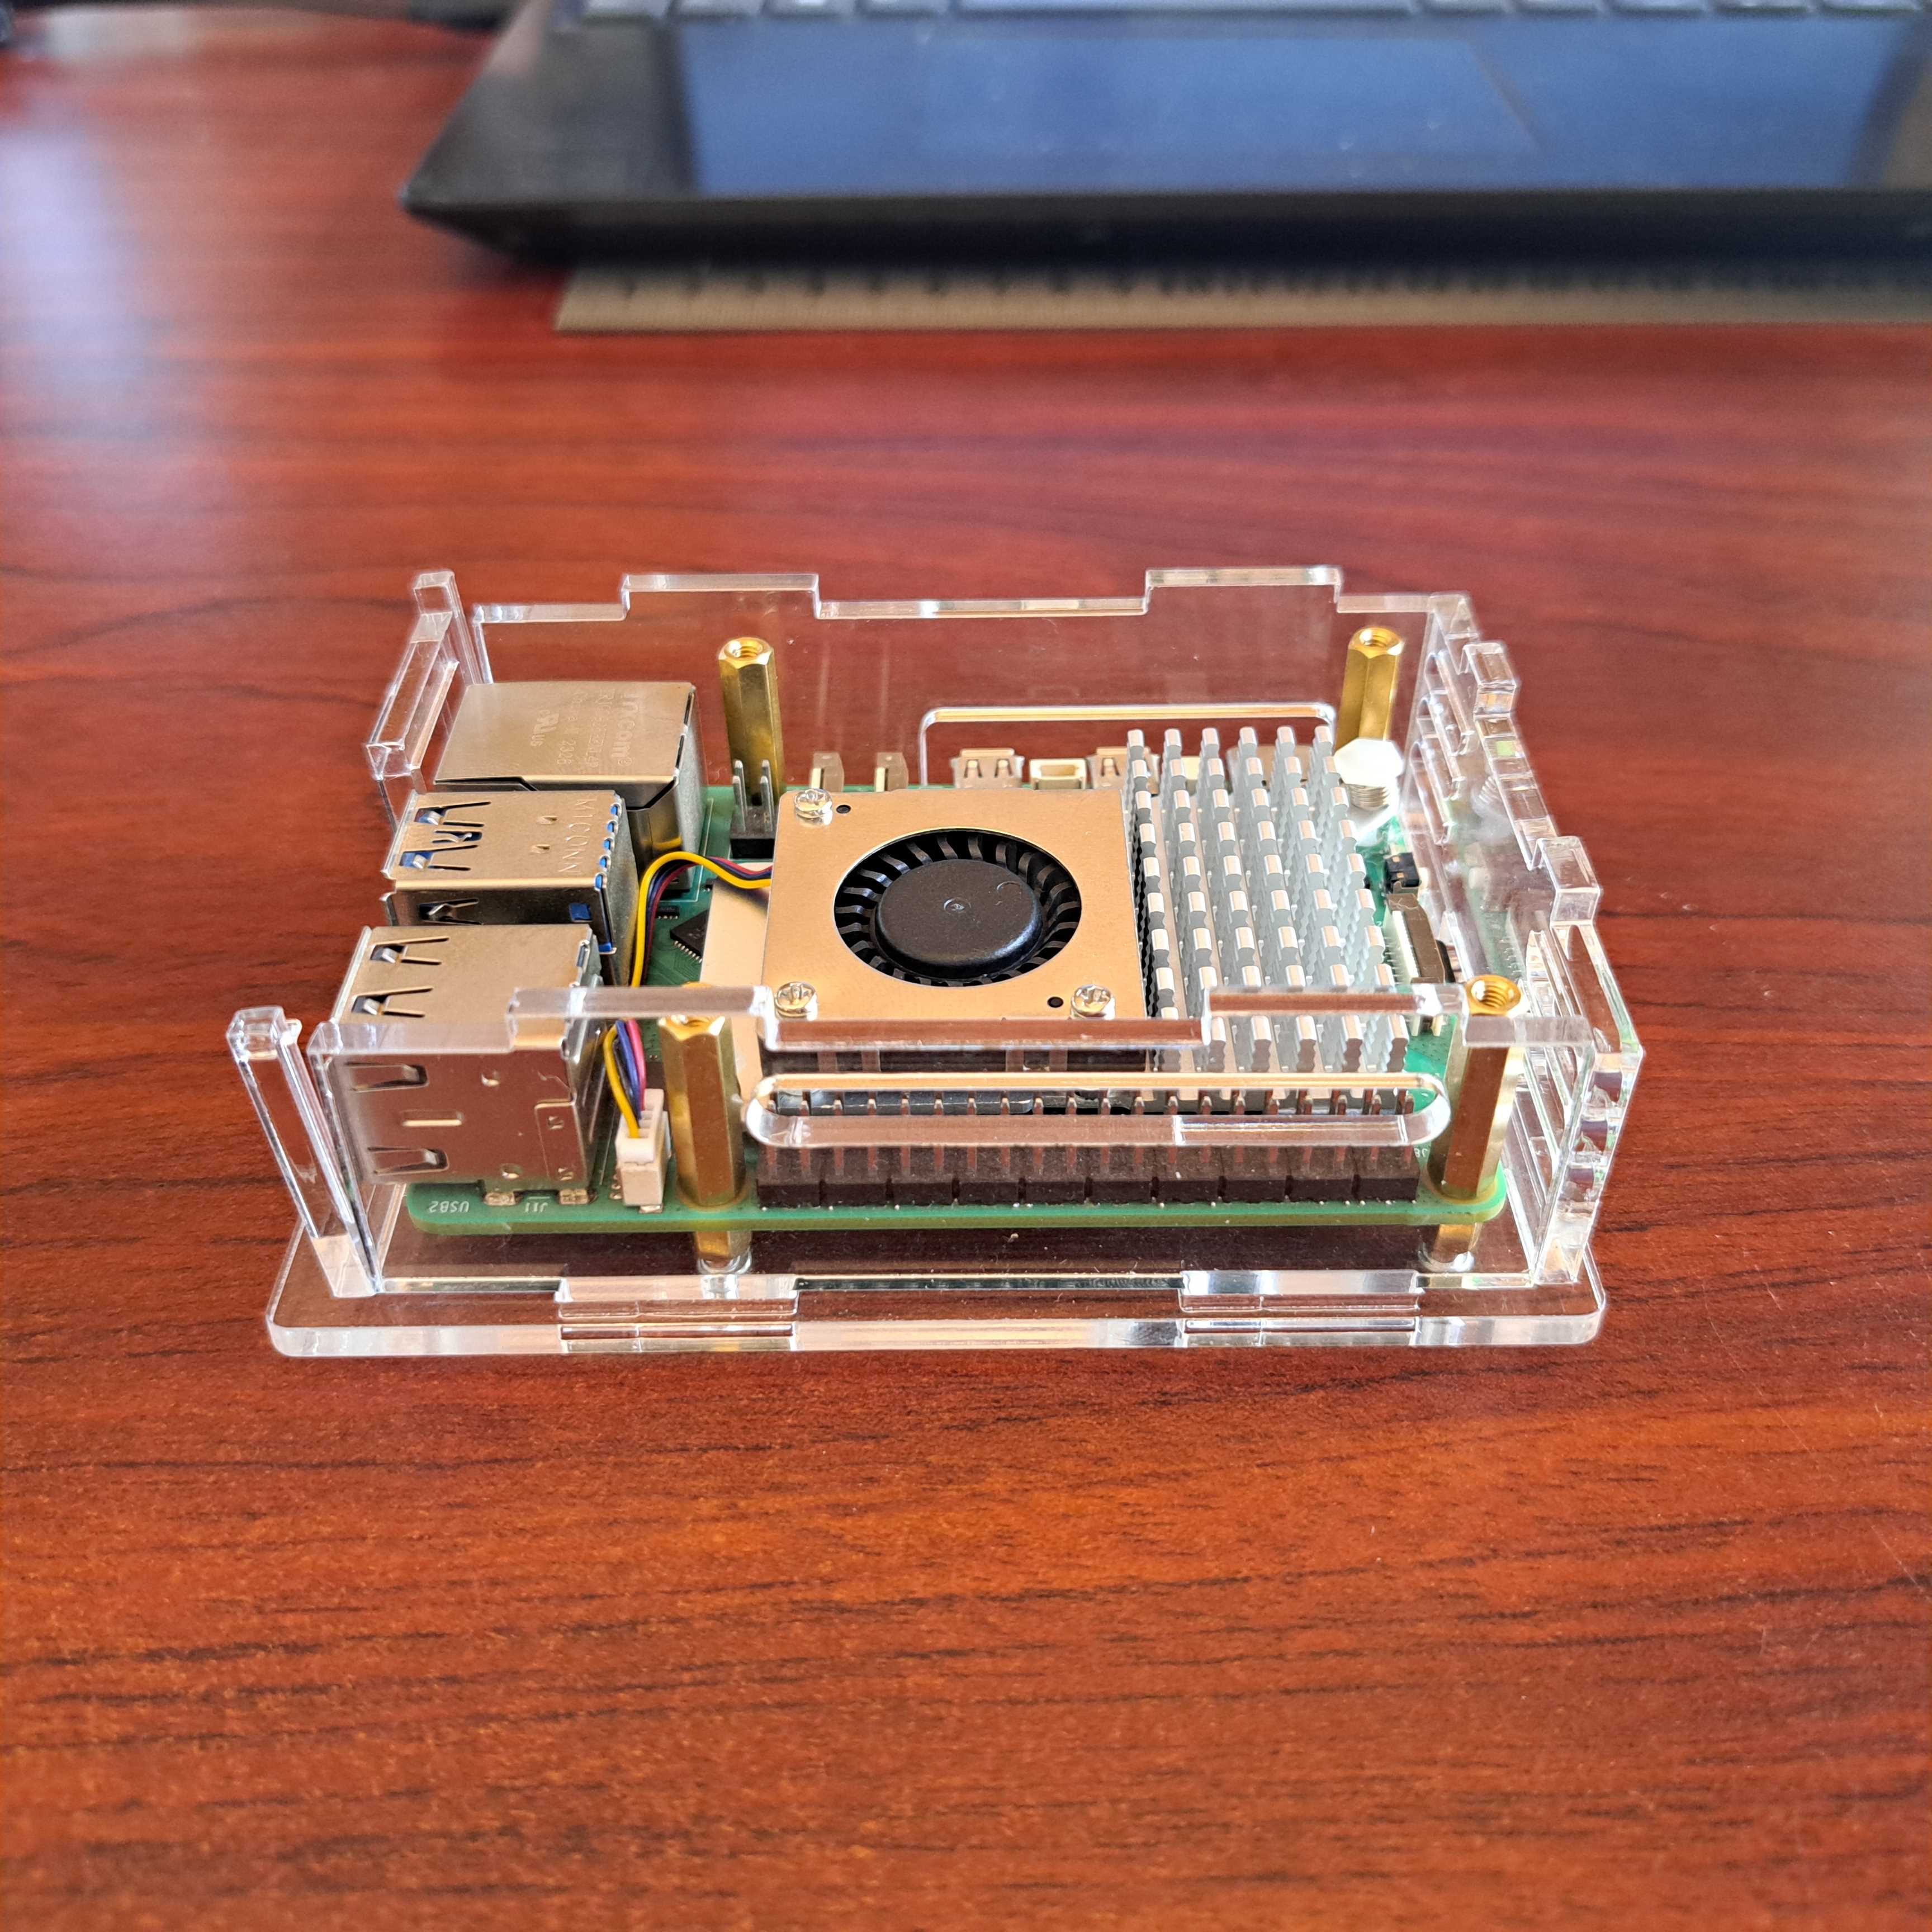
5. Install the top plate. This is where all the bits come together. You might experience a bit of difficulty aligning all the plates. A bit of pressure on the top plate helps to get all to pop into place.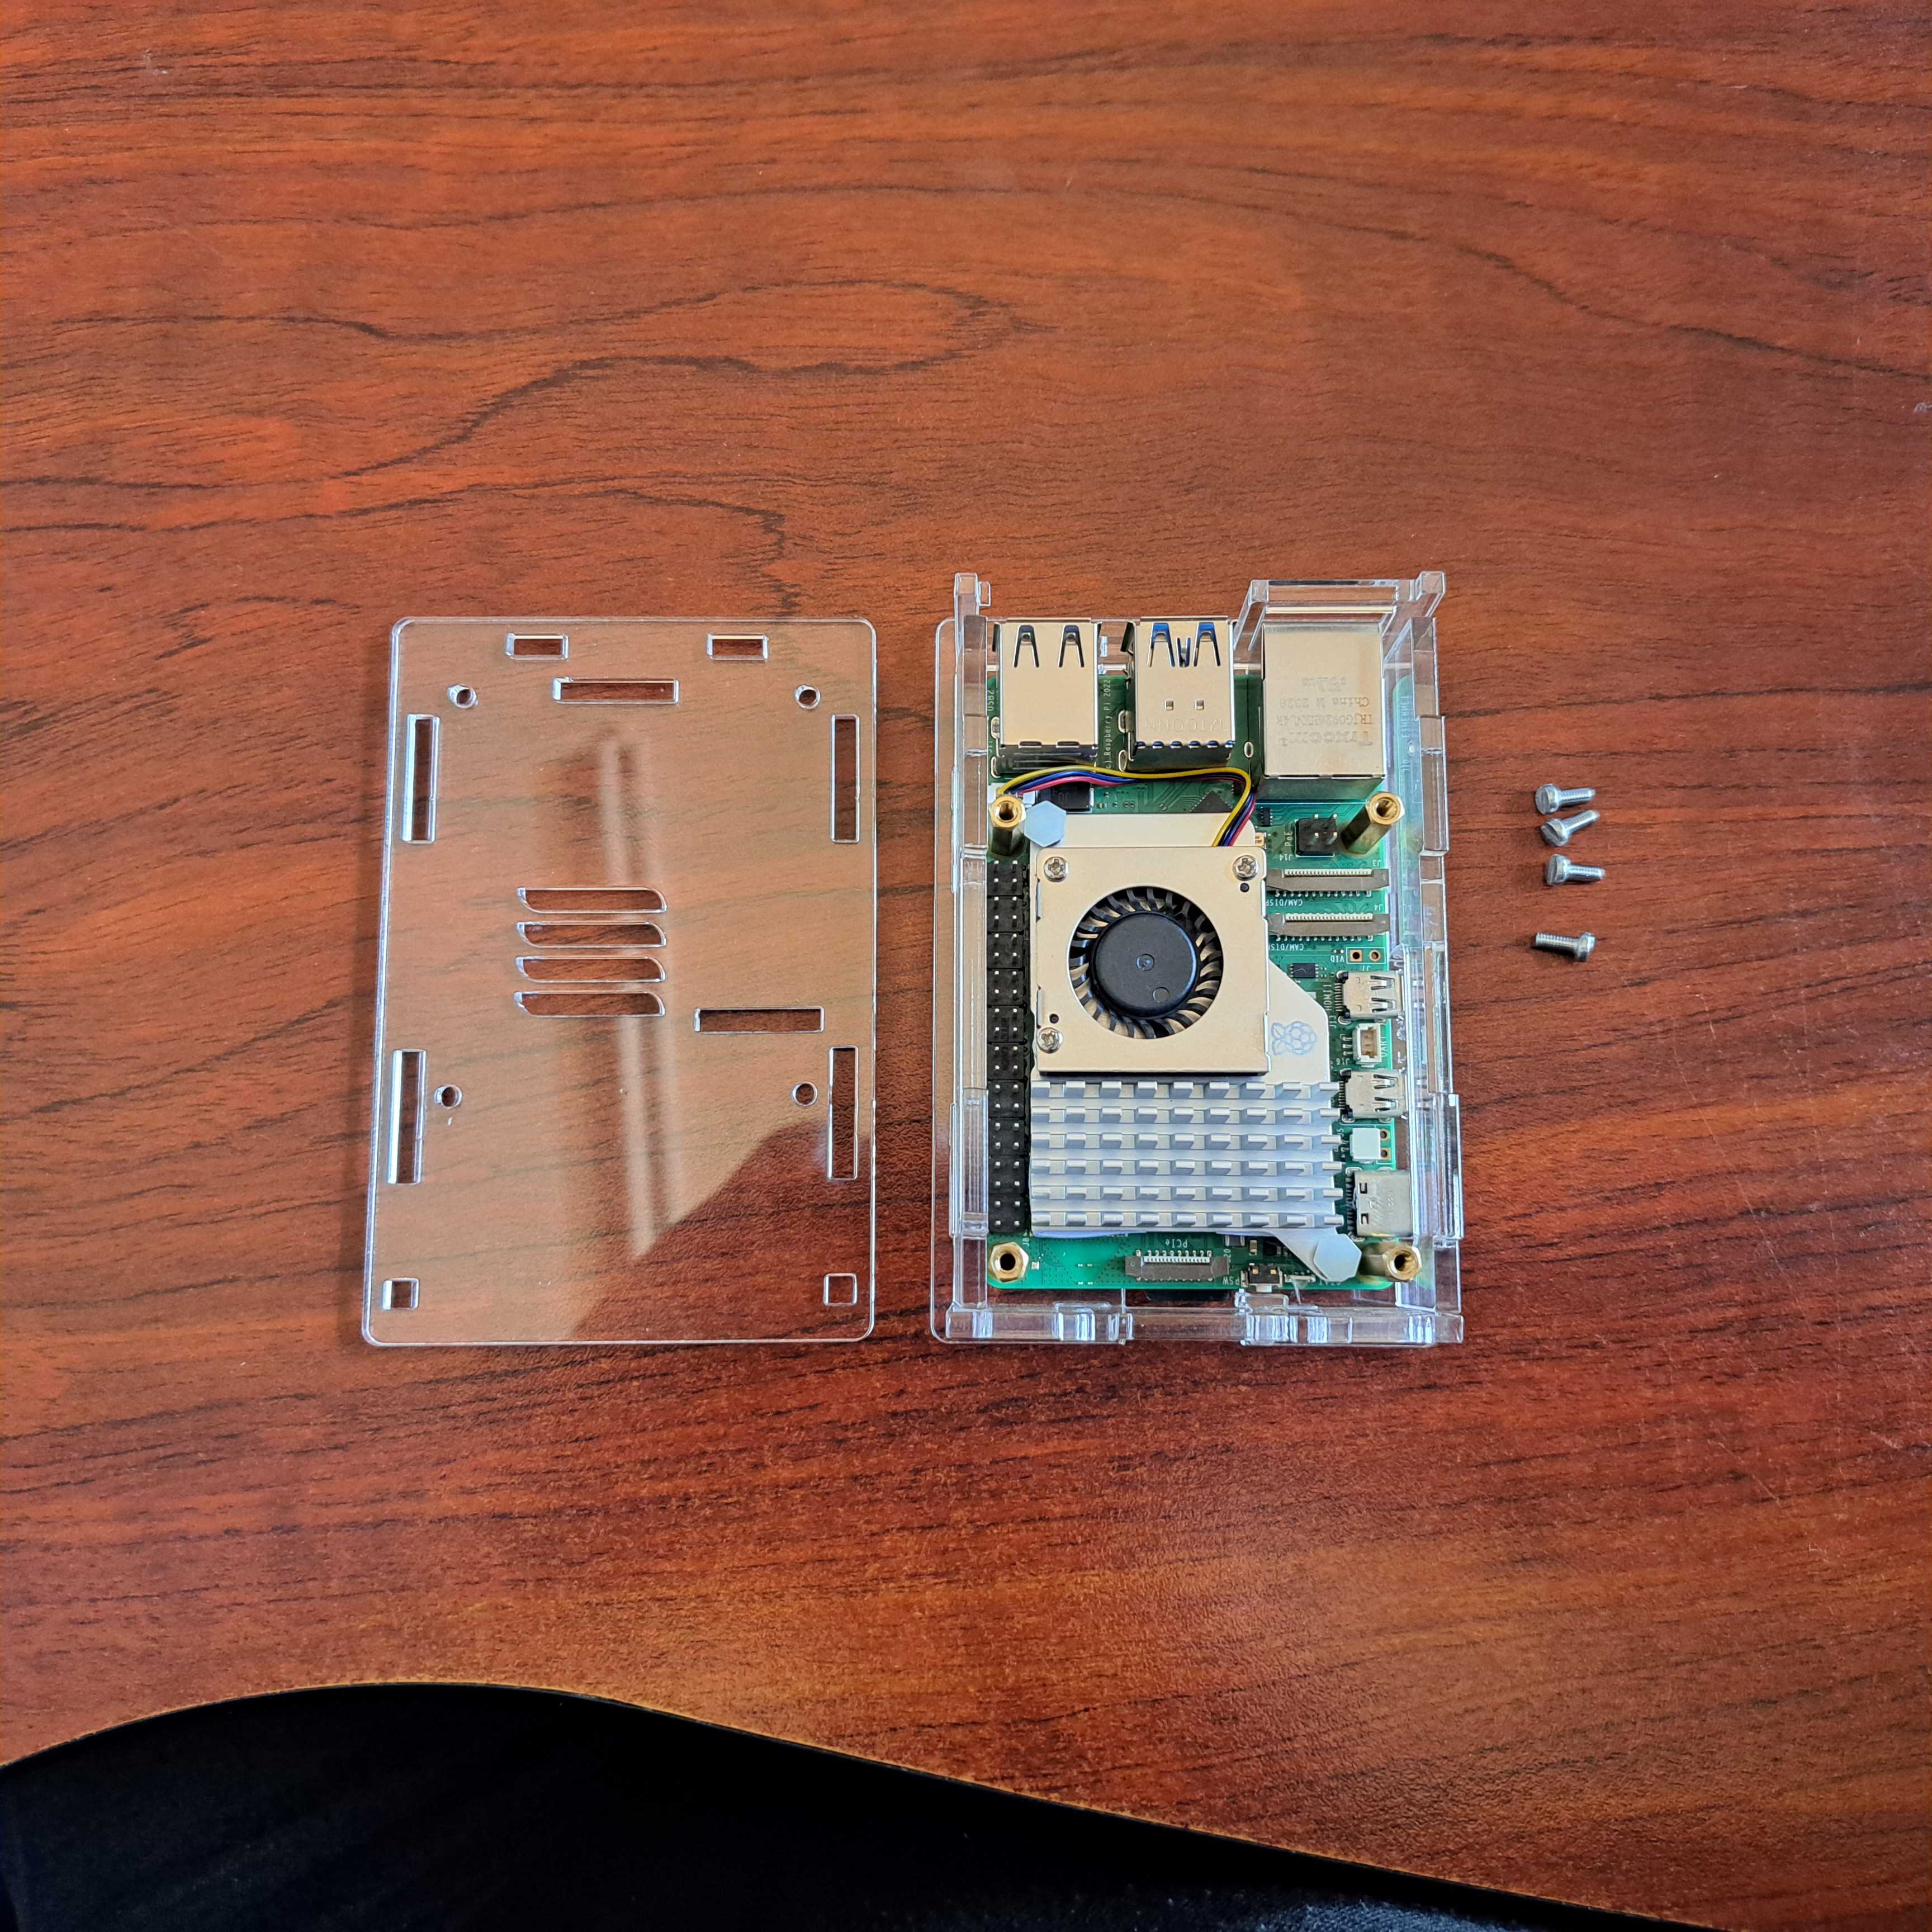
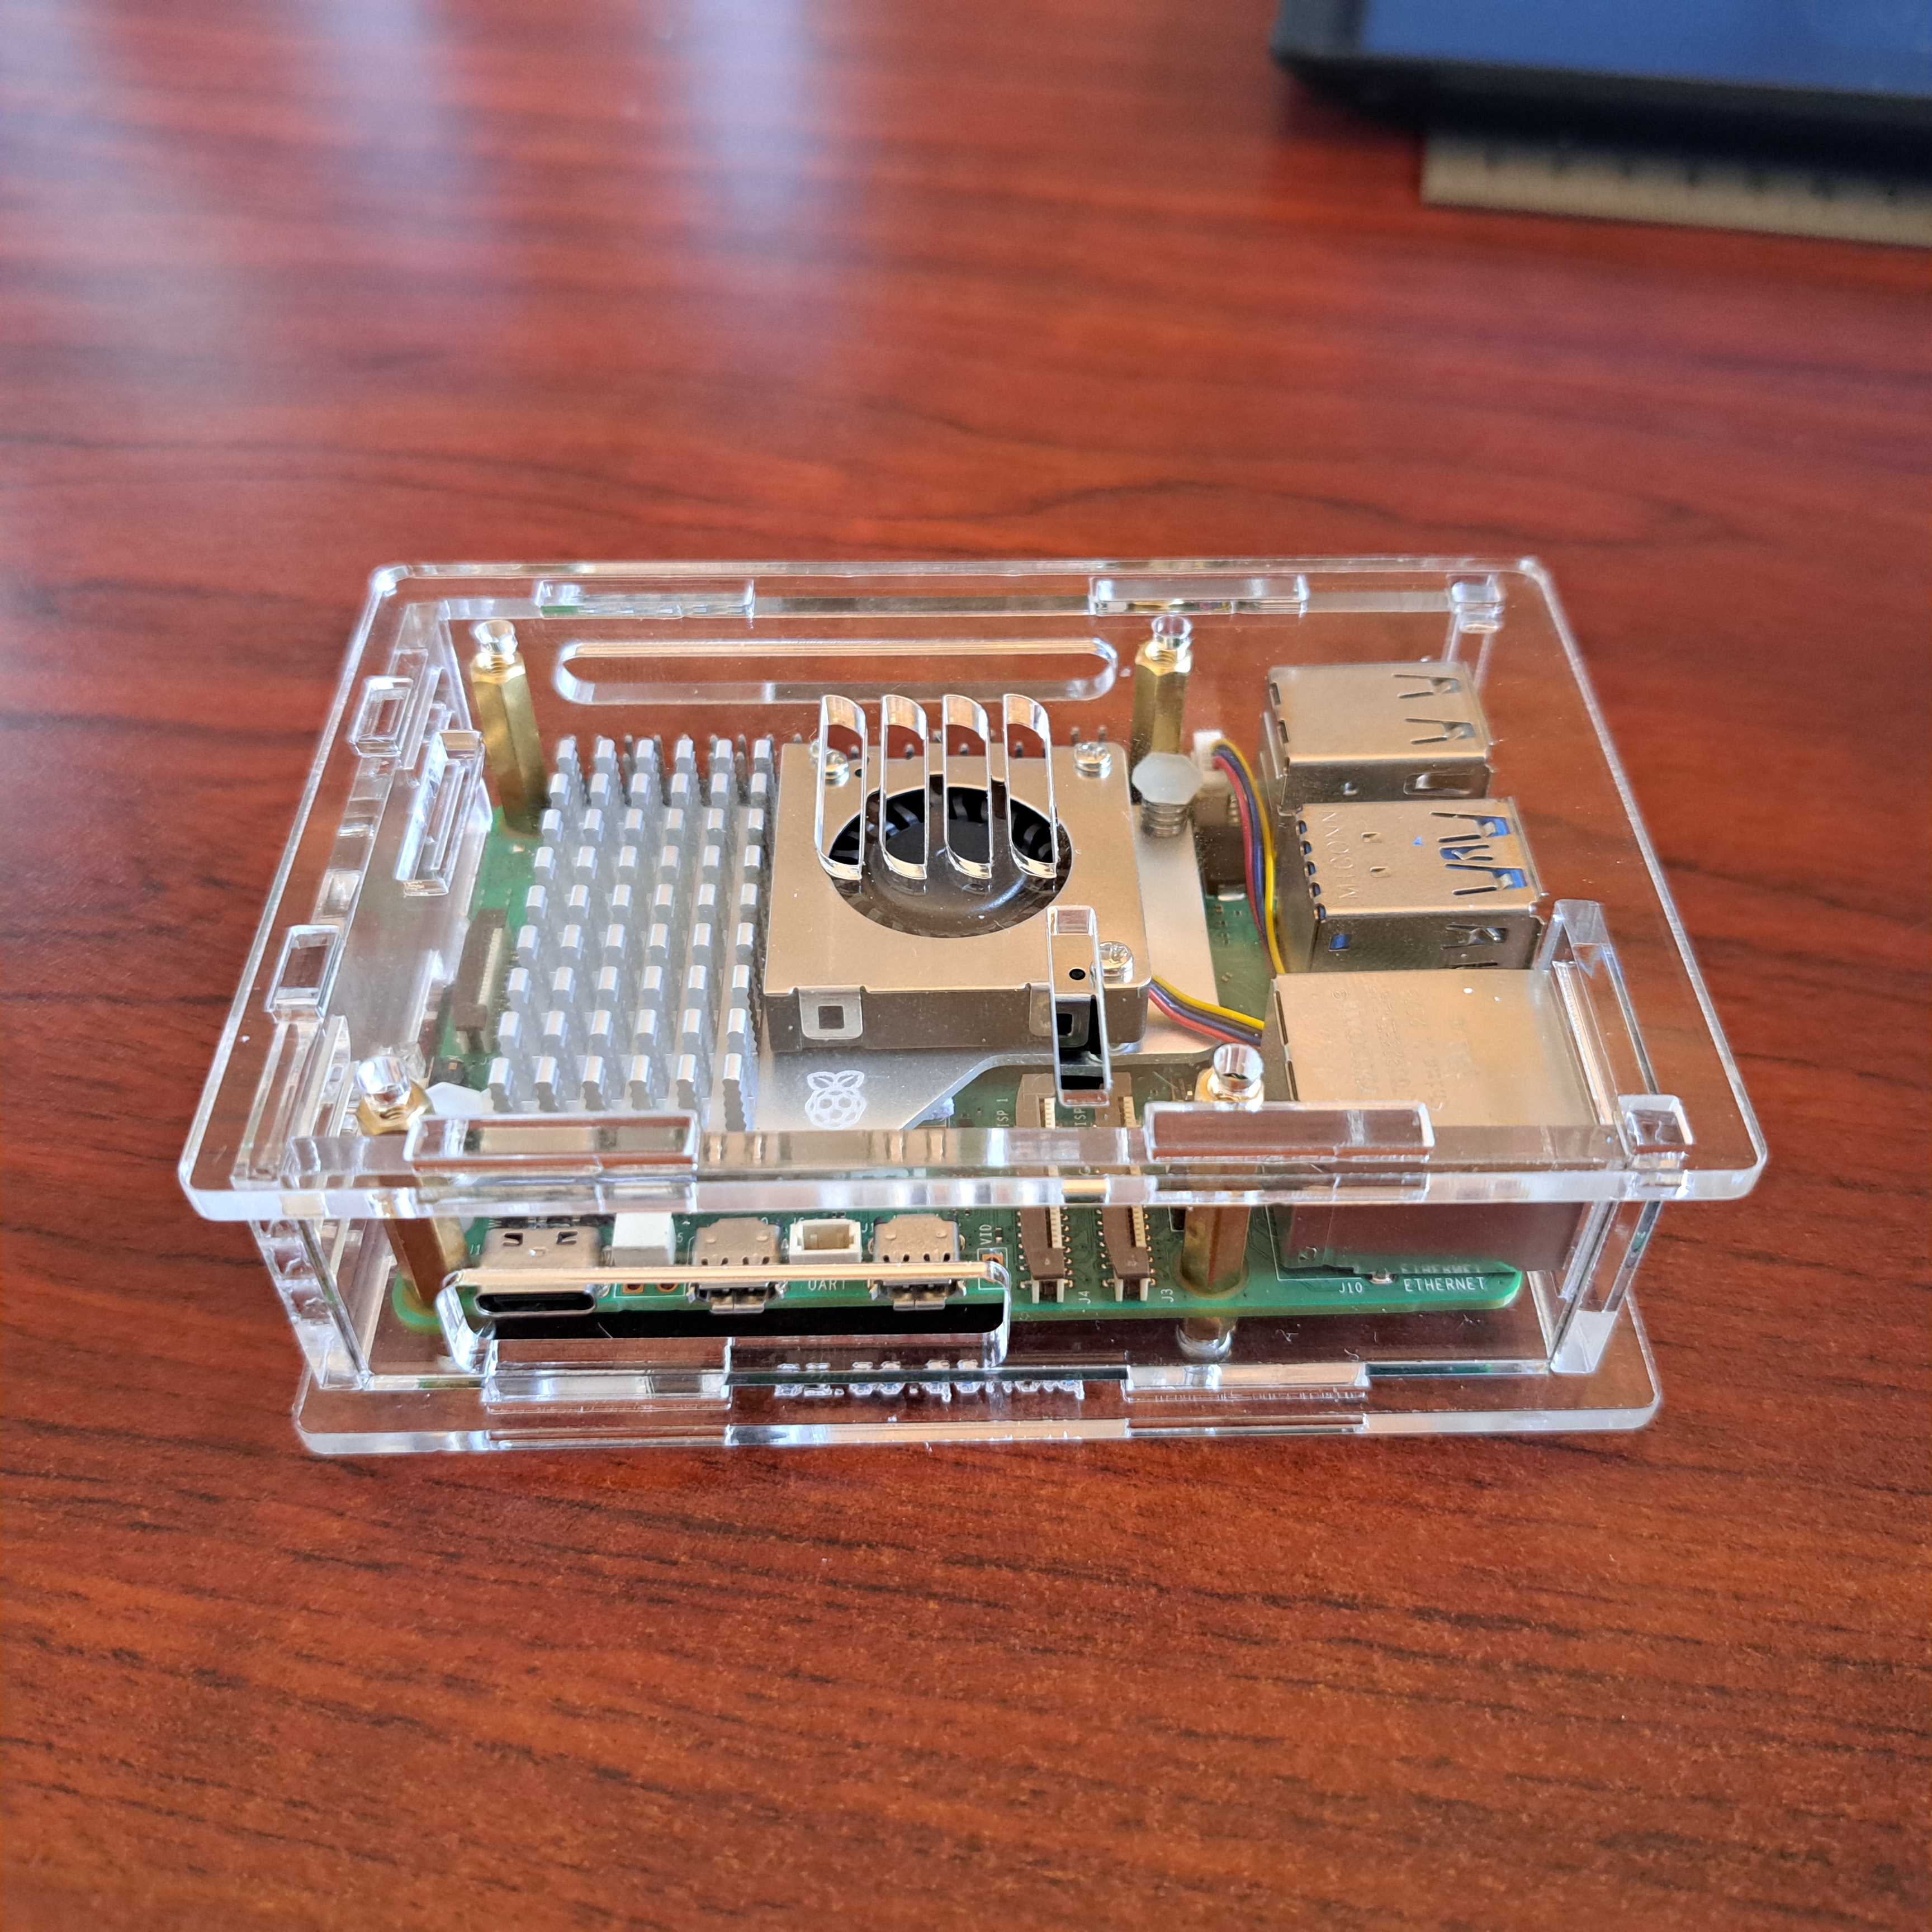
6. Insert the top 4 screws that holds it all together. You don't have to use force to tighten them.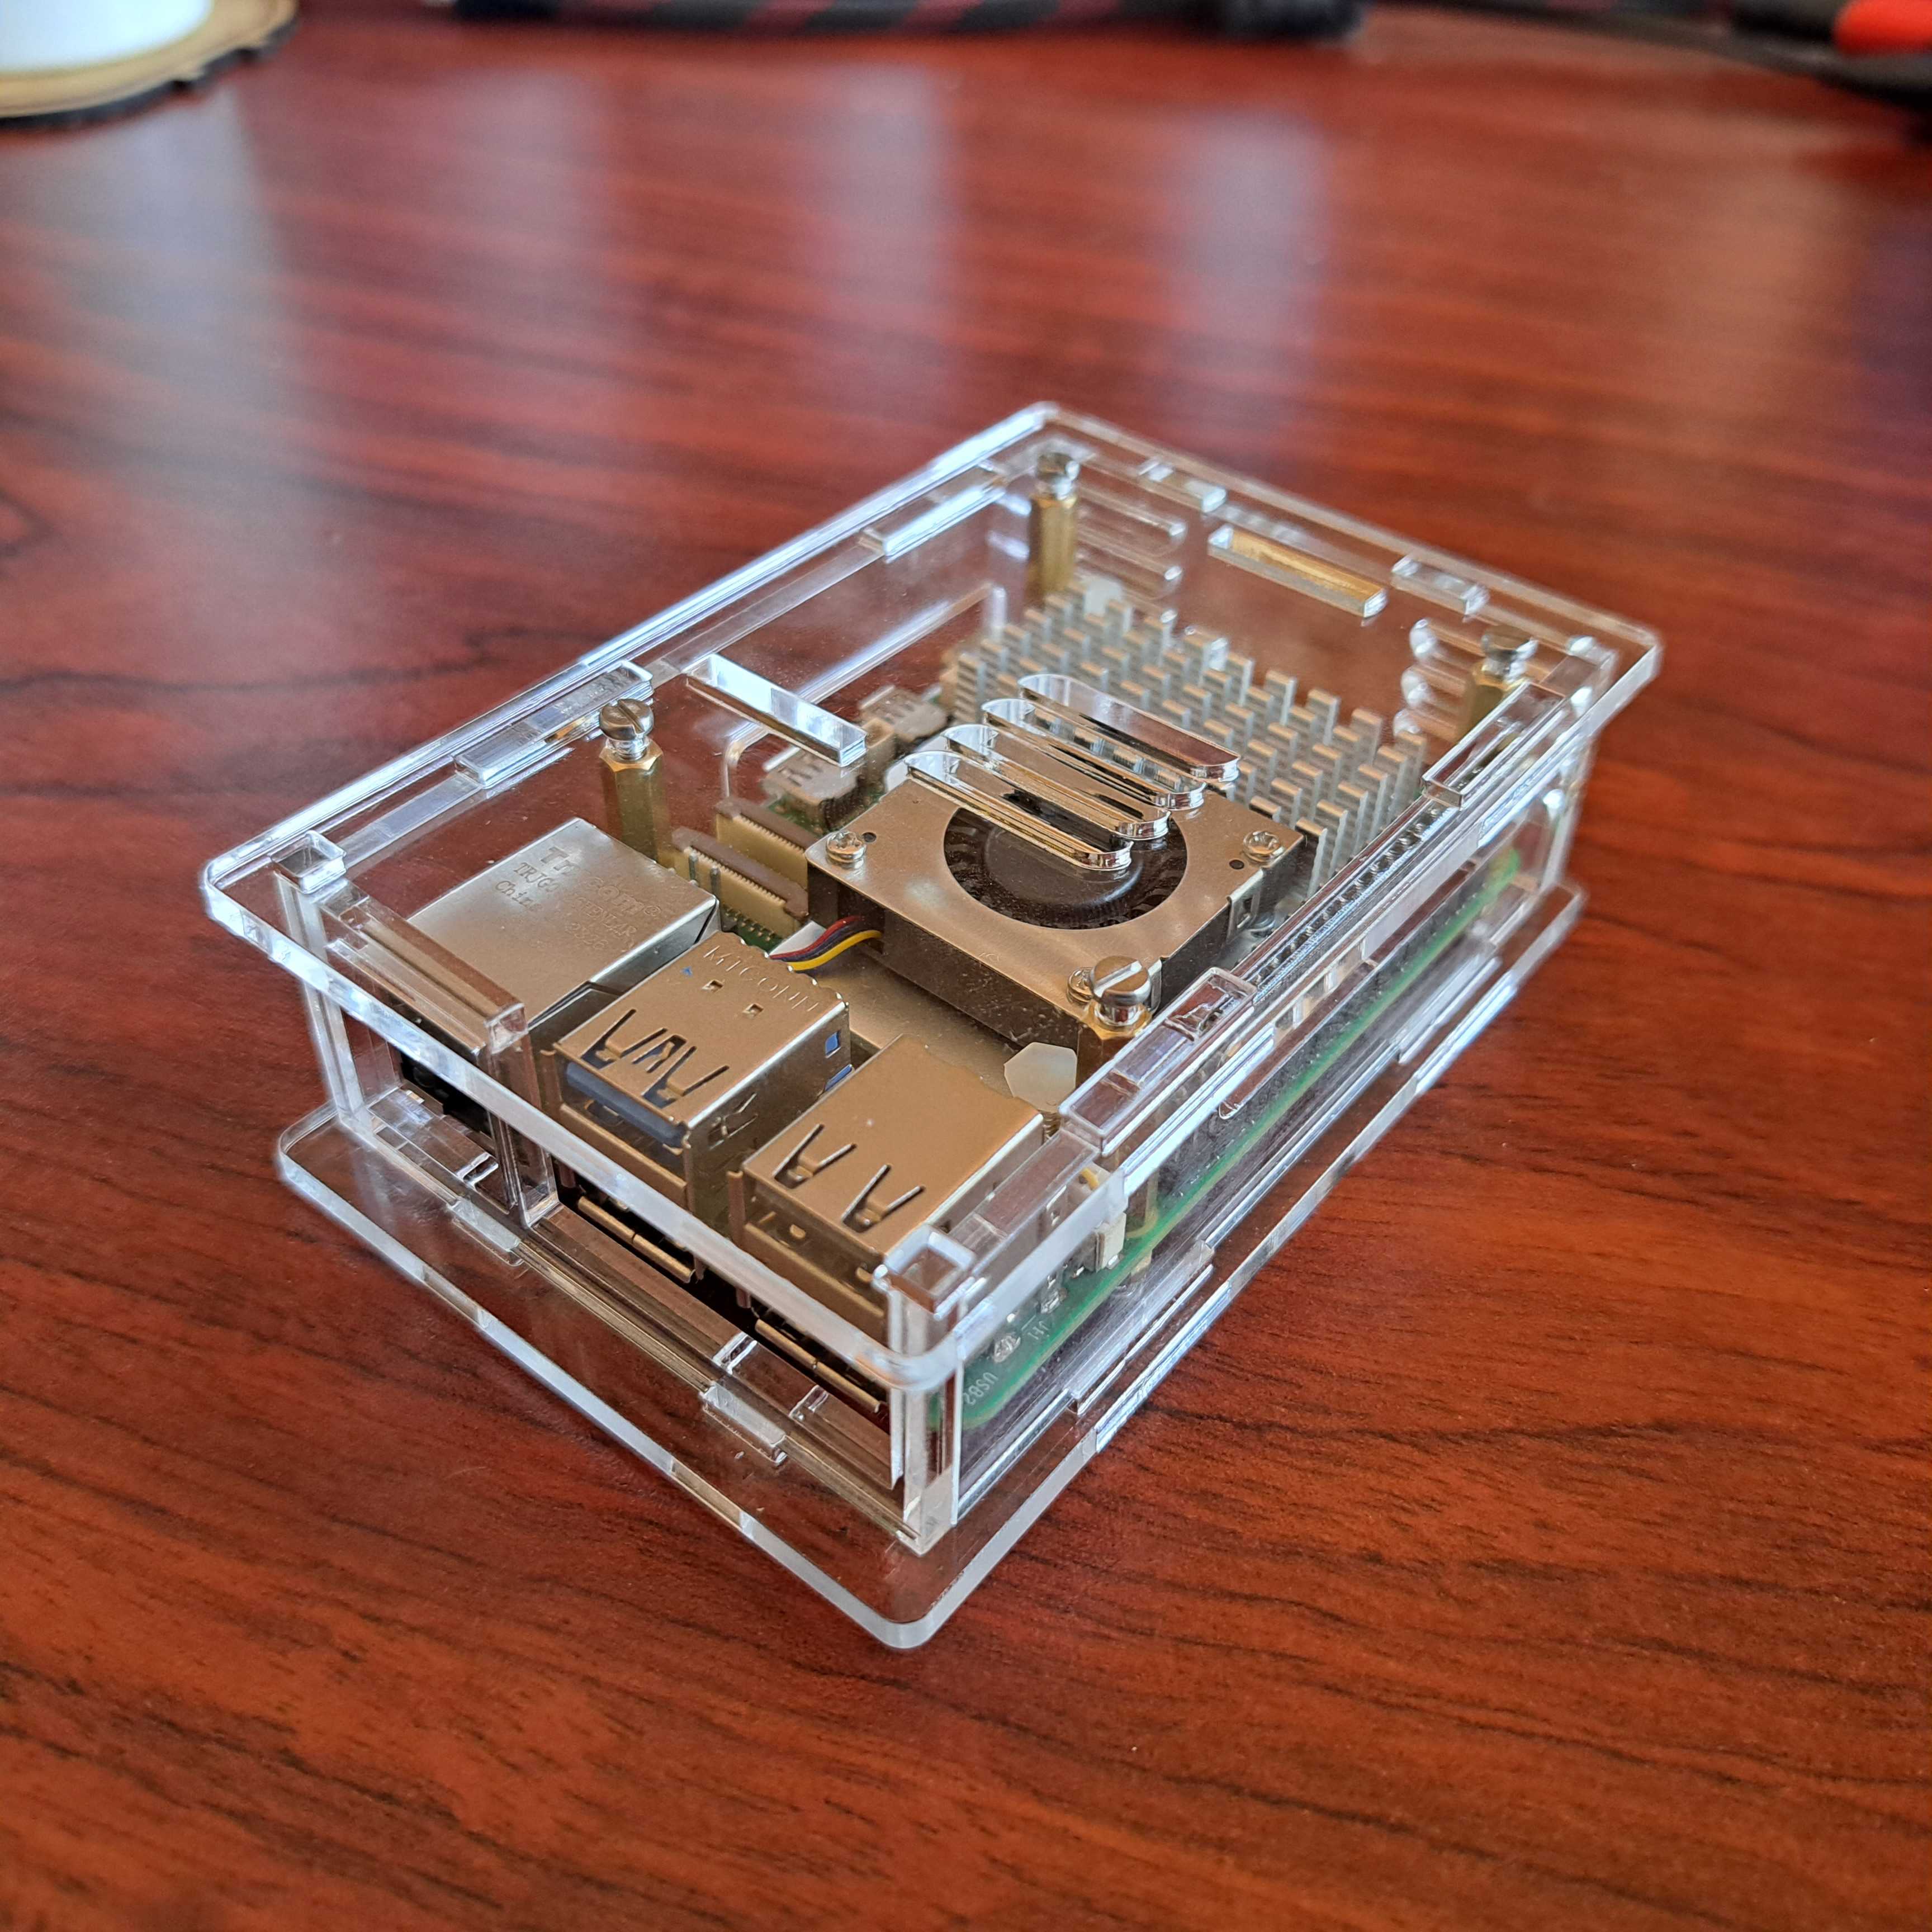
Protect and showcase your Raspberry Pi with this durable, precision-cut acrylic case. Designed for optimal ventilation and full access to ports, this sleek enclosure keeps your Pi safe while maintaining a clean, modern look. Easy to assemble with included mini screwdriver.
Features
- Compatible with Raspberry Pi 5 and multifunctional adapter
- Sufficient space to fit the Active Cooler
- Transparent panels for visibility and aesthetics
- Ventilation slots for efficient heat dissipation
- Cutouts for all GPIO, USB, HDMI, and power ports
- Lightweight, stackable, and perfect for DIY projects
- Material: Acrylic
- Colour: Transparent (Remove the protective film)
- Requires Customer Assembly
What's in the box?
6 x acrylic plate parts(peel off the protective film on both sides)
4 x M2.5x5+5 standoffs to fit under the Pi screw part facing upwards
4 x M2.5x7 standoffs to fit under the adapter board screw part facing upwards
4 x FF M2.5 x 18 standoff to fit on top of the Pi
2 x FF M2.5x16 Brass standoffs to fit on the outer side of the adapter
2 x FF M2.5x5 brass standoffs to fit on the inner side of the adapter
14 x M2.5x6 screws - 8 for the bottom and 6 for the top of the case
4 x rubber feet
1 x mini screwdriver
Tip: It helps to tighten all the screws only once they have all been fitted loosely in place

- GPIO pins and headers on top
- USB-C for power and data
- The Qwiic Connector
What's in the box?
1 x UNO Q Acrylic Case parts(remove the protection film)
4 x Nonskid rubber pads
1 x Screwdriver
1 x Screws and standoffs pack
- GPIO pins and headers on top
- USB-C for power and data
- The Qwiic Connector
What's in the box?
1 x UNO Q Acrylic Case parts(remove the protection film)
1 x Screws and standoffs pack
We suggest that you add four rubber non-slip feet