Main Menu
Specials
Account
Login
Check Your Order
Wishlist
Cart
Checkout
Blog
Contact Us
0
Items -
R0.00
All Categories
All Categories
Kits & Bundles
Boards
Cases
Power
Cameras
Cables
Networking
Displays
Keyboards and Mouses
Tools
CNC/3D Printing/Laser
Robotics/Sensors/Automation
Components
Electronics
SD/Storage/Hubs
Books/Magazines
Merch
Gadgets & Gift Ideas
STEAM Young Makers
Laser by PiShop
All Products
Raspberry Pi 5
Home
Specials
Account
Login
Check Your Order
Wishlist
Cart
Checkout
Blog
Contact Us
Kits & Bundles
Raspberry Pi kits
Compatible with Arduino kits
micro:bit kits
Jetson Nano kits
NODEMCU kits
Arcade kits
Electronics Beginners/Education kits
Electronic parts kits
Boards
Raspberry Pi Boards
Arduino Boards
Compatible with Arduino boards
Audio
micro:bit
Nvidia Jetson
Home Assistant
ESP
NodeMcu
Wearables
Other Boards
Cases
Raspberry Pi cases
Arduino Cases
Micro:bit cases
Case Add-ons
Mounting Brackets/Cases
Display Cases/Frames
Camera Cases
Project Cases
Power
Raspberry Pi Power
Arduino Power
Solar,Wind and Backup Power
Batteries & Enclosures
Other Power
UPS
Cameras
Official Raspberry Pi Cameras
Other Cameras for RPi
Jetson Cameras
Arduino Cameras
ESP Cameras
USB Cameras
Camera Lenses
Camera Cables
Camera Brackets
CCTV
Camera Guides
Cables
HDMI/VGA/DVI cables/adapters
USB cables/adapters
Ethernet cables/adapters
Power
Twinflex/Ripcord
Solar Cables/Adapters
CSI camera cables
DSI Display cables
PCIe cables
Other Cables/Adapters
Networking
Wired
Wireless
Lora
Displays
Keyboards and Mouses
Tools
Soldering
Test/Measure/Experiment
Ethernet
Insulation
CNC
Solar
3D Printing
General Tools
Protective Gear
Storage
Extra Shipping
Other
CNC/3D Printing/Laser
CNC
3D Printing
Laser Cutting/Engraving
Robotics/Sensors/Automation
Robotics
Sensors
Automation
Components
Speakers
StandOffs & Screws
Experimental boards
Keypads
Arcade
Heatsinks & Cooling
Relays
Remotes
RFID/NFC
Printing
Weather station
Protection
Motors & Servos
Junction boxes
Other
Electronics
IC and Sockets
LED's
Resistors
Diodes
Transistors
Voltage Regulators
Capacitors
Switches/buttons
Potentiometers
Relays
Buzzers
Headers and Terminals
Breadboard & PCB
Jumper Cables
Other Electronics
SD/Storage/Hubs
SD cards & readers
NVME
Flash Drives & HDD/SSD
USB Hubs
Books/Magazines
Merch
Gadgets & Gift Ideas
STEAM Young Makers
Ages 4 and up
Ages 6 and up
Ages 8 and up
Ages 10 and up
Ages 12 and up
Ages 14 and up
Laser by PiShop
All Products
Raspberry Pi 5
Home
Displays
Displays
Sort By:
Default
Name A - Z
Name Z - A
Price Low > High
Price High > Low
Rating Highest
Rating Lowest
Date New > Old
Date Old > New
128×32 2.23inch OLED display HAT for Raspberry Pi
View
R289.90 Inc VAT
Full Graphic 12864 Smart Controller RAMPS 1.4 LCD 12864 LCD Control Panel Blue Screen for 3D Printer
View
R338.90 Inc VAT
1.14inch LCD Display Module for Raspberry Pi Pico, 65K Colors, 240x135, SPI
View
R162.90 Inc VAT
R173.99
2.13inch E-Paper E-Ink Display Module for Raspberry Pi Pico, 250×122, Black / White, SPI
View
R289.90 Inc VAT
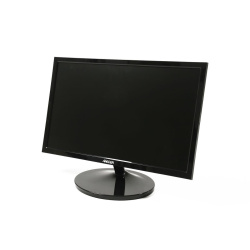
Mecer 19.5" 16 x 9 TFT LED Wide Monitor 1600 x 900 W/VGA HDMI & Built-in Speakers - Black
View
R1,699.90 Inc VAT
R1,999.90
15.6inch Capacitive Touch Screen LCD, 1920×1080, HDMI, IPS, Various Systems Support
View
R3,699.90 Inc VAT
Overall Evaluation Board for Raspberry Pi Pico
View
R949.90 Inc VAT
7-Segment for micro:bit
View
R424.76 Inc VAT
7inch Capacitive Touch Display for Raspberry Pi4 , DSI Interface, 800×480 (No Case)
View
R1,066.72 Inc VAT
Pico Display Pack 2.0
View
R469.90 Inc VAT
R491.80
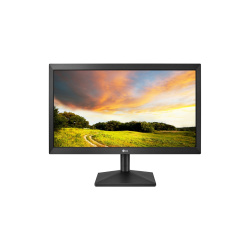
LG 20MK400H 19.5inch monitor with HDMI and D-Sub
View
R1,699.90 Inc VAT
R2,099.90
4inch Resistive Touch Screen LCD, 480×800, HDMI, IPS, Low Power
View
R743.65 Inc VAT
WS 264x176, 2.7 inch Black E-Ink display HAT for Raspberry Pi
View
R439.90 Inc VAT
LCD1602 RGB Module, 16x2 Characters LCD, RGB Backlight, 3.3V/5V, I2C Bus
View
R276.92 Inc VAT
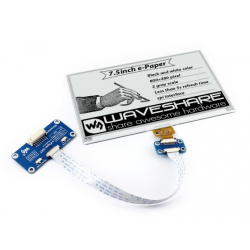
800×480, 7.5inch E-Ink display HAT for Raspberry Pi
View
R1,299.90 Inc VAT
R1,494.93
7.5inch E-Paper E-Ink Display Module for Raspberry Pi Pico, 800×480, Black / White, SPI
View
R1,199.90 Inc VAT
MAX7219 Dot Matrix MCU LED Display Control Module Kit ( Green)
View
R49.90 Inc VAT
HDMI 4K Switcher 3 In 1 Out One-Click Switch
View
R276.59 Inc VAT
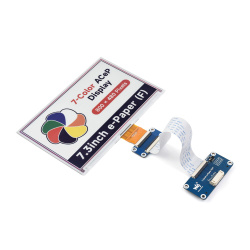
7.3inch ACeP 7-Color E-Paper E-Ink Display Module, 800×480 Pixels, SPI Communication
View
R1,499.00 Inc VAT
R1,599.90
Sonoff NSPanel Smart Wall Display Switch - White
View
R1,399.90 Inc VAT
128×32 2.23inch OLED display HAT for Raspberry Pi (WS OLED display hat)
View
R289.90 Inc VAT
Full Graphic 12864 Smart Controller RAMPS 1.4 LCD 12864 LCD Control Panel Blue Screen for 3D Printer (12864 3d printer display)
View
R338.90 Inc VAT
1.14inch LCD Display Module for Raspberry Pi Pico, 65K Colors, 240x135, SPI (ws pico display 240x135 SPI)
View
R162.90 Inc VAT
R173.99
2.13inch E-Paper E-Ink Display Module for Raspberry Pi Pico, 250×122, Black / White, SPI (ws pico e-paper 250x122)
View
R289.90 Inc VAT
Mecer 19.5" 16 x 9 TFT LED Wide Monitor 1600 x 900 W/VGA HDMI & Built-in Speakers - Black (mecer 19.5 hdmi display )
View
R1,699.90 Inc VAT
R1,999.90
15.6inch Capacitive Touch Screen LCD, 1920×1080, HDMI, IPS, Various Systems Support (15.6 cap touch display)
View
R3,699.90 Inc VAT
Overall Evaluation Board for Raspberry Pi Pico (Overall Evaluation Board for Pico)
View
R949.90 Inc VAT
7-Segment for micro:bit (7-Segment for micro:bit )
View
R424.76 Inc VAT
7inch Capacitive Touch Display for Raspberry Pi4 , DSI Interface, 800×480 (No Case) (WS 7inch display(no case))
View
R1,066.72 Inc VAT
Pico Display Pack 2.0 (Pico Display pack 2.0)
View
R469.90 Inc VAT
R491.80
LG 20MK400H 19.5inch monitor with HDMI and D-Sub (LG 19.5 20MK400H)
View
R1,699.90 Inc VAT
R2,099.90
4inch Resistive Touch Screen LCD, 480×800, HDMI, IPS, Low Power (WS 4inch resistive display)
View
R743.65 Inc VAT
WS 264x176, 2.7 inch Black E-Ink display HAT for Raspberry Pi (2.7 Black E-Ink HAT)
View
R439.90 Inc VAT
LCD1602 RGB Module, 16x2 Characters LCD, RGB Backlight, 3.3V/5V, I2C Bus (WS LCD1602 RGB)
View
R276.92 Inc VAT
800×480, 7.5inch E-Ink display HAT for Raspberry Pi (7.5inch e-ink for pi)
View
R1,299.90 Inc VAT
R1,494.93
7.5inch E-Paper E-Ink Display Module for Raspberry Pi Pico, 800×480, Black / White, SPI (7.5inch e-paper for pico)
View
R1,199.90 Inc VAT
MAX7219 Dot Matrix MCU LED Display Control Module Kit ( Green) (MAX7219 matrix display green)
View
R49.90 Inc VAT
HDMI 4K Switcher 3 In 1 Out One-Click Switch ( HDMI 4K Switcher)
View
R276.59 Inc VAT
7.3inch ACeP 7-Color E-Paper E-Ink Display Module, 800×480 Pixels, SPI Communication (7.3inch e-paper 7Colour)
View
R1,499.00 Inc VAT
R1,599.90
Sonoff NSPanel Smart Wall Display Switch - White (NSPanel Display White)
View
R1,399.90 Inc VAT
Per Page
10
20
30
40
50
21 - 40 of 70
<<
<
1
2
3
4
>
>>